
Athlete Hub: Getting Started with Data Import
You've been collecting athlete information for years: favorite foods, pets, hobbies, vehicle brands, and all those little details that turn into sponsorship opportunities. It's probably sitting in spreadsheets, scattered across your team's files.
Data Import lets you bring all of that information into SA Score in minutes. No manual re-entry. No copying and pasting athlete by athlete. Just upload your CSV, map the columns, and your data is instantly searchable and filterable alongside everything else in the platform.
Let's walk through exactly how it works.
Before You Start: Setting Up Your Properties
Before importing data, you'll need properties to import into. Properties are the custom fields you define in the Athlete Hub: things like "Favorite Food Category," "Pet Type," or "Vehicle Brand."
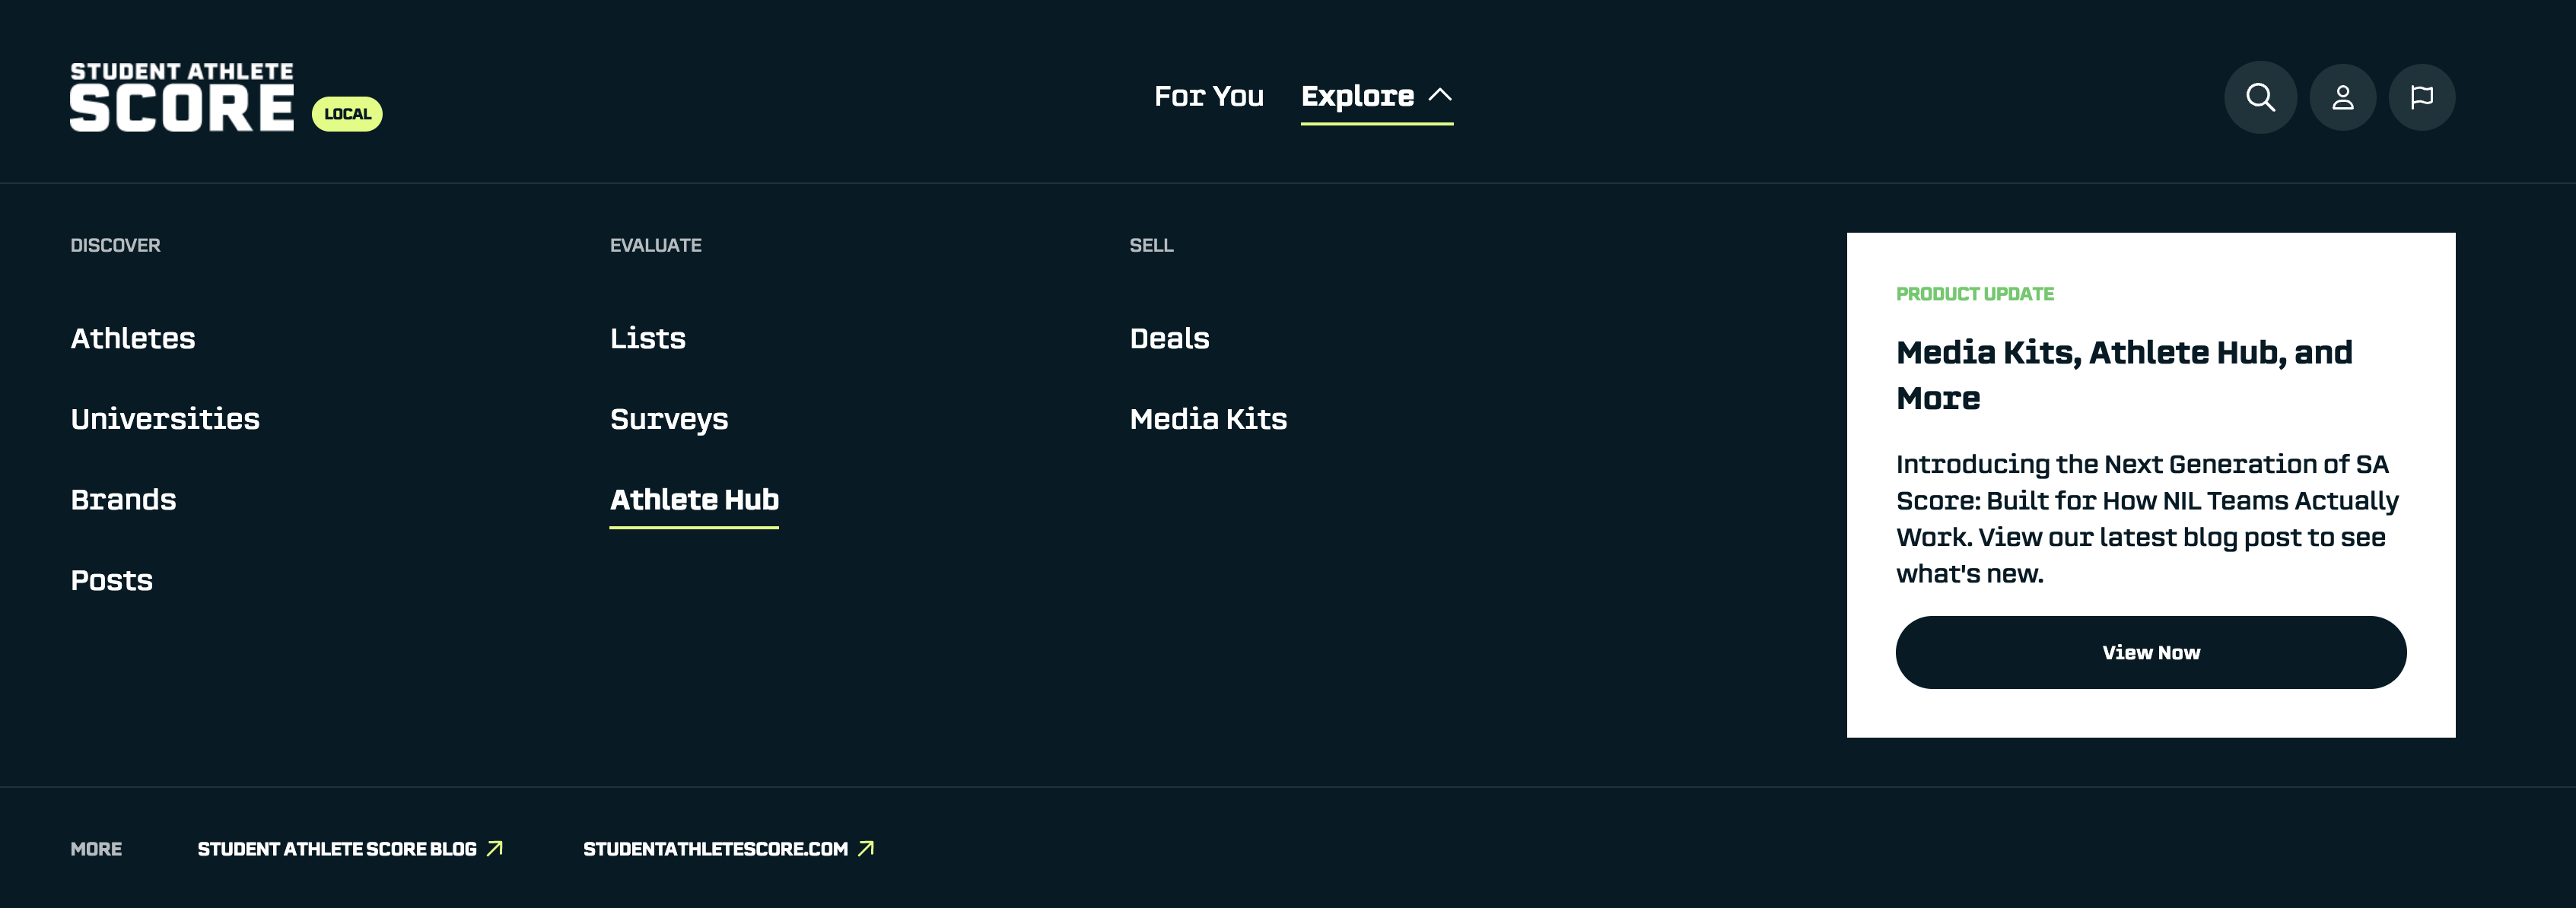
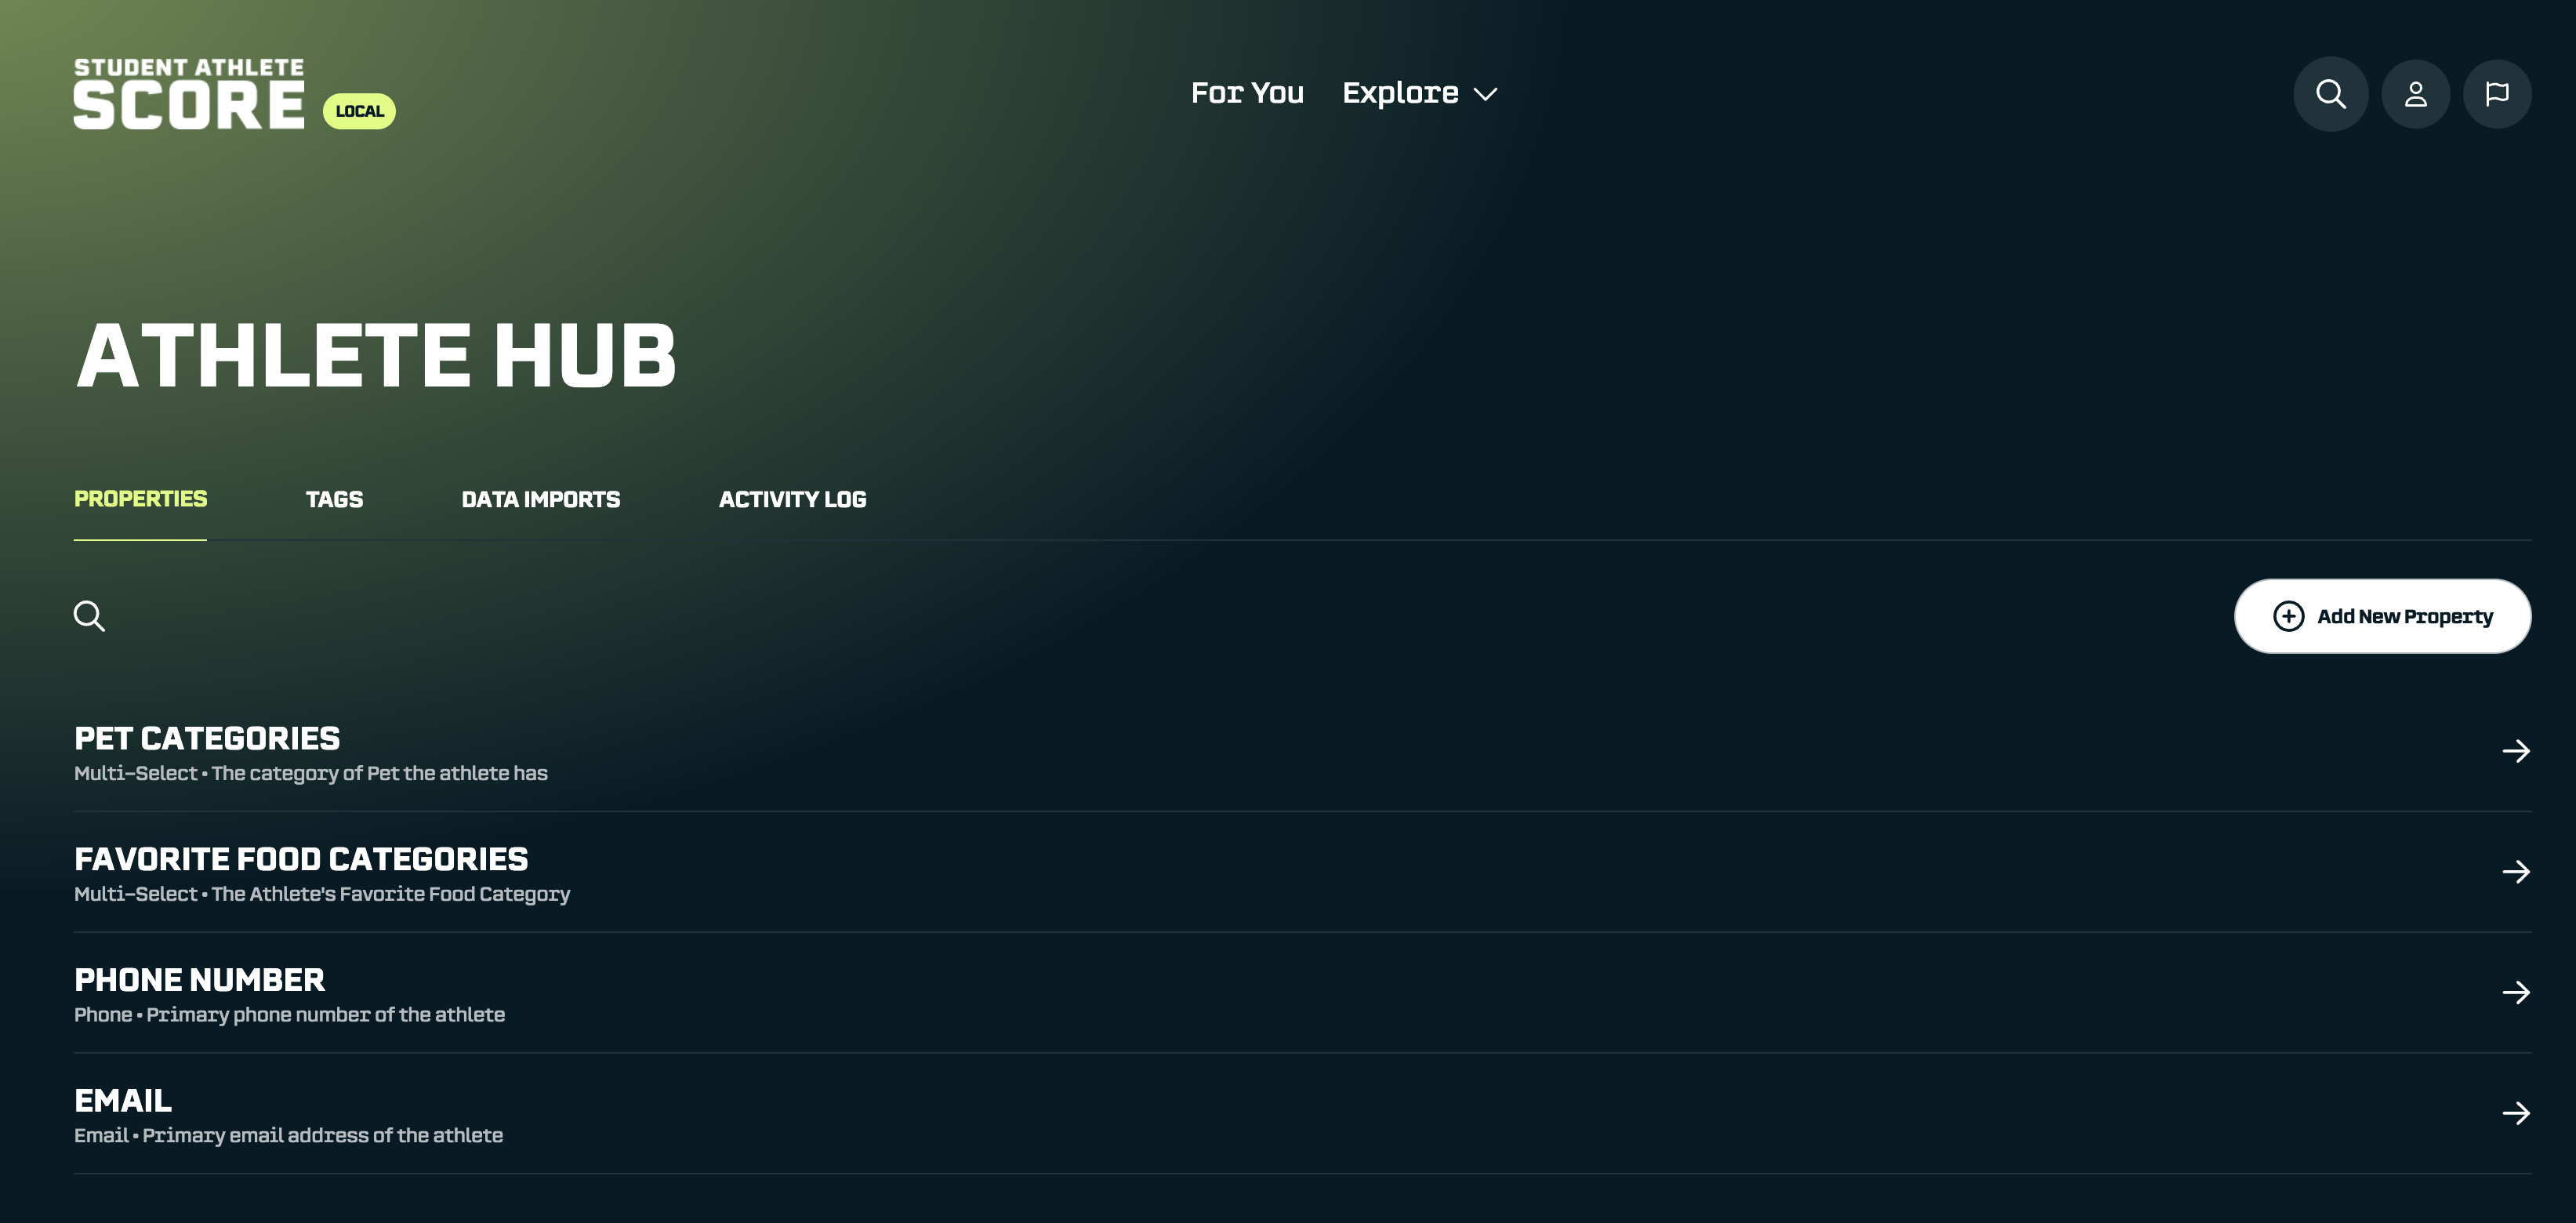
To get started, click into the Athlete Hub from the navigation bar.
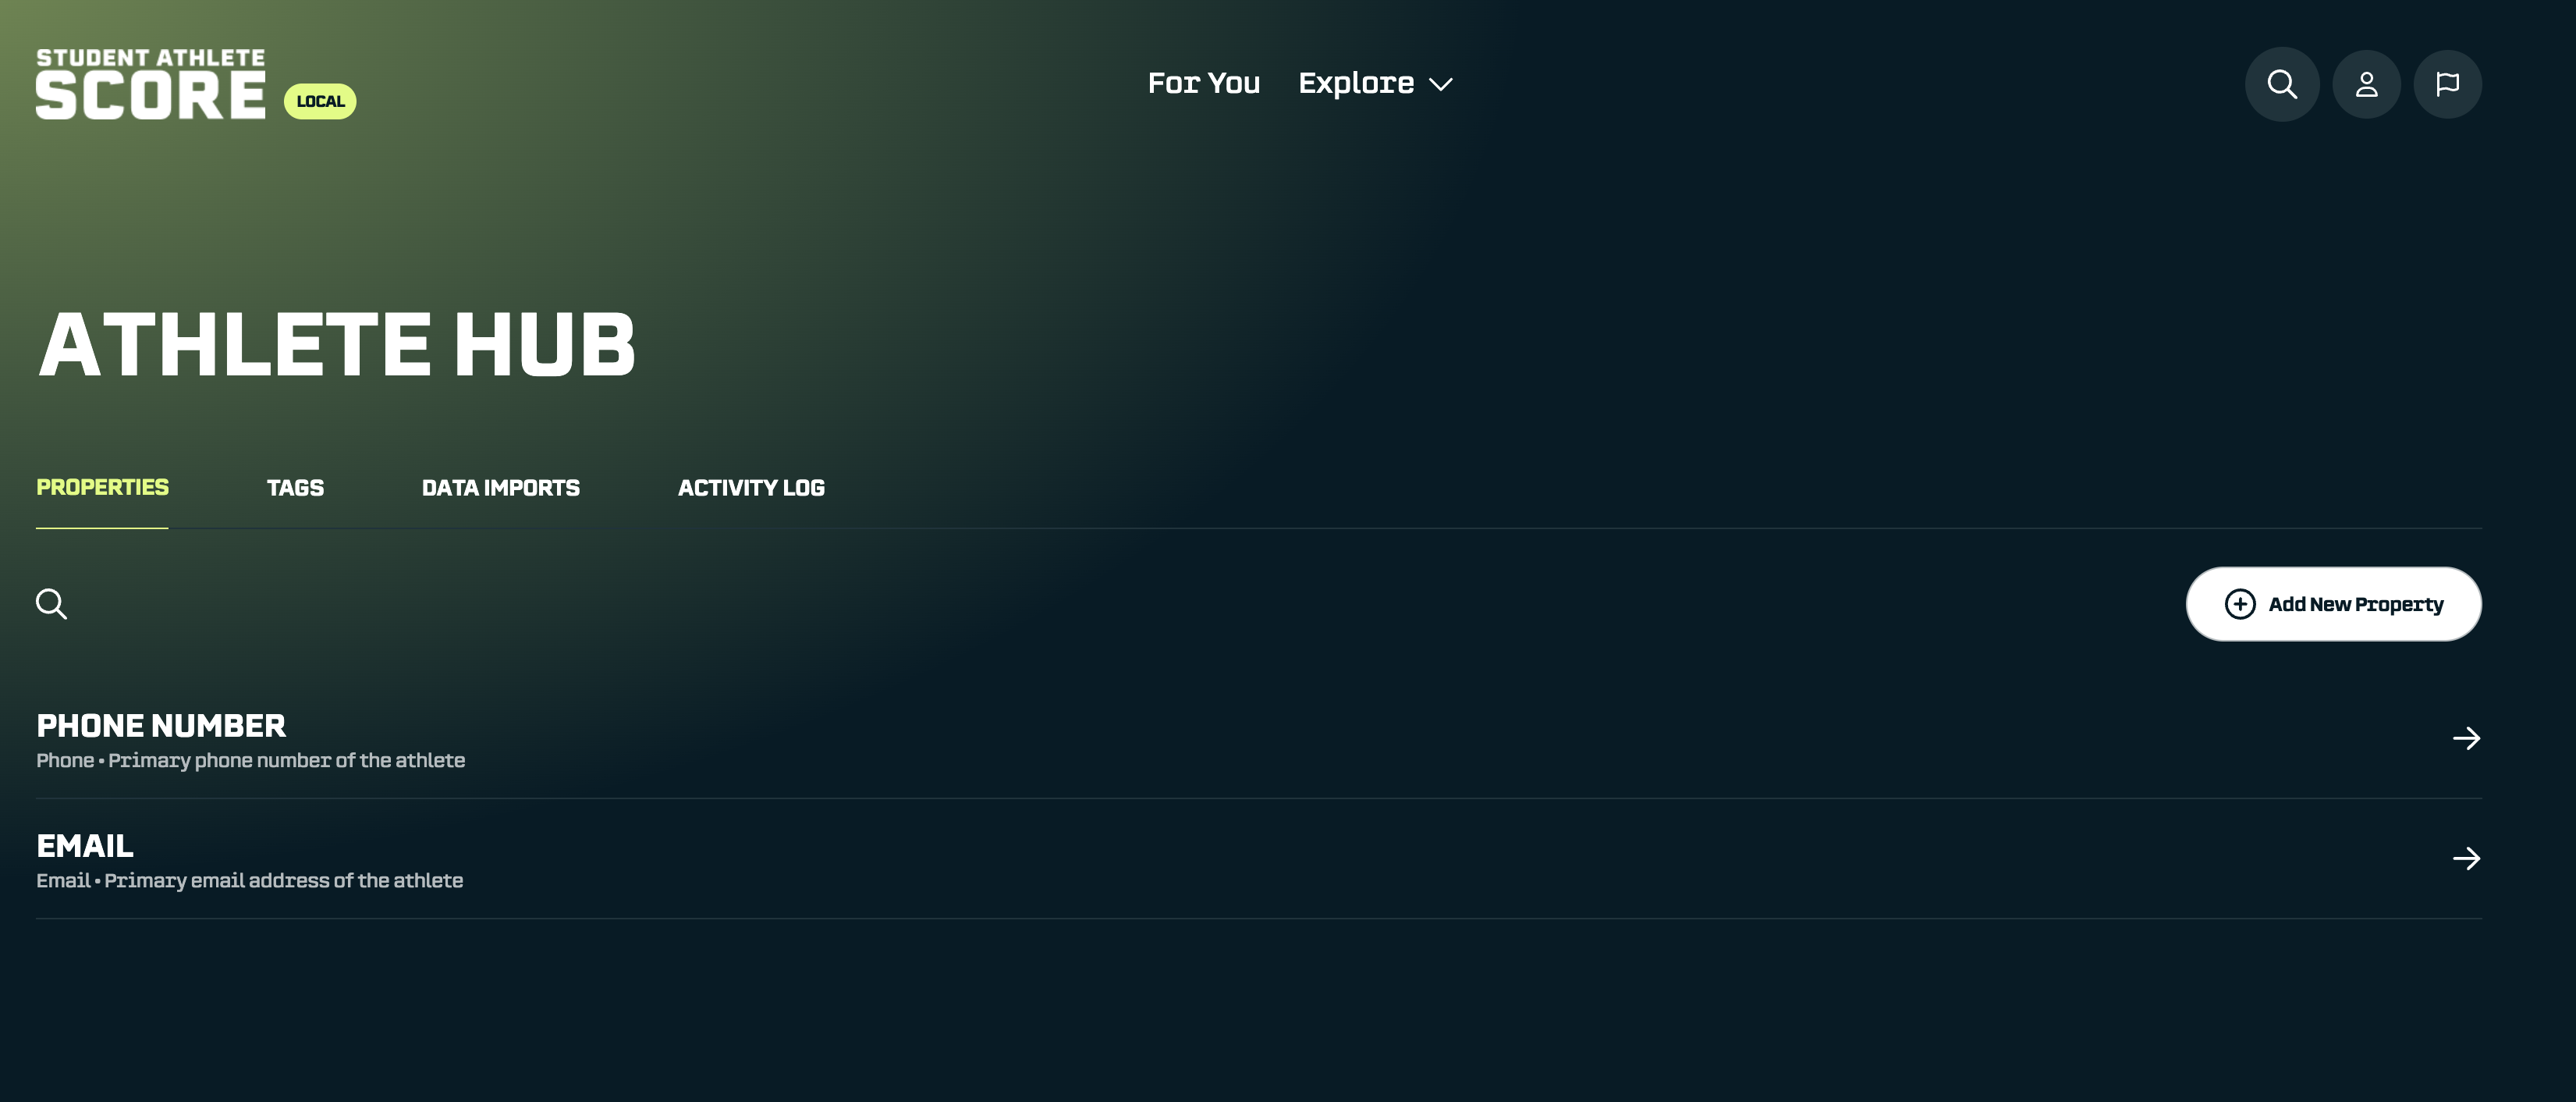
Navigate to the Properties tab to see all your organization's properties.
Creating Properties
For this walkthrough, I'll create two properties: Favorite Food Categories and Pet Categories.
Since athletes might have multiple favorites (we'll allow ties) and could have more than one type of pet, I'll make these multi-select properties. This keeps answers organized into preset categories rather than free-form text.
Here are the options I'll add:
Favorite Food Categories:
Italian, Mexican, American, Chinese, Japanese, Indian, Mediterranean, Thai, Korean, Greek, BBQ, Seafood, Vegetarian, Fast Food, Desserts
Pet Categories:
Dog, Cat, Fish, Bird, Hamster, Rabbit, Turtle, Snake, Lizard
To create a property, click Add New Property. A sidebar will open where you can enter the details.

Fill out the basic information first.
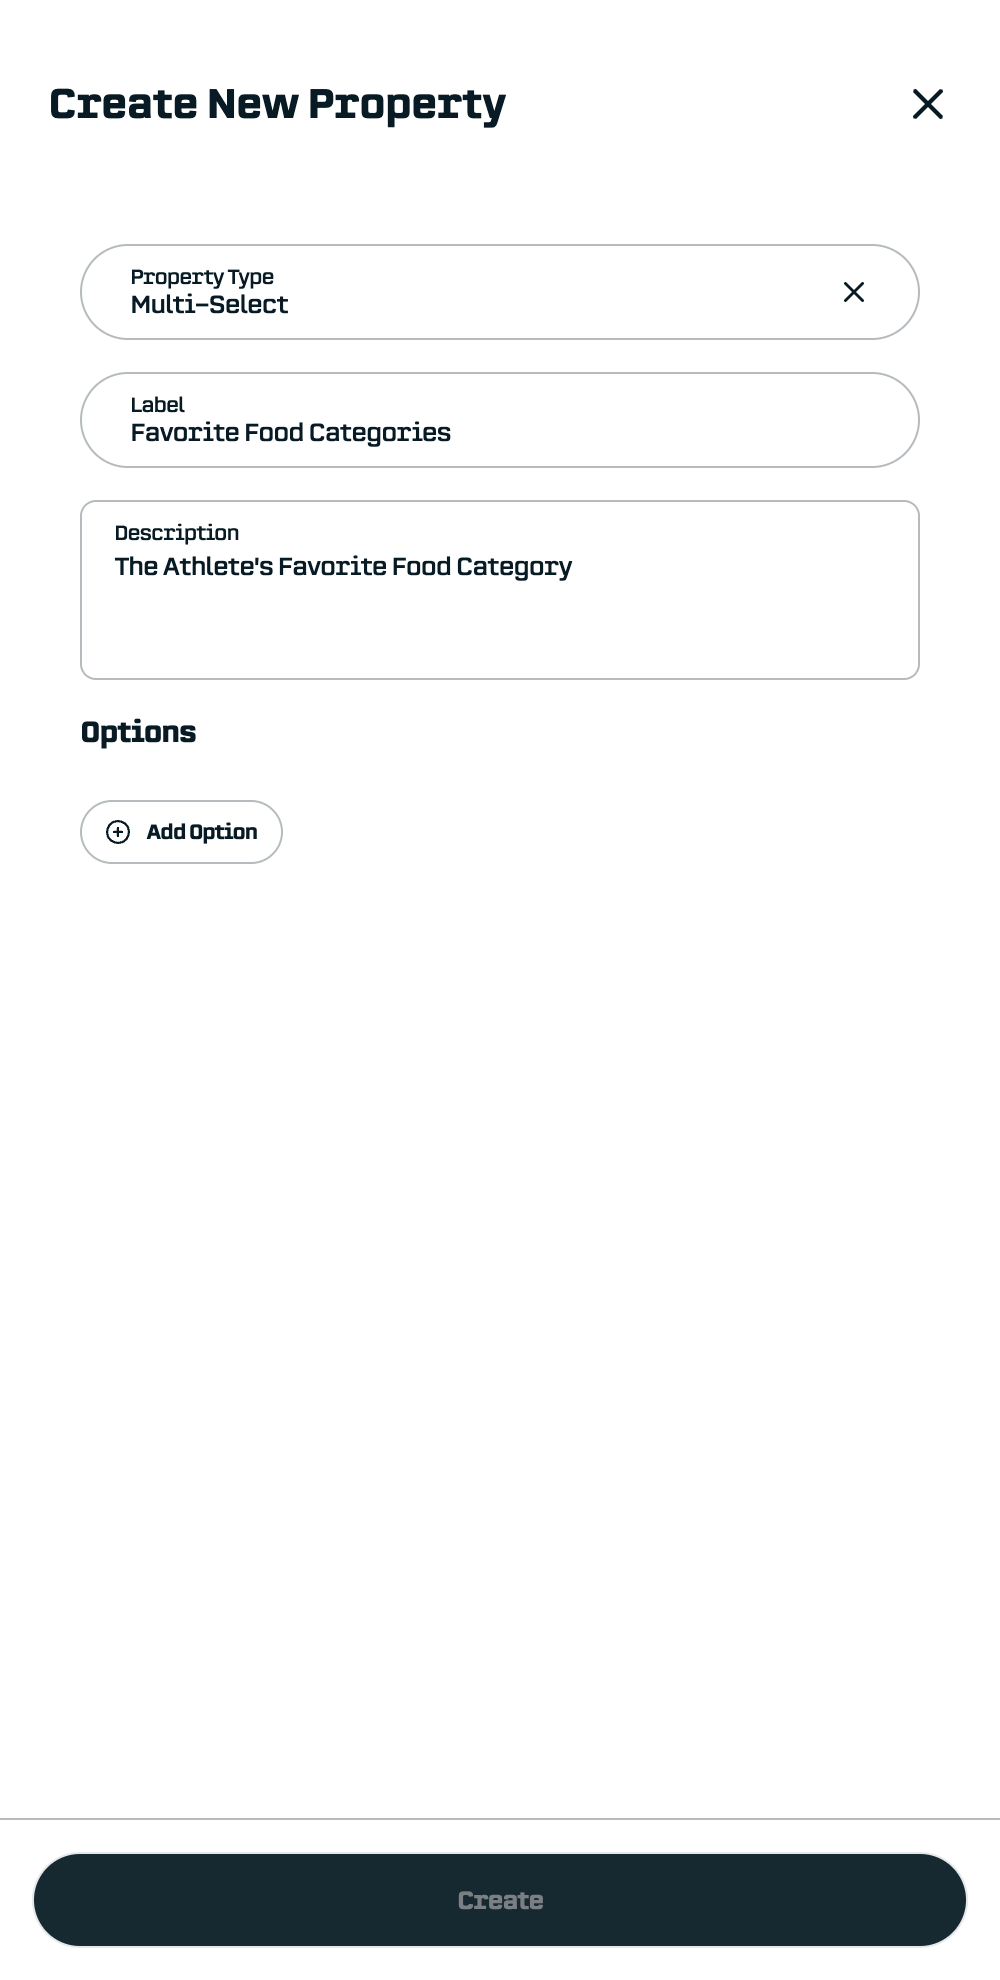
Then add your options. Click Add Option to add each choice.
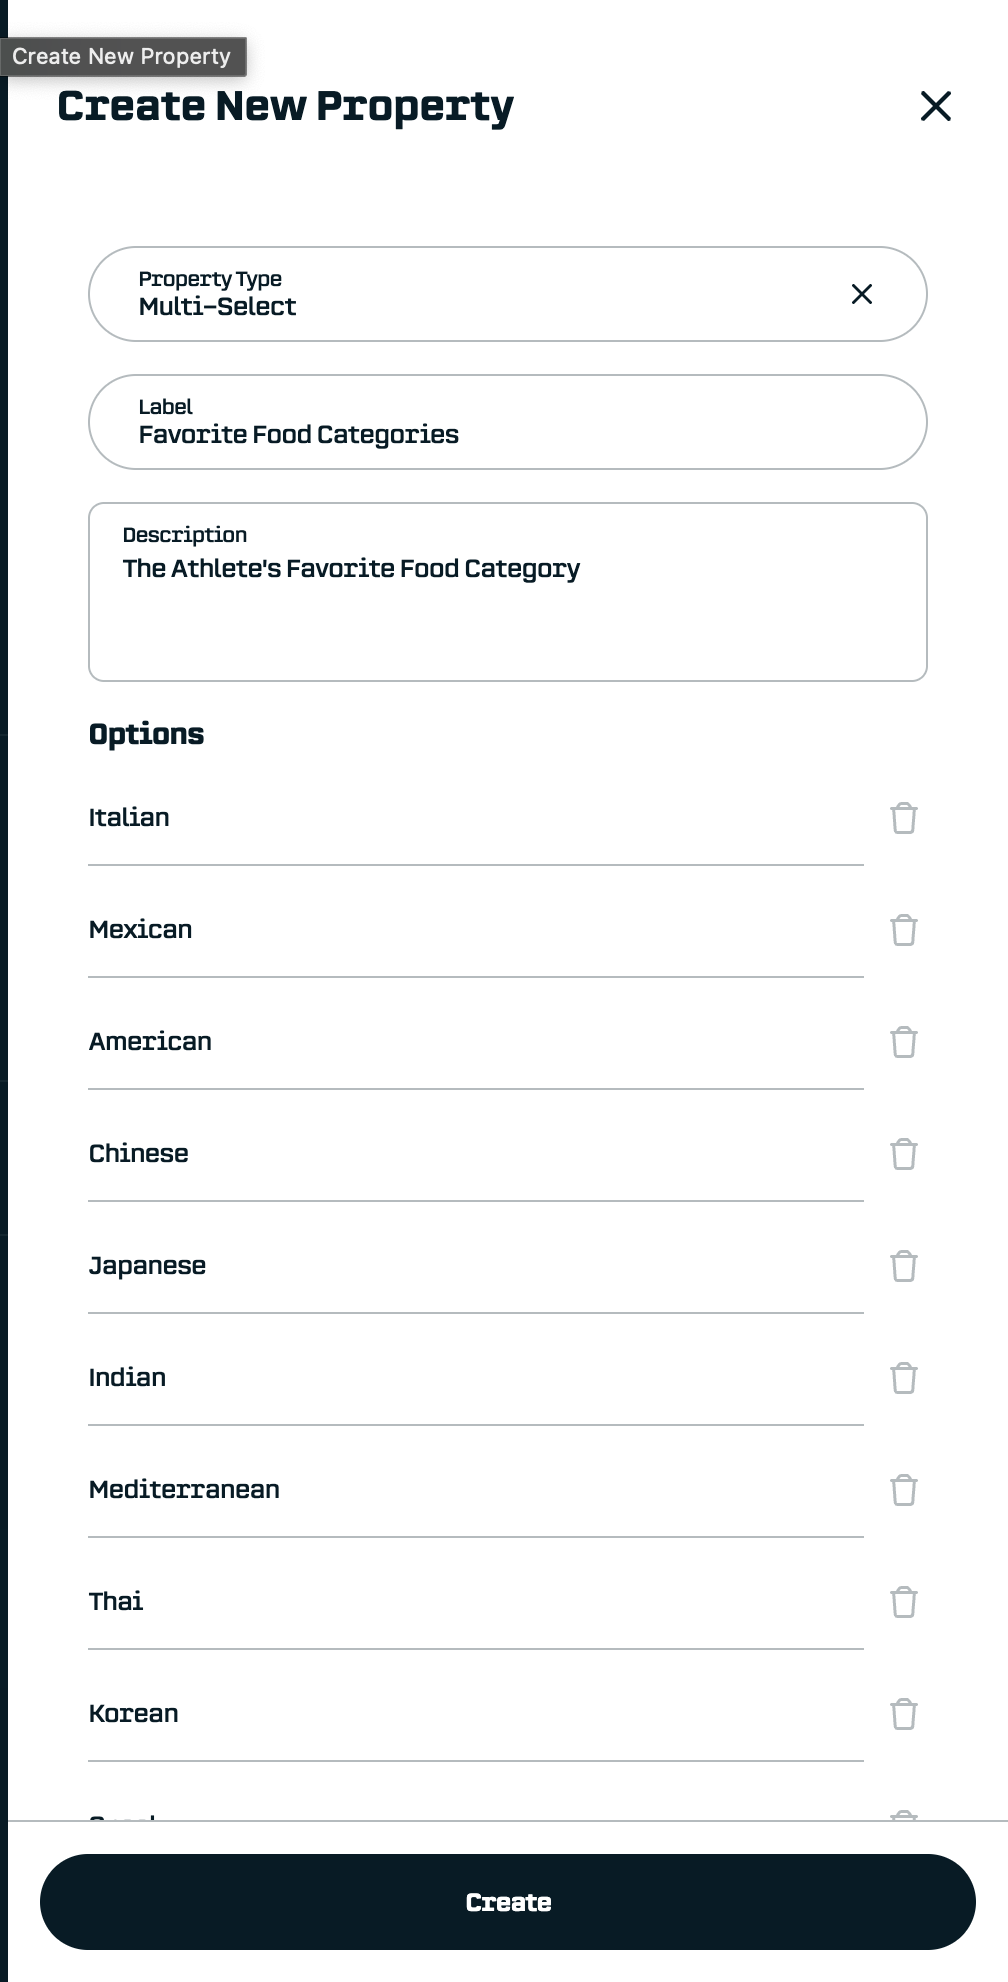
Click Create when you're done, then repeat for any additional properties. Here's what my Properties tab looks like with both properties created:
Now we're ready to import.
The Data Import Process
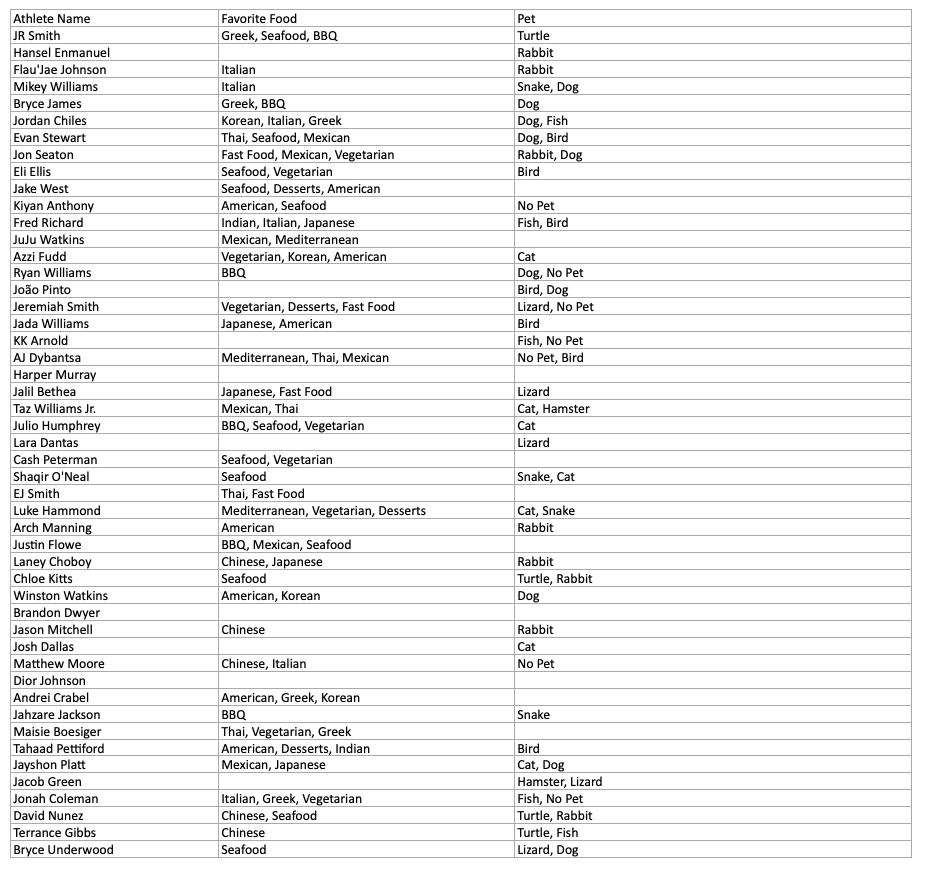
I've prepared a spreadsheet with data for 50 athletes. Some have multiple answers, some have none, and a few even have answers that don't match my preset options (like "No Pet"). That's all fine, the import process handles these gracefully.
The import follows five steps:
- Upload your file
- Map columns to properties
- Match rows to athletes
- Configure import settings
- Preview and import
Let’s walk through each one with the example.
Step 1: Upload Your File
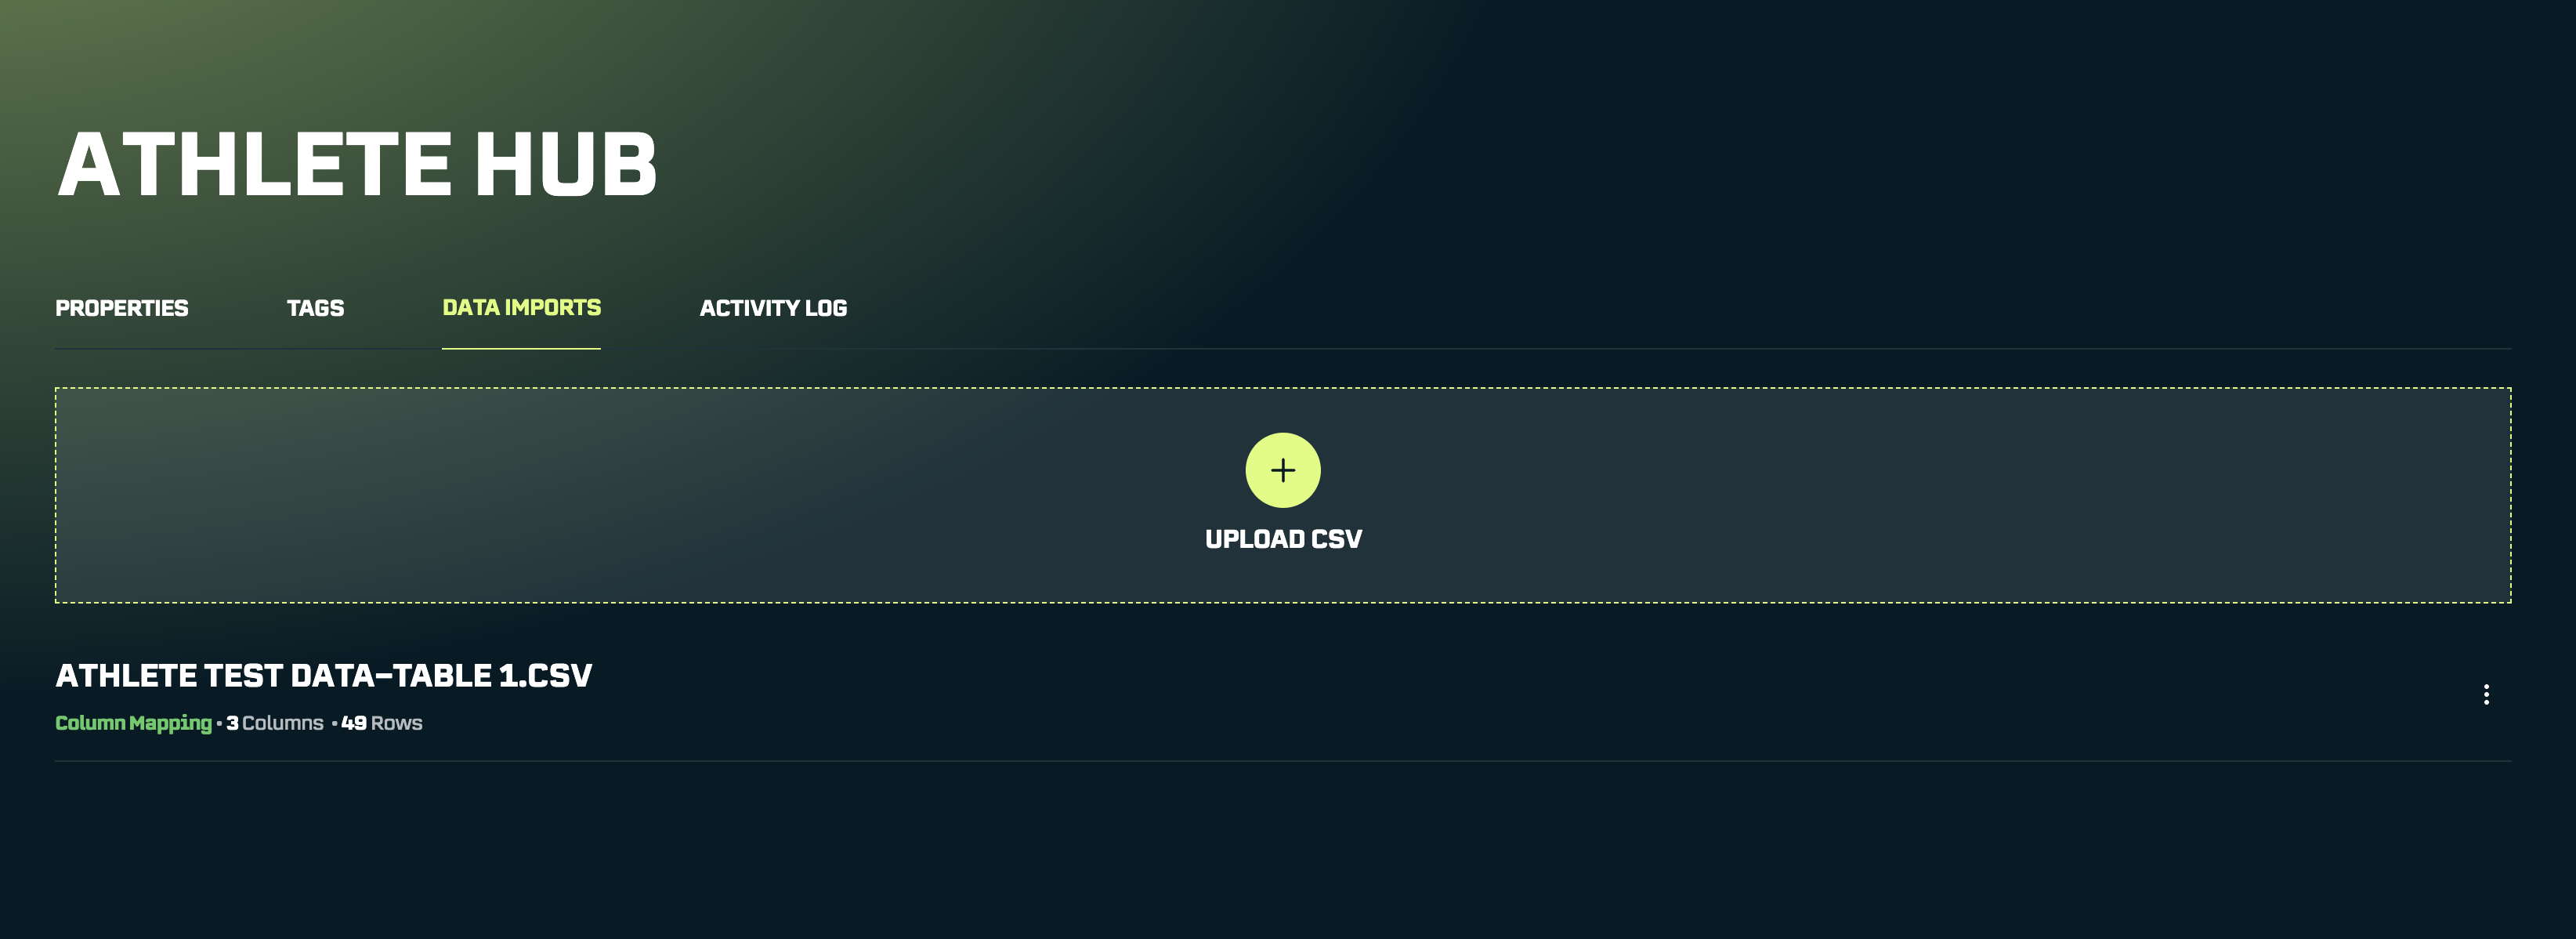
Navigate to Data Import and drag your CSV file into the upload area (or click to browse your computer).

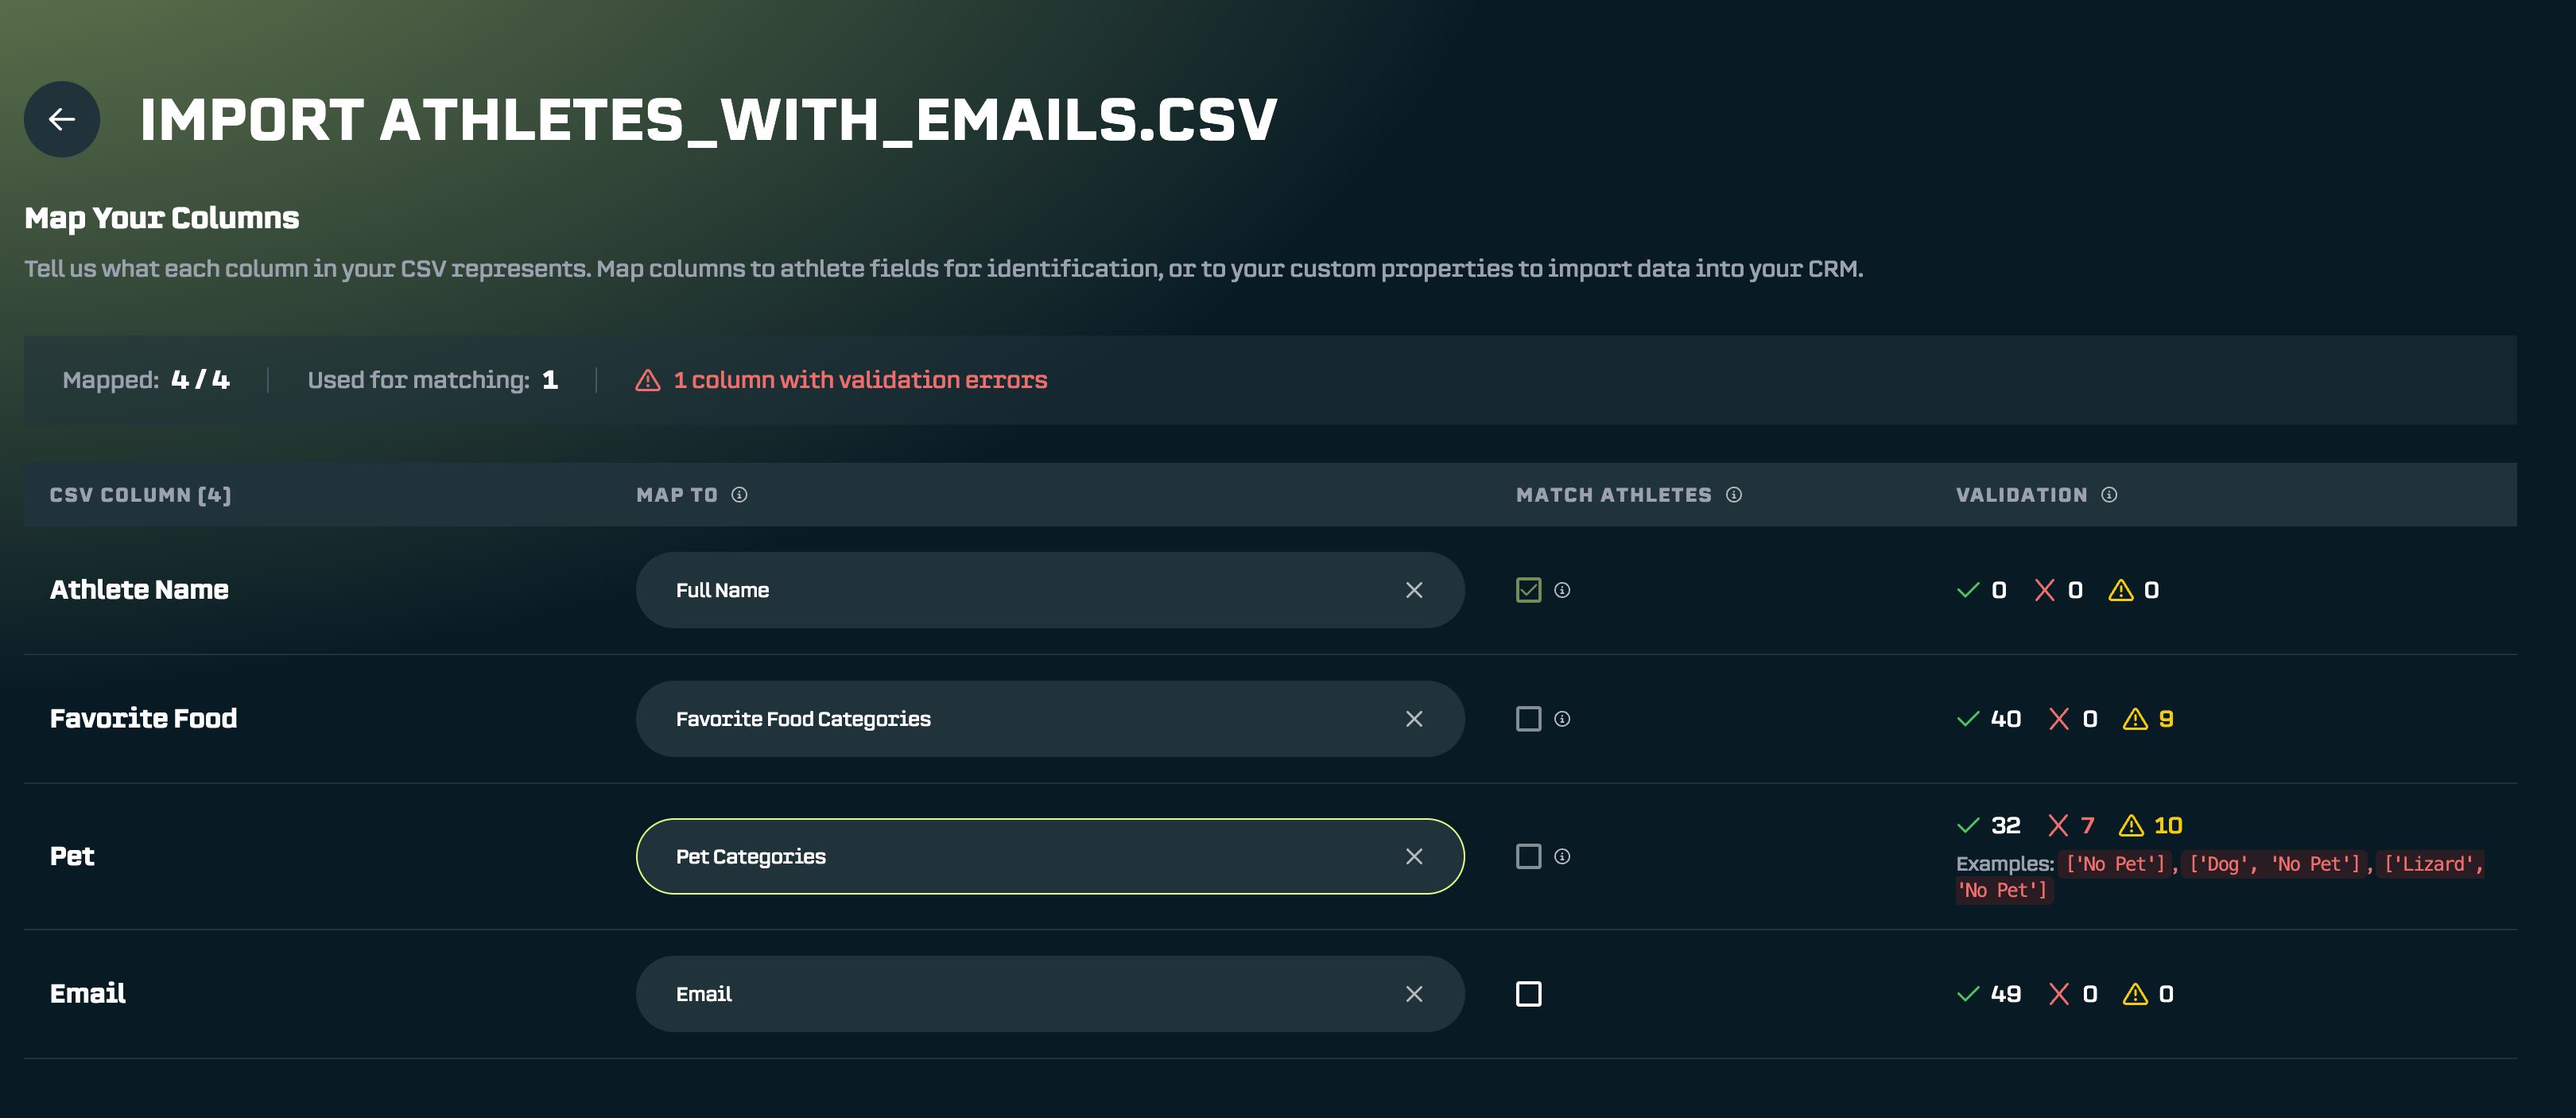
Step 2: Map Your Columns
This is where you tell SA Score what each column in your spreadsheet represents.
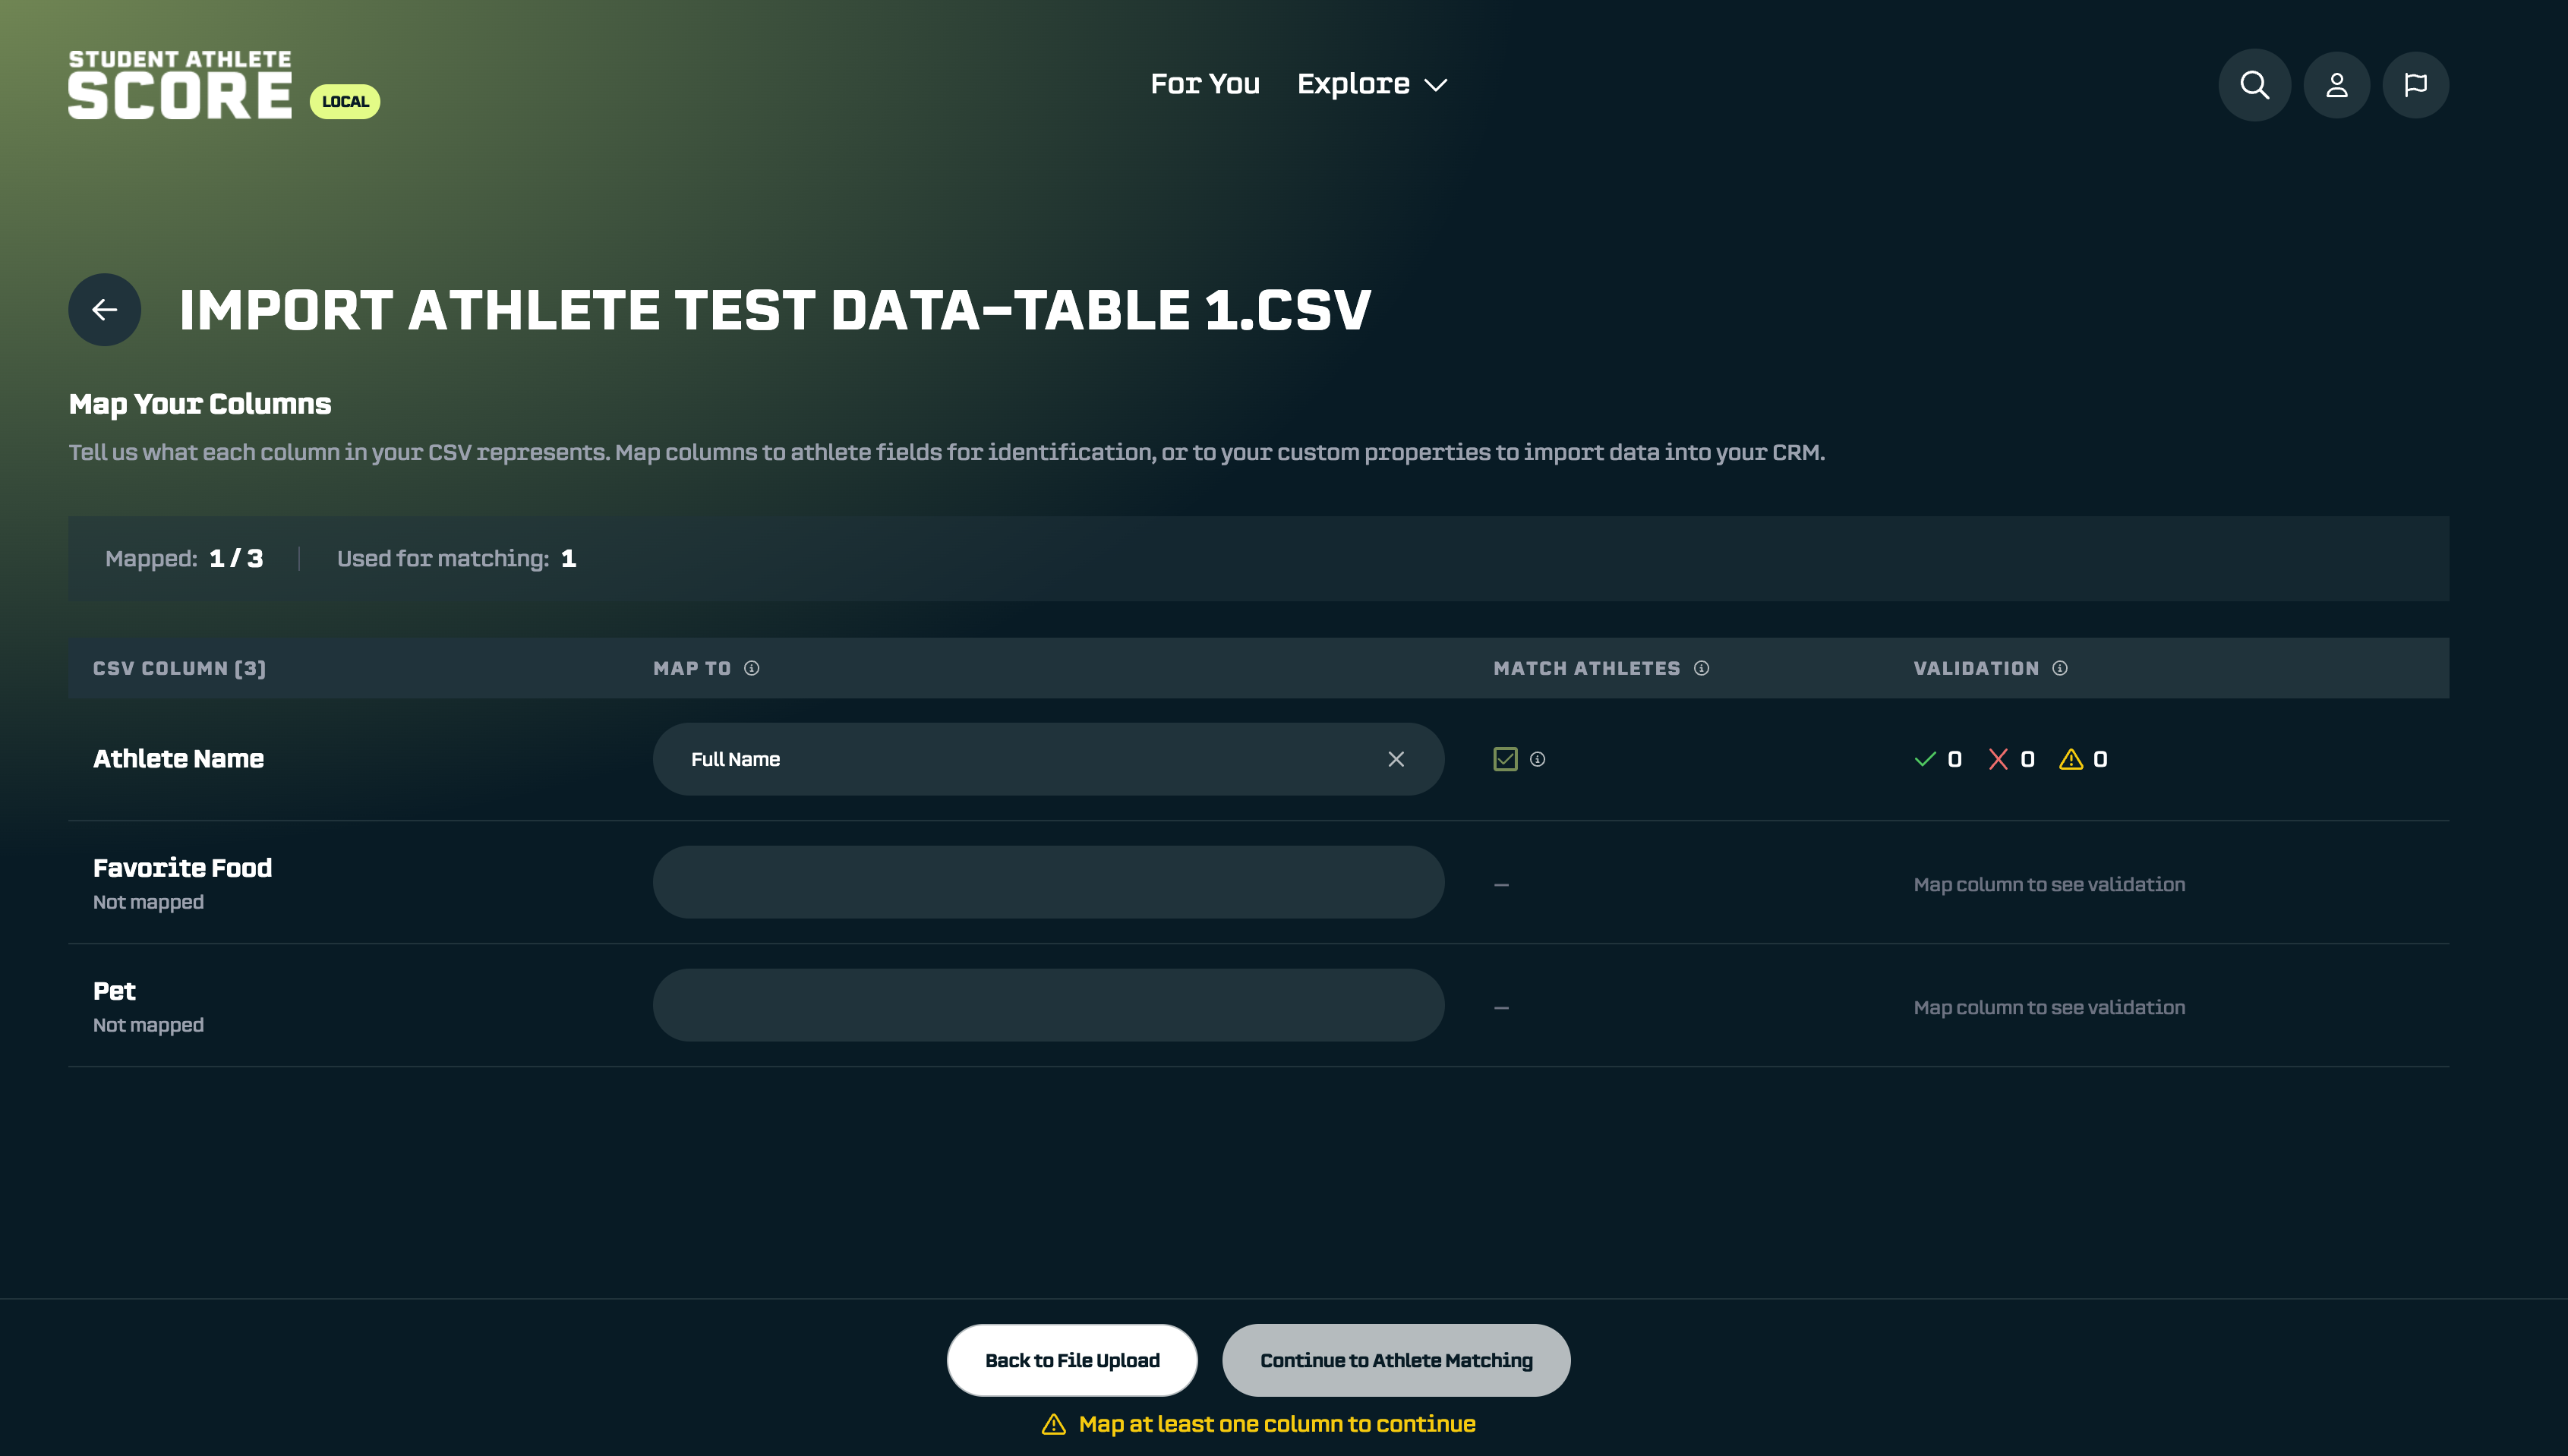
Here’s what you’re looking at:
- CSV Column - Shows all the columns from your spreadsheet
- Map To - Where you select which Athlete Field or Athlete Hub Property this column should connect to
- Match Athletes - When checked, this column helps auto-match rows to athletes
- Validation - Shows if there are any empty values or errors in your data
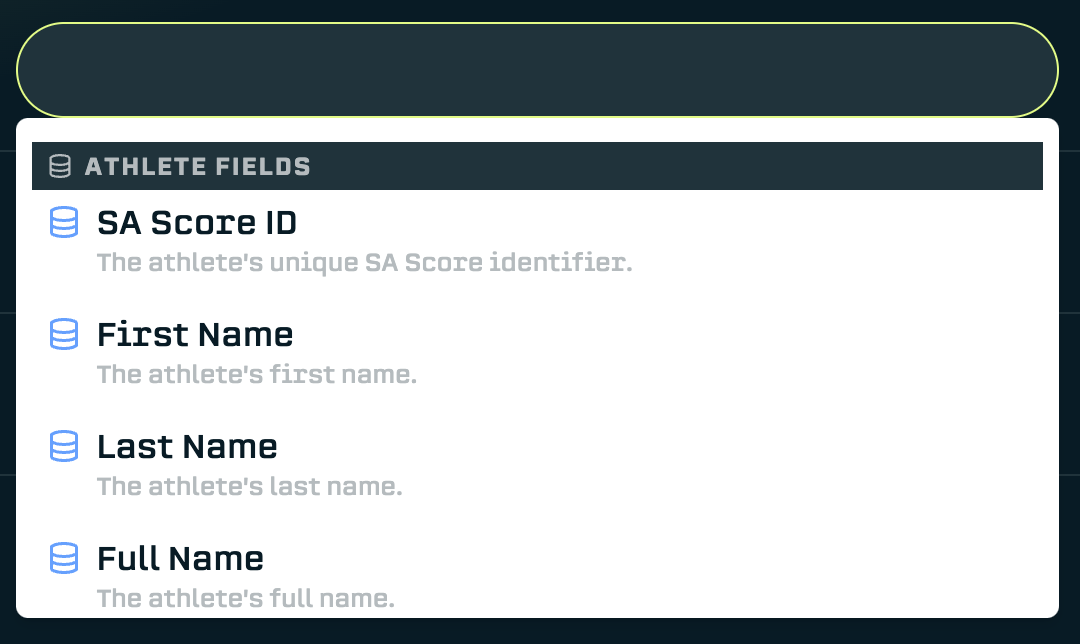
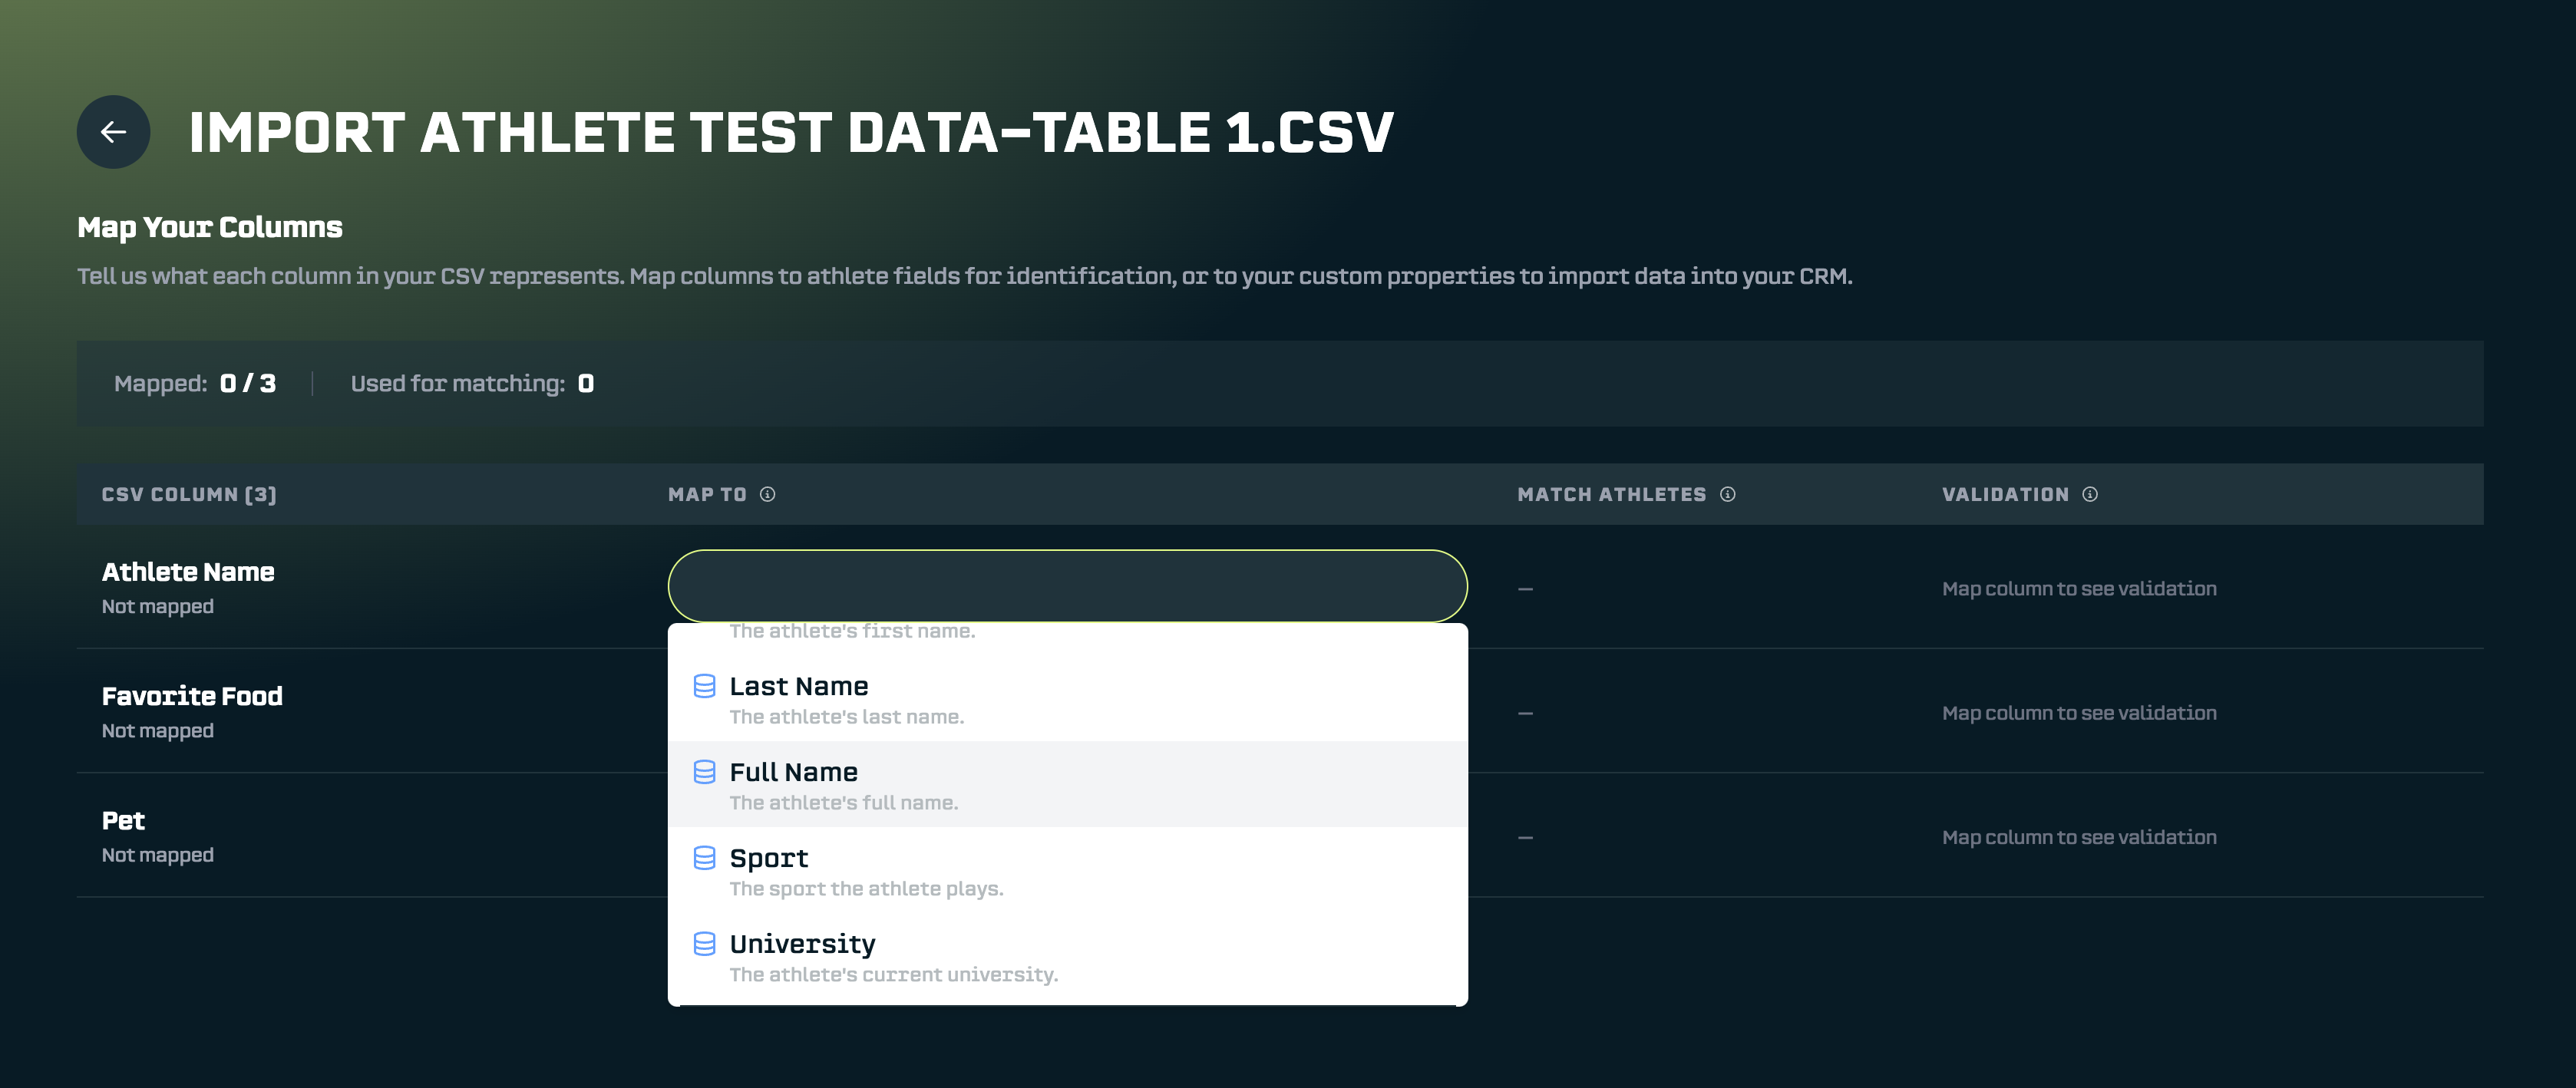
Understanding "Map To" Options
When you click on the Map To dropdown, you'll see two types of options:
Athlete Fields are built-in fields like name, sport, and university. These are only used for matching. They help the system figure out which row belongs to which athlete, but they won't change any athlete information in SA Score.
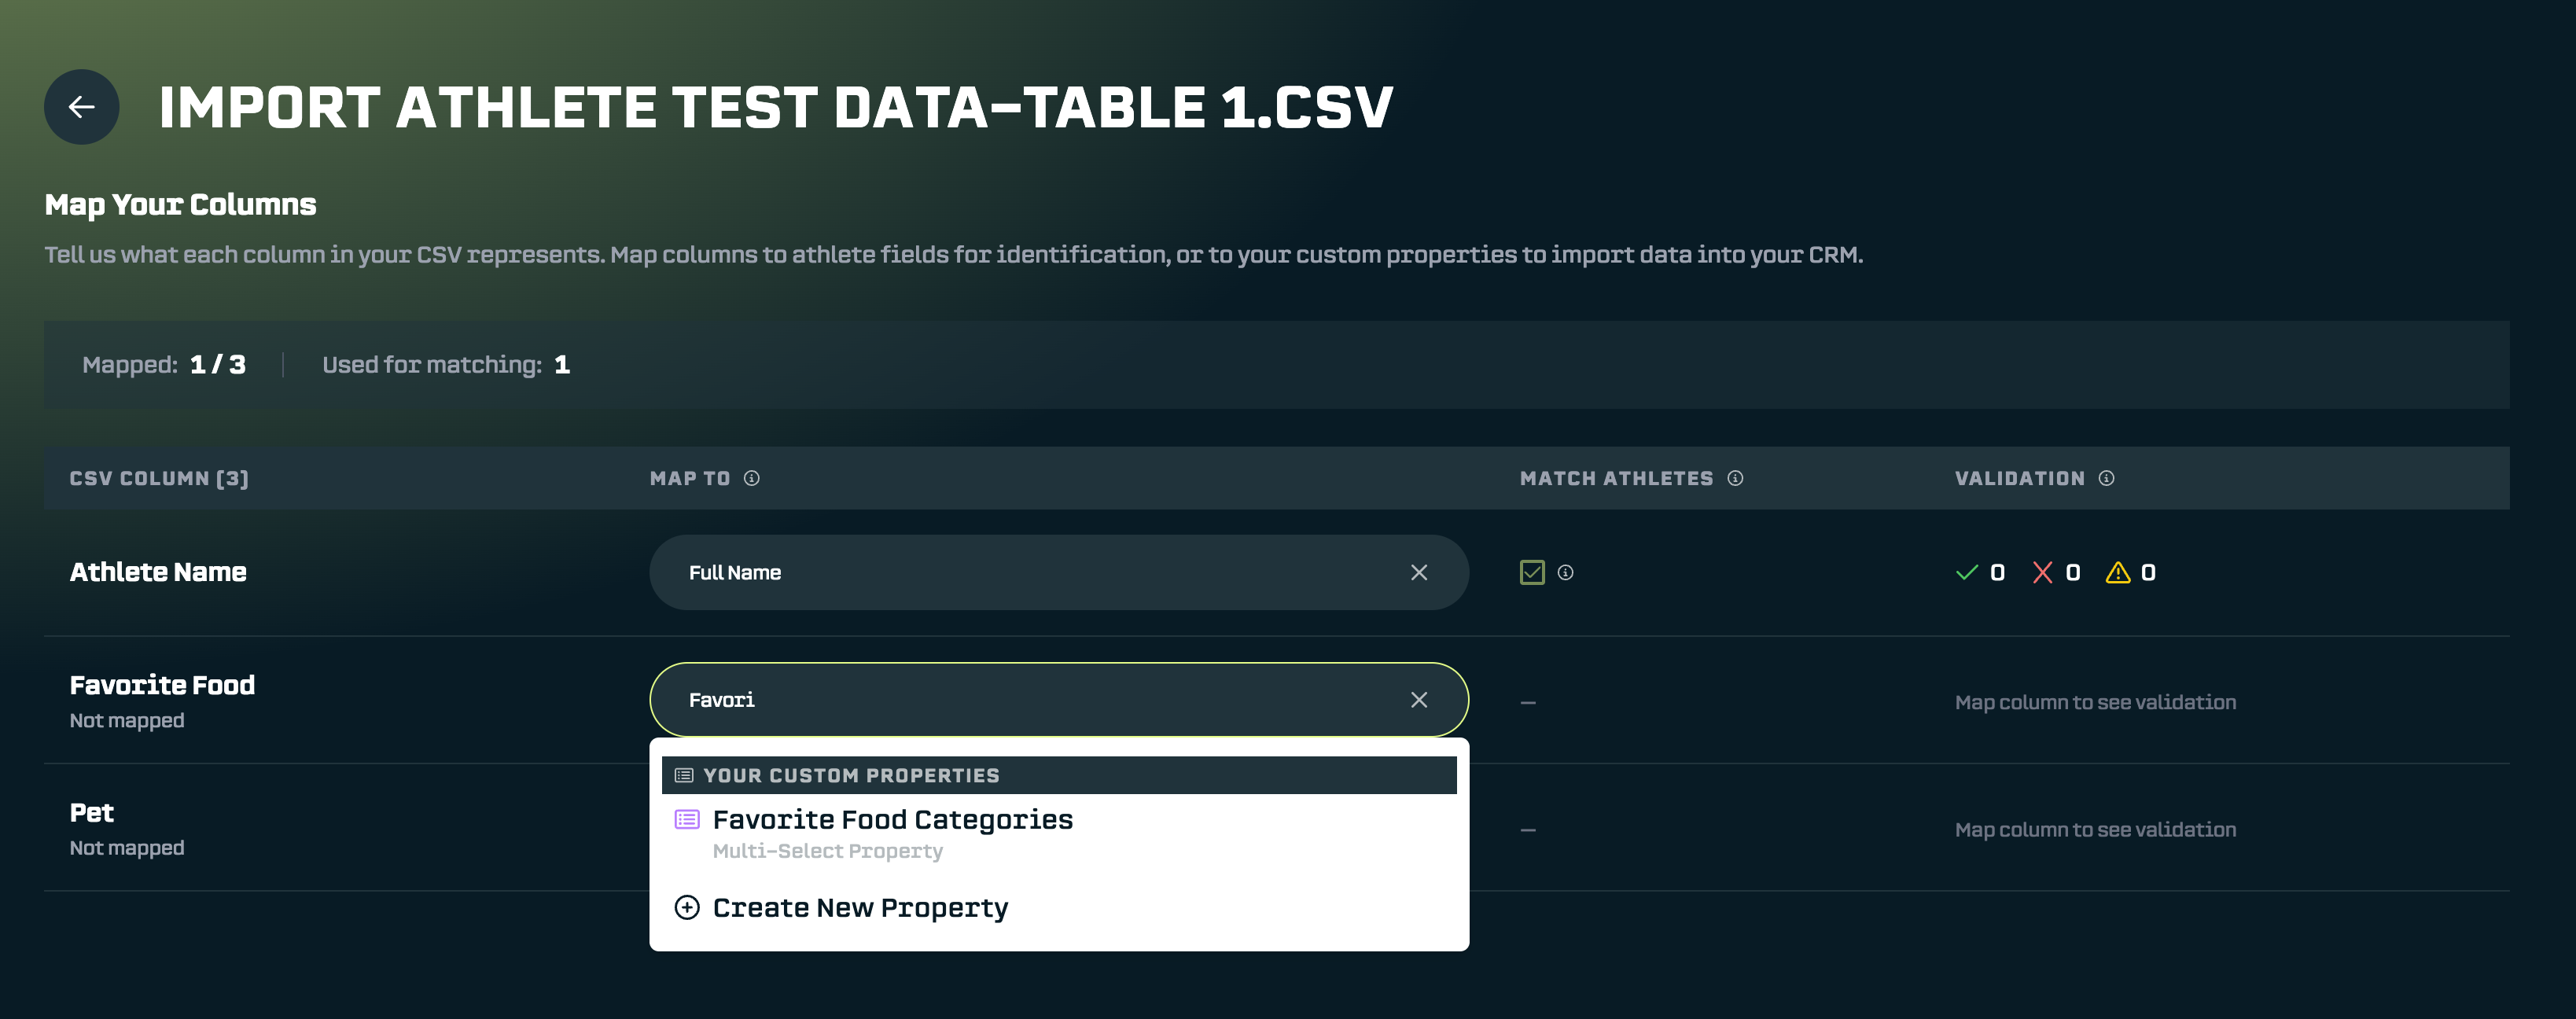
Your Custom Properties are the properties you created in the Athlete Hub. When you map a column to one of these, the data will actually be imported and saved to each athlete's profile.


Mapping My Columns
First, I'll map the Athlete Name column to the Full Name athlete field. This helps auto-match athletes in the next step (otherwise I’ll have to do all the matching manually).
Next, I'll map Favorite Food to my Favorite Food Categories property.
And Pet to Pet Categories.
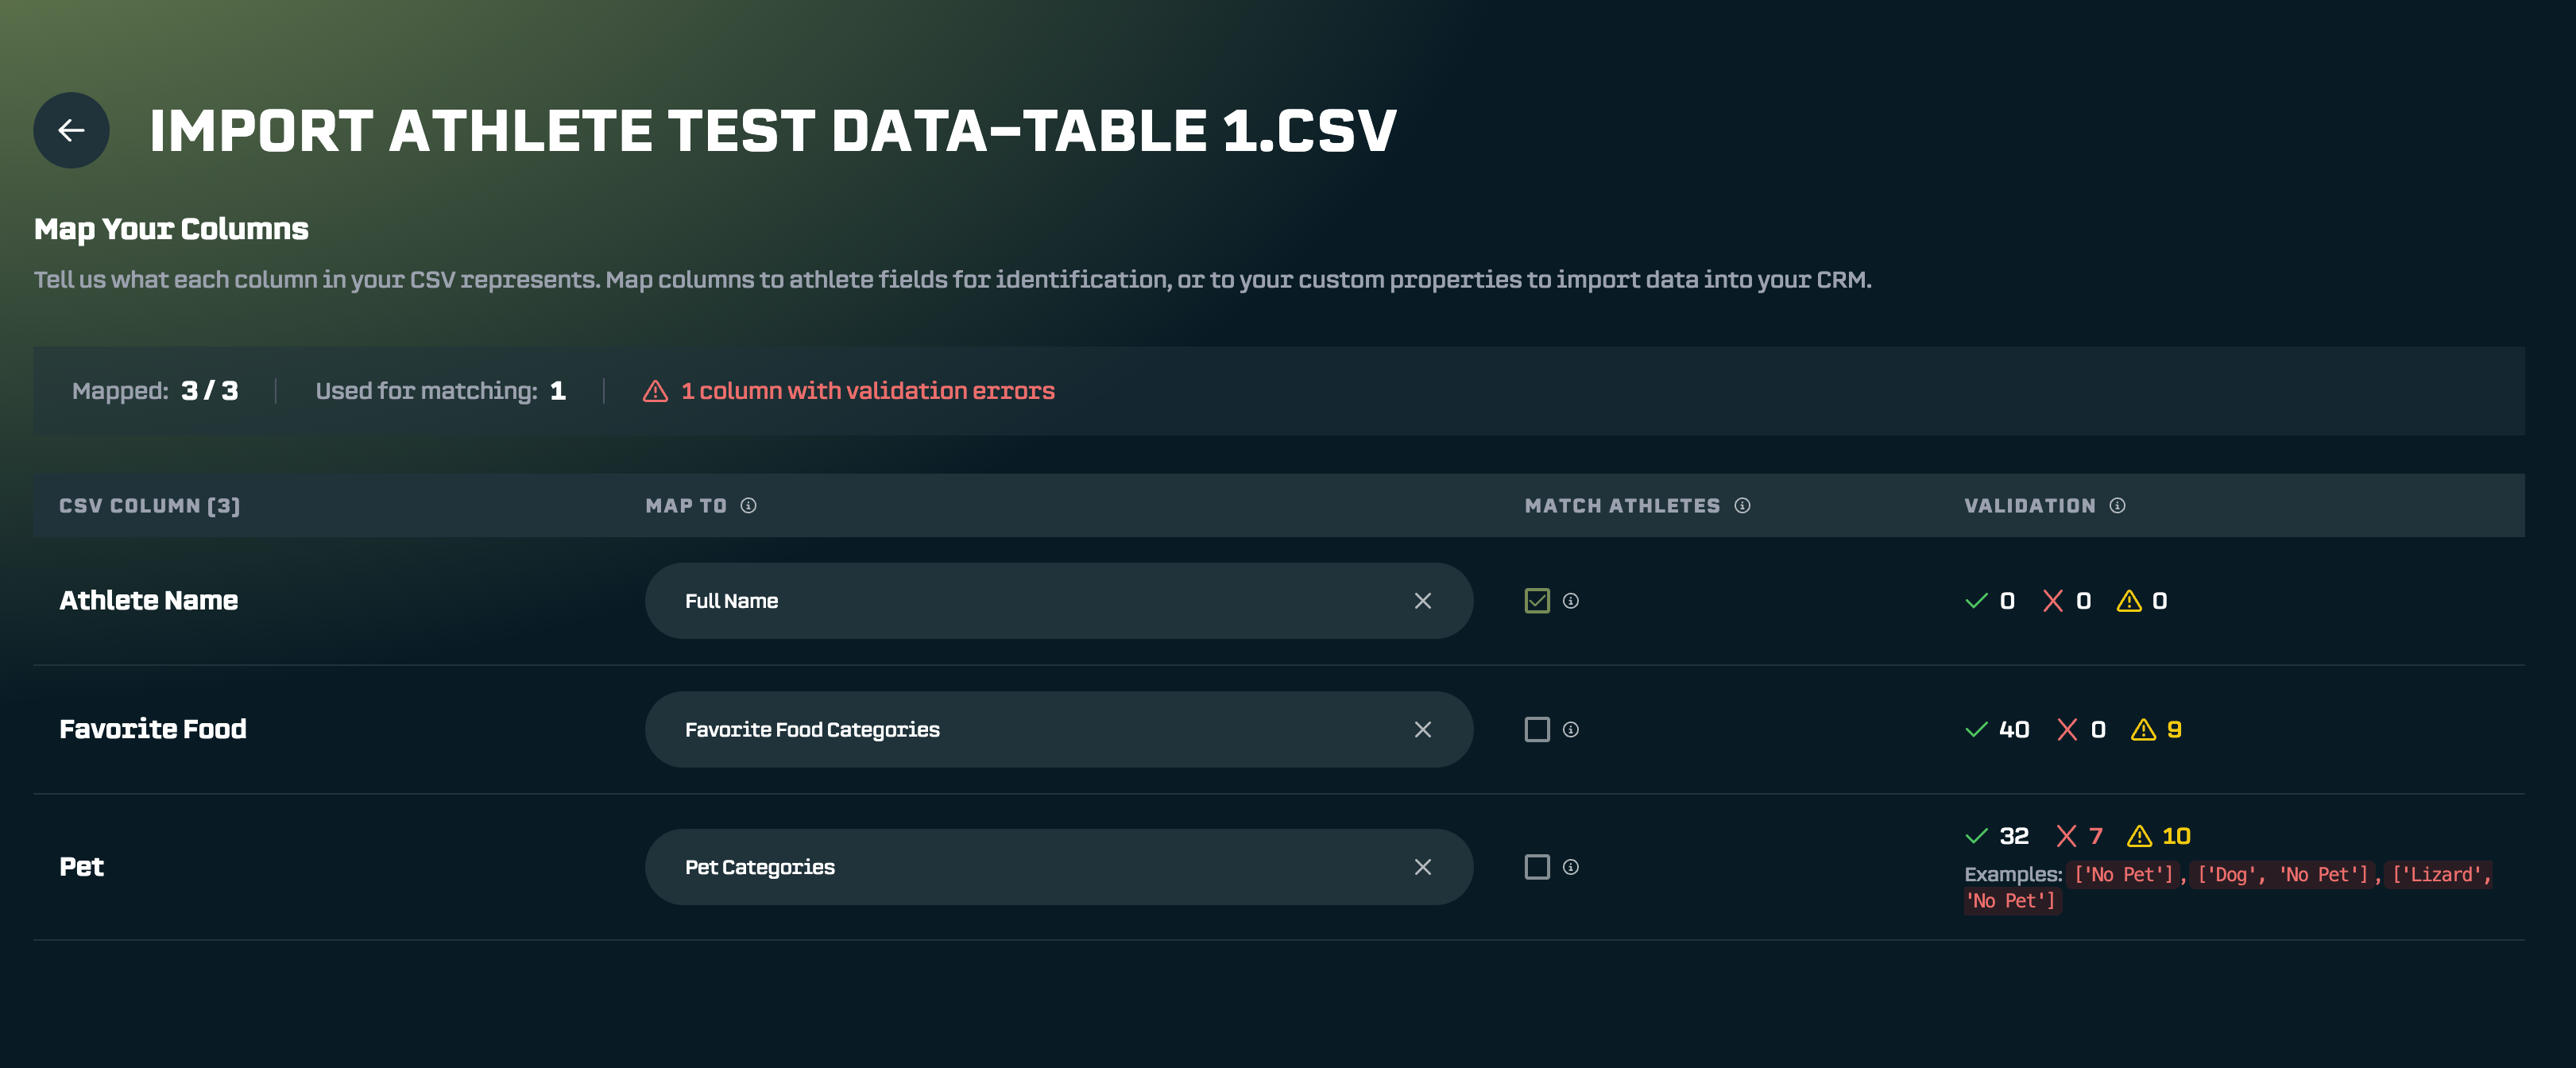
Understanding Validation Indicators
After mapping, you'll notice symbols appear in the Validation column:
- ✅ Green check - Number of rows with valid data. For Favorite Food, 40 rows have valid answers.
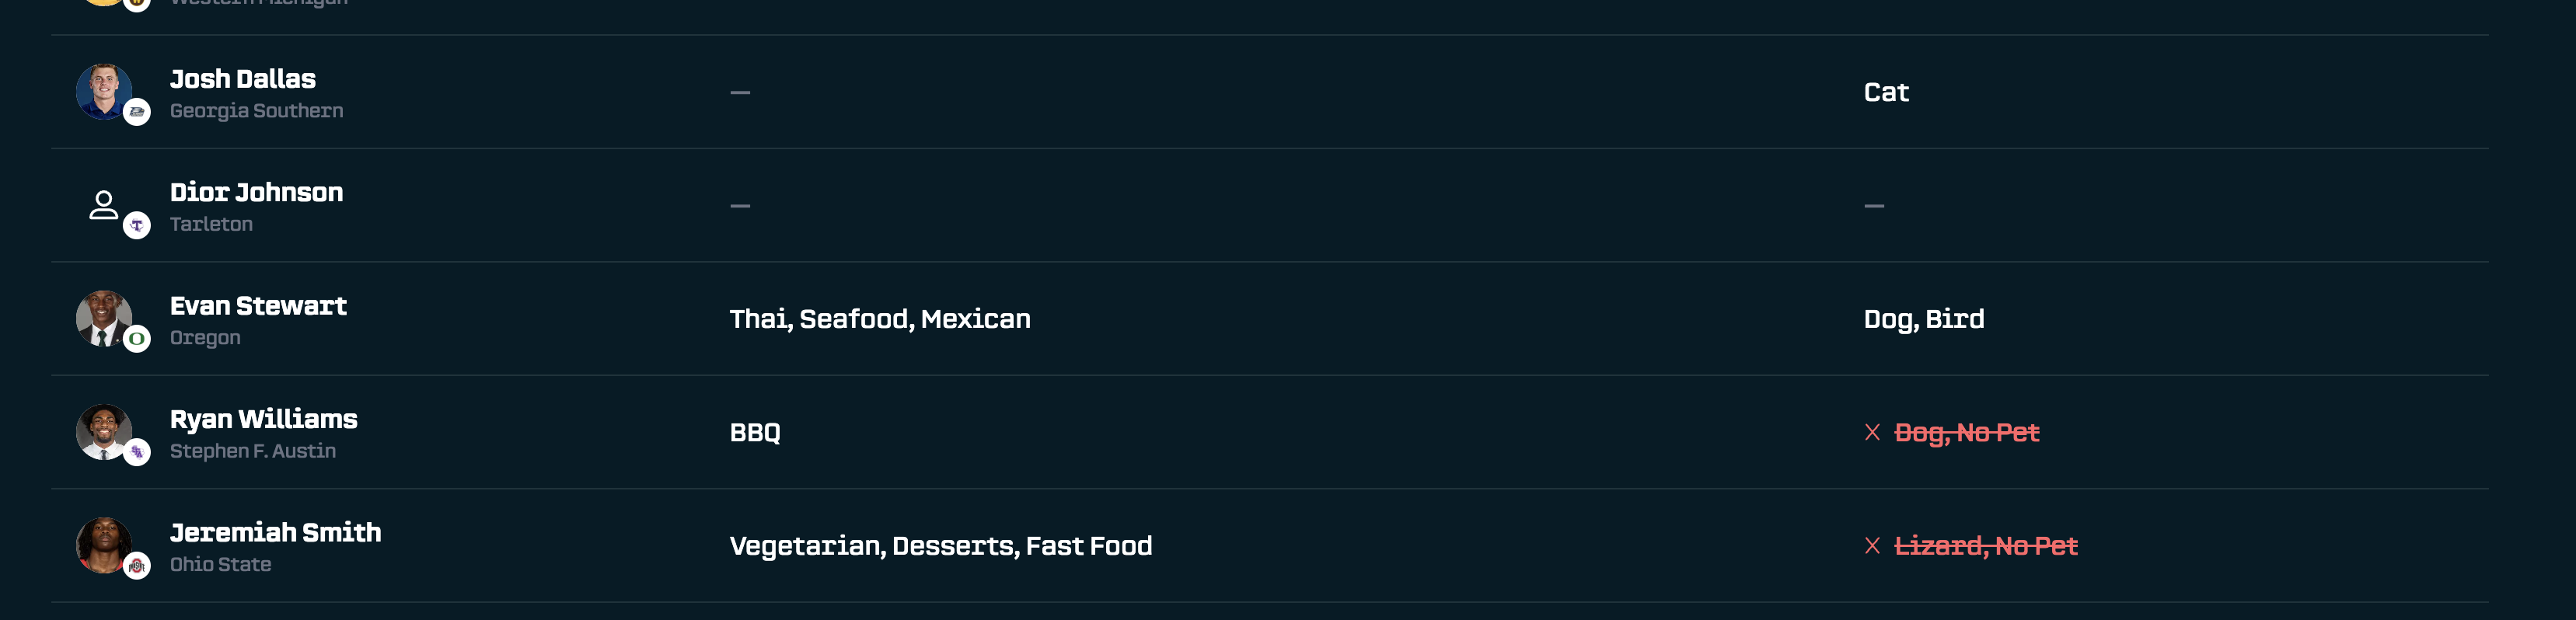
- ❌ Red X - Number of rows with invalid data. Pet shows 7 invalid rows because "No Pet" isn't one of my preset options. You can either add that option to your property, or continue and those values will simply be skipped.
- ⚠️ Yellow warning - Number of rows with empty data. Nine athletes don't have any pet information, which is fine.
Once your columns are mapped, click Continue to Athlete Matching.
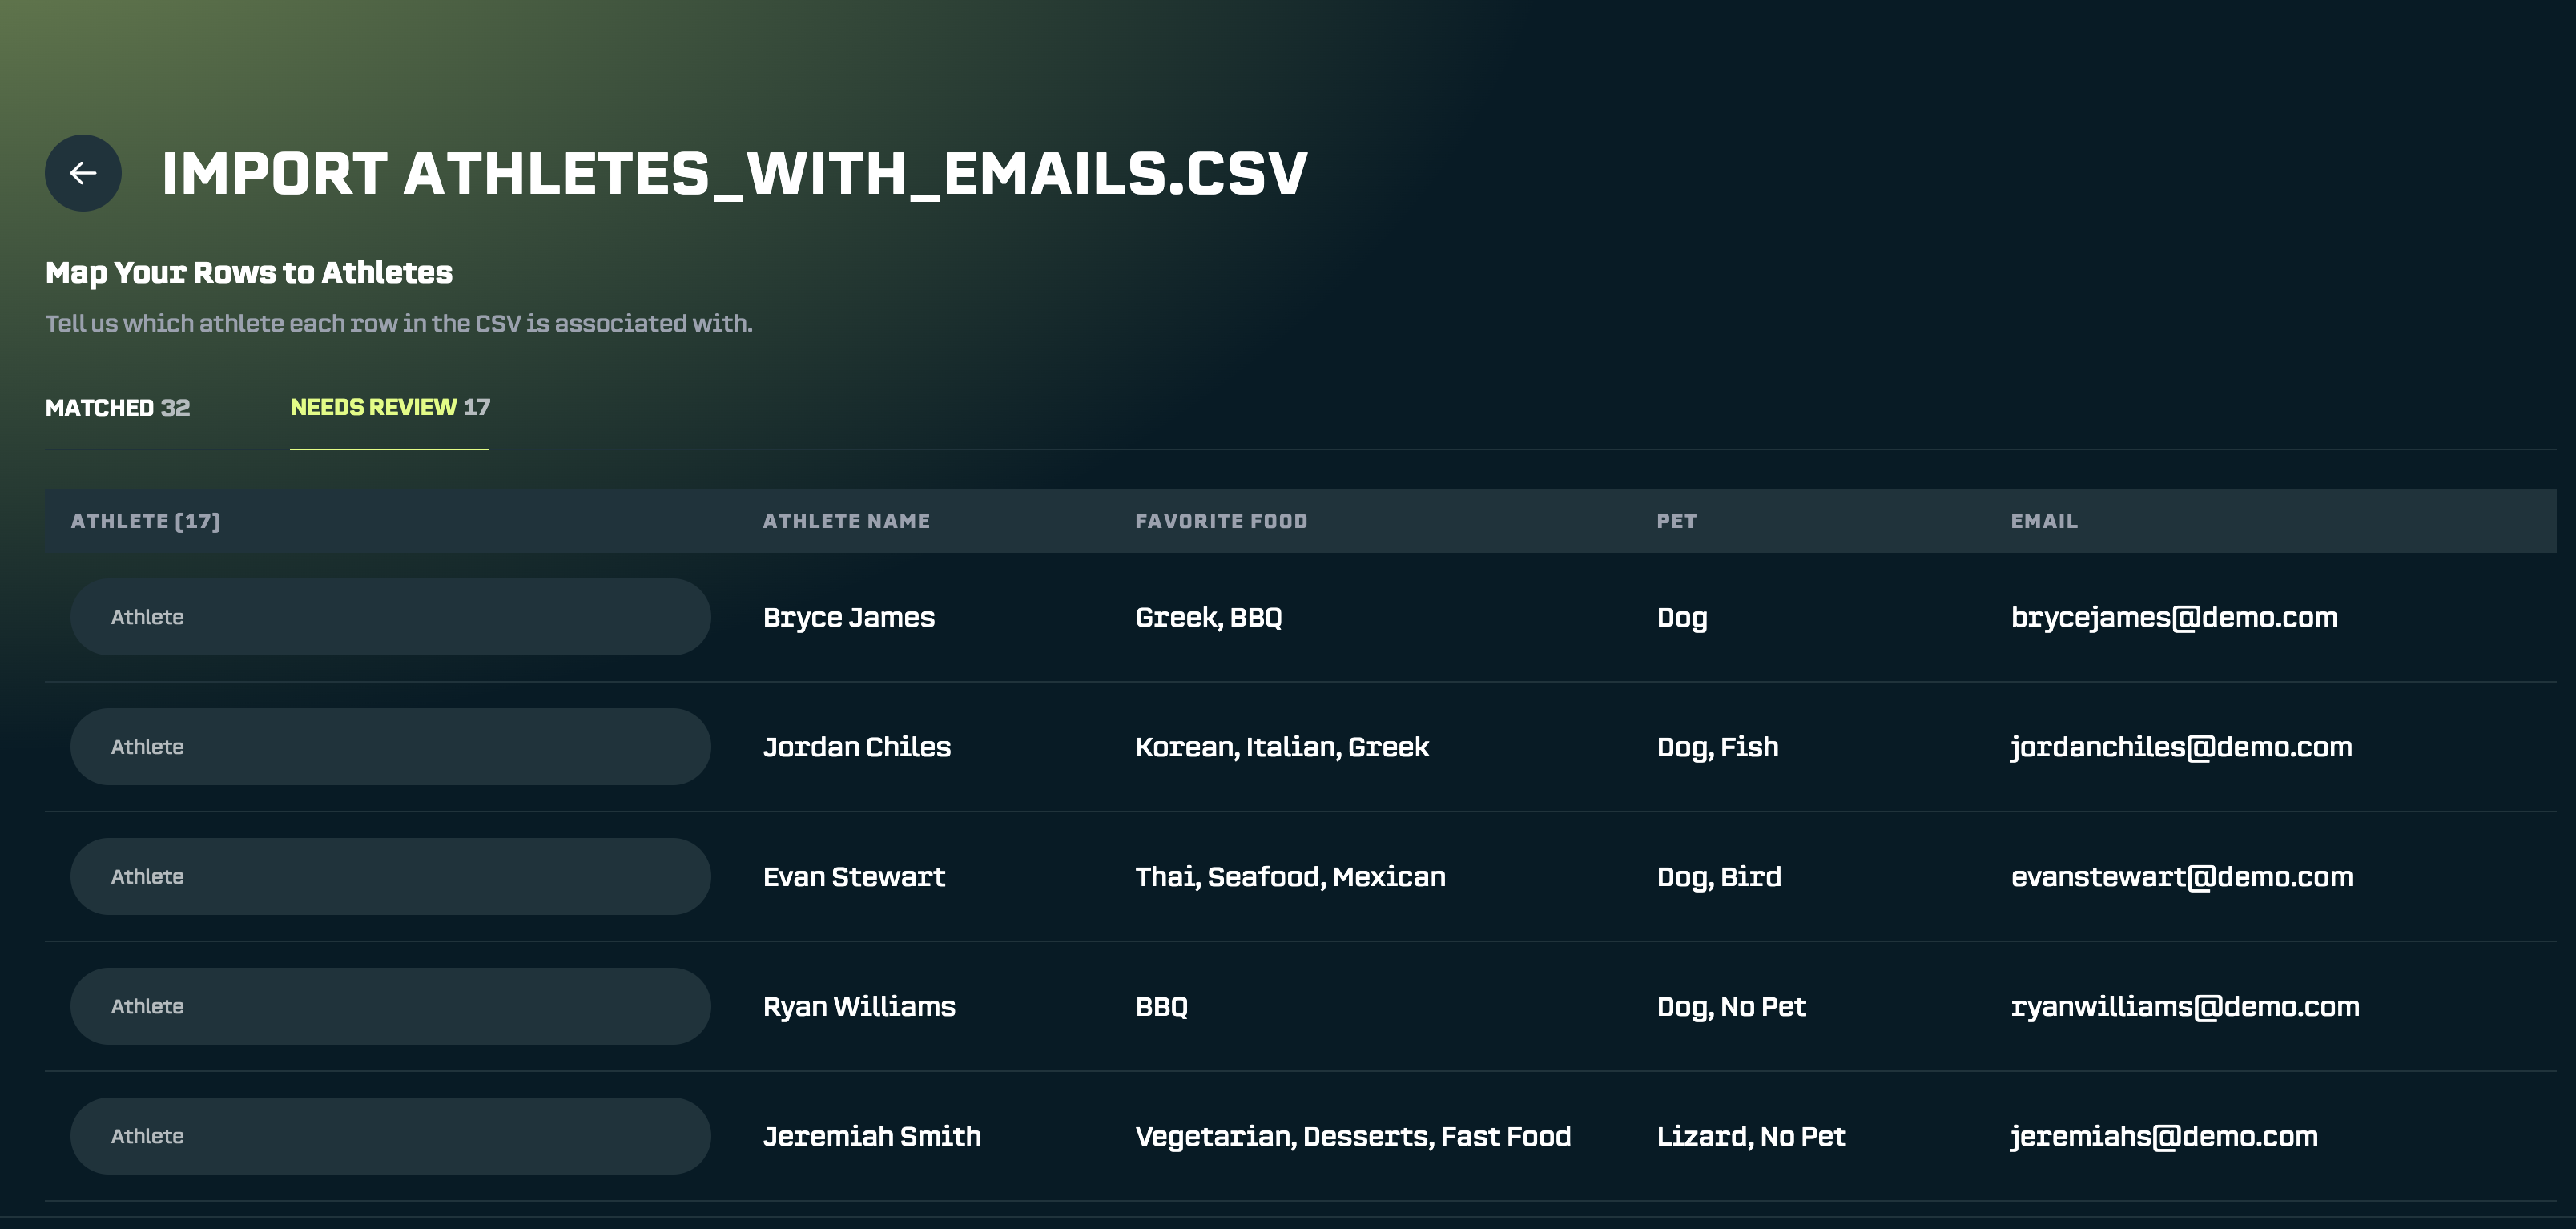
Step 3: Match Rows to Athletes
This is where each row in your spreadsheet gets connected to an athlete in SA Score.
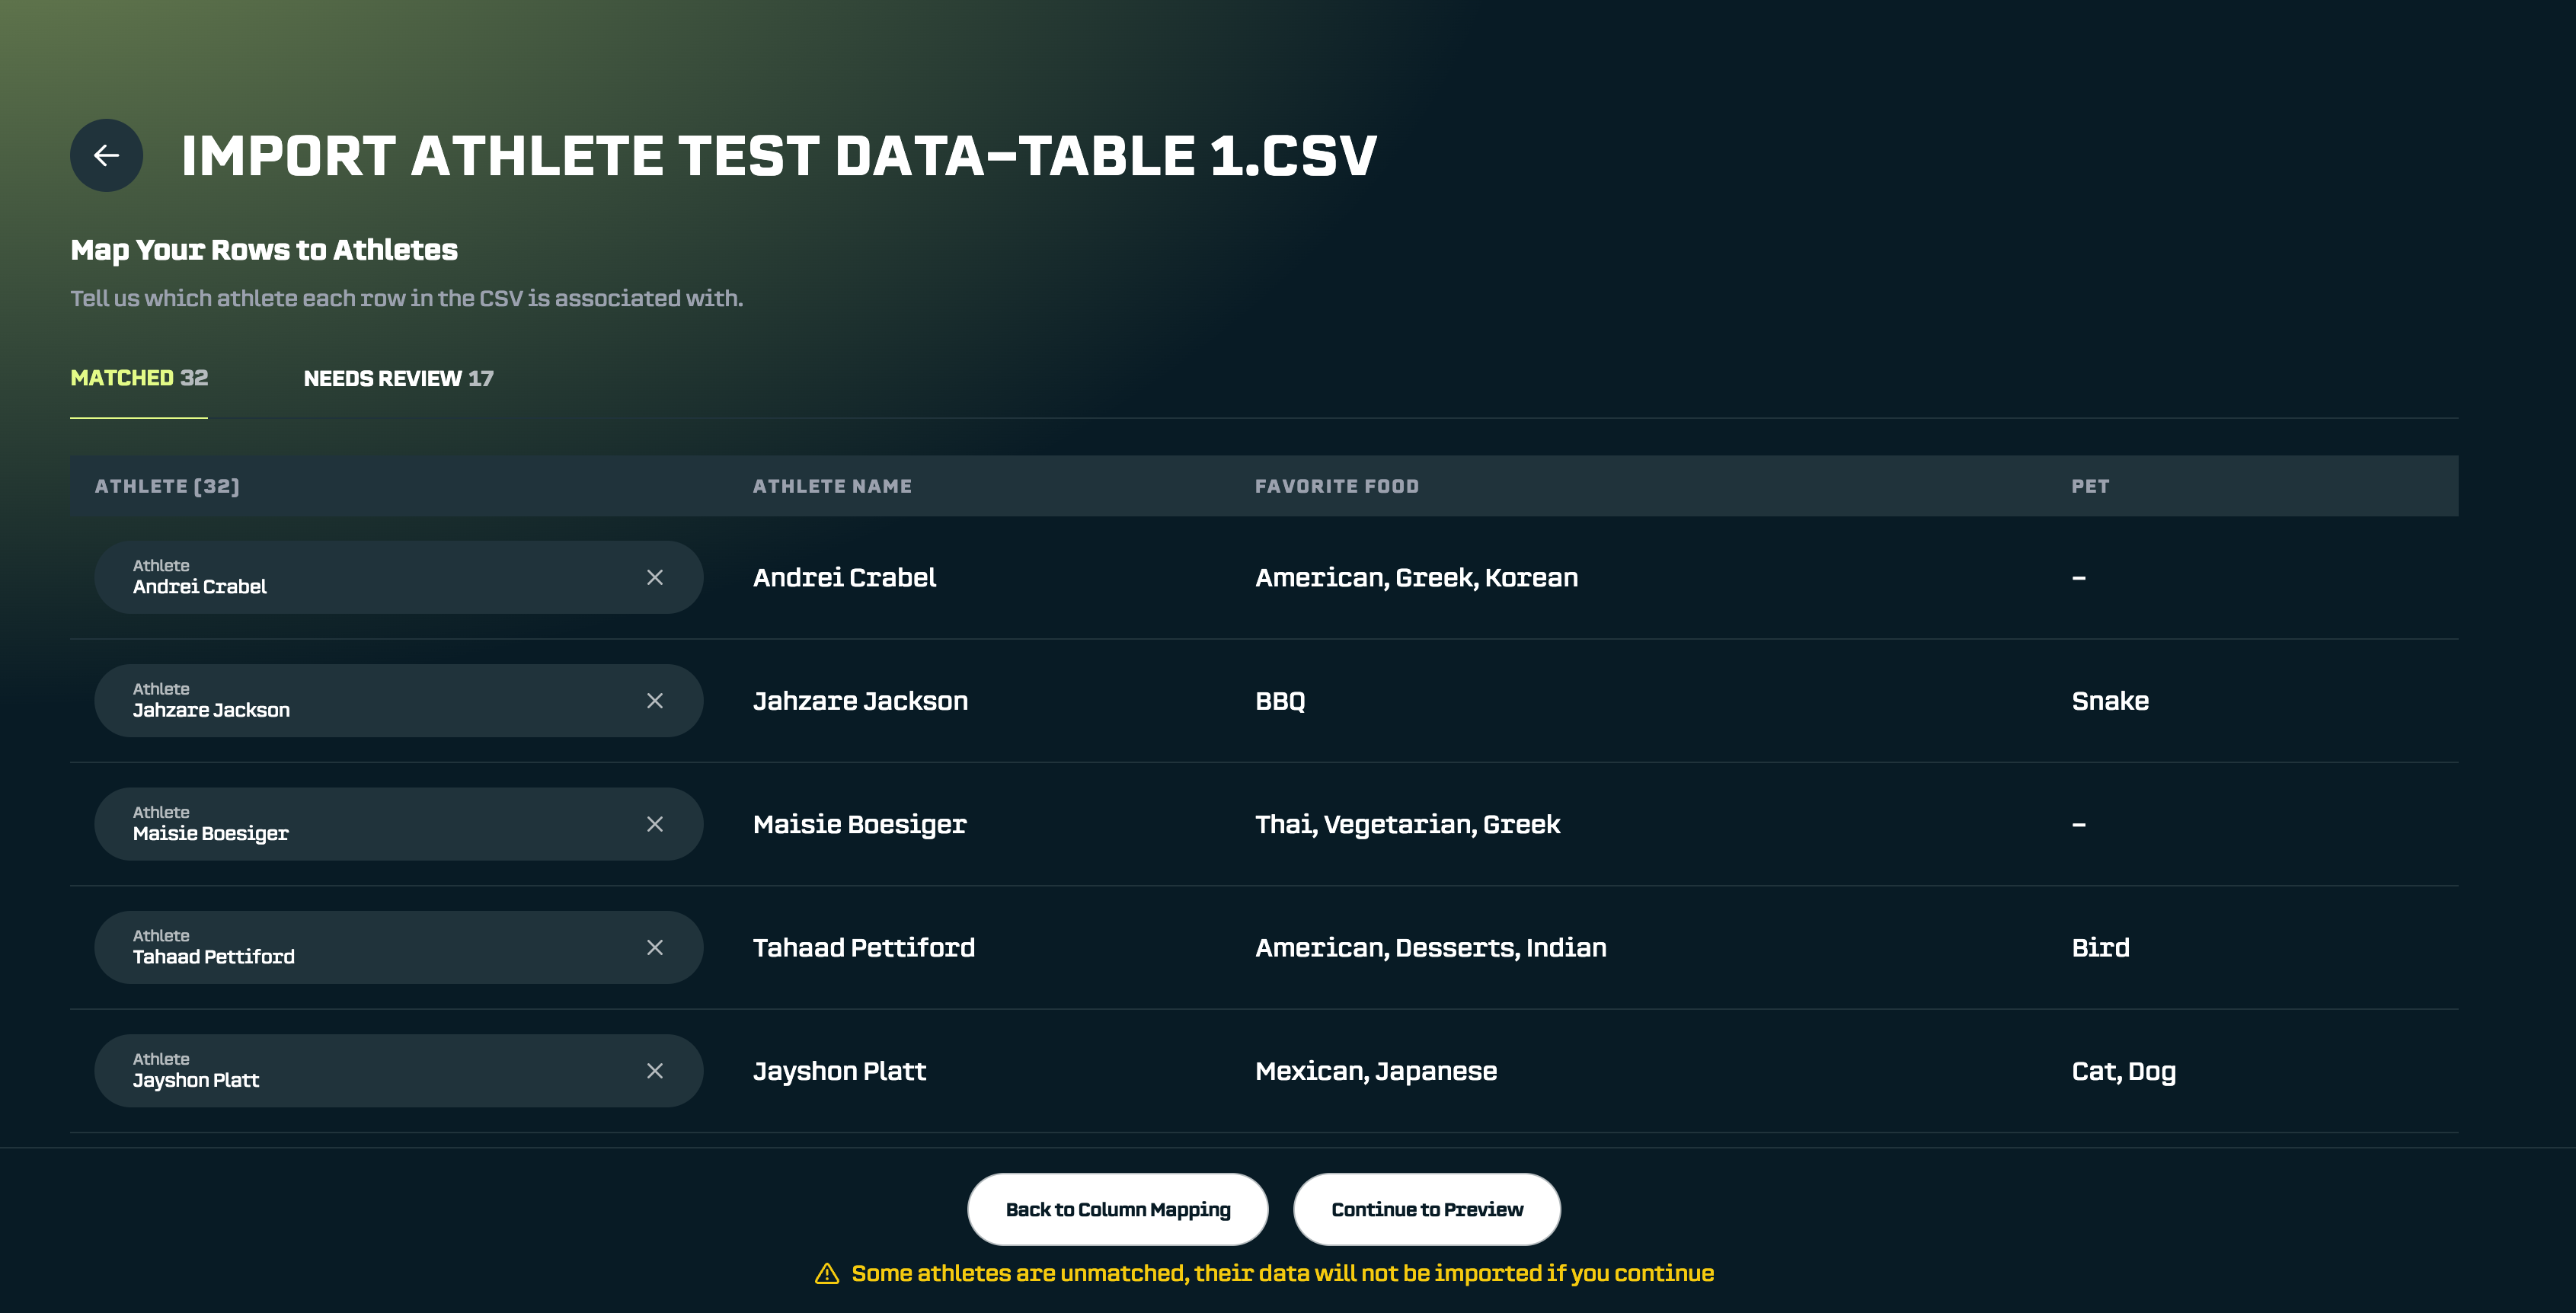
Good news: 32 athletes already matched automatically! Because I mapped the CSV Column “Athlete Name” to the Athlete Field “Full Name”, SA Score’s AutoMatcher found those athletes for me.
The remaining 17 athletes need a review. This happens when there are multiple athletes with the same name, or when a name doesn’t match exactly. No problem, we can match them manually.
Manually Matching Athletes
Click on the Review tab to see unmatched rows.
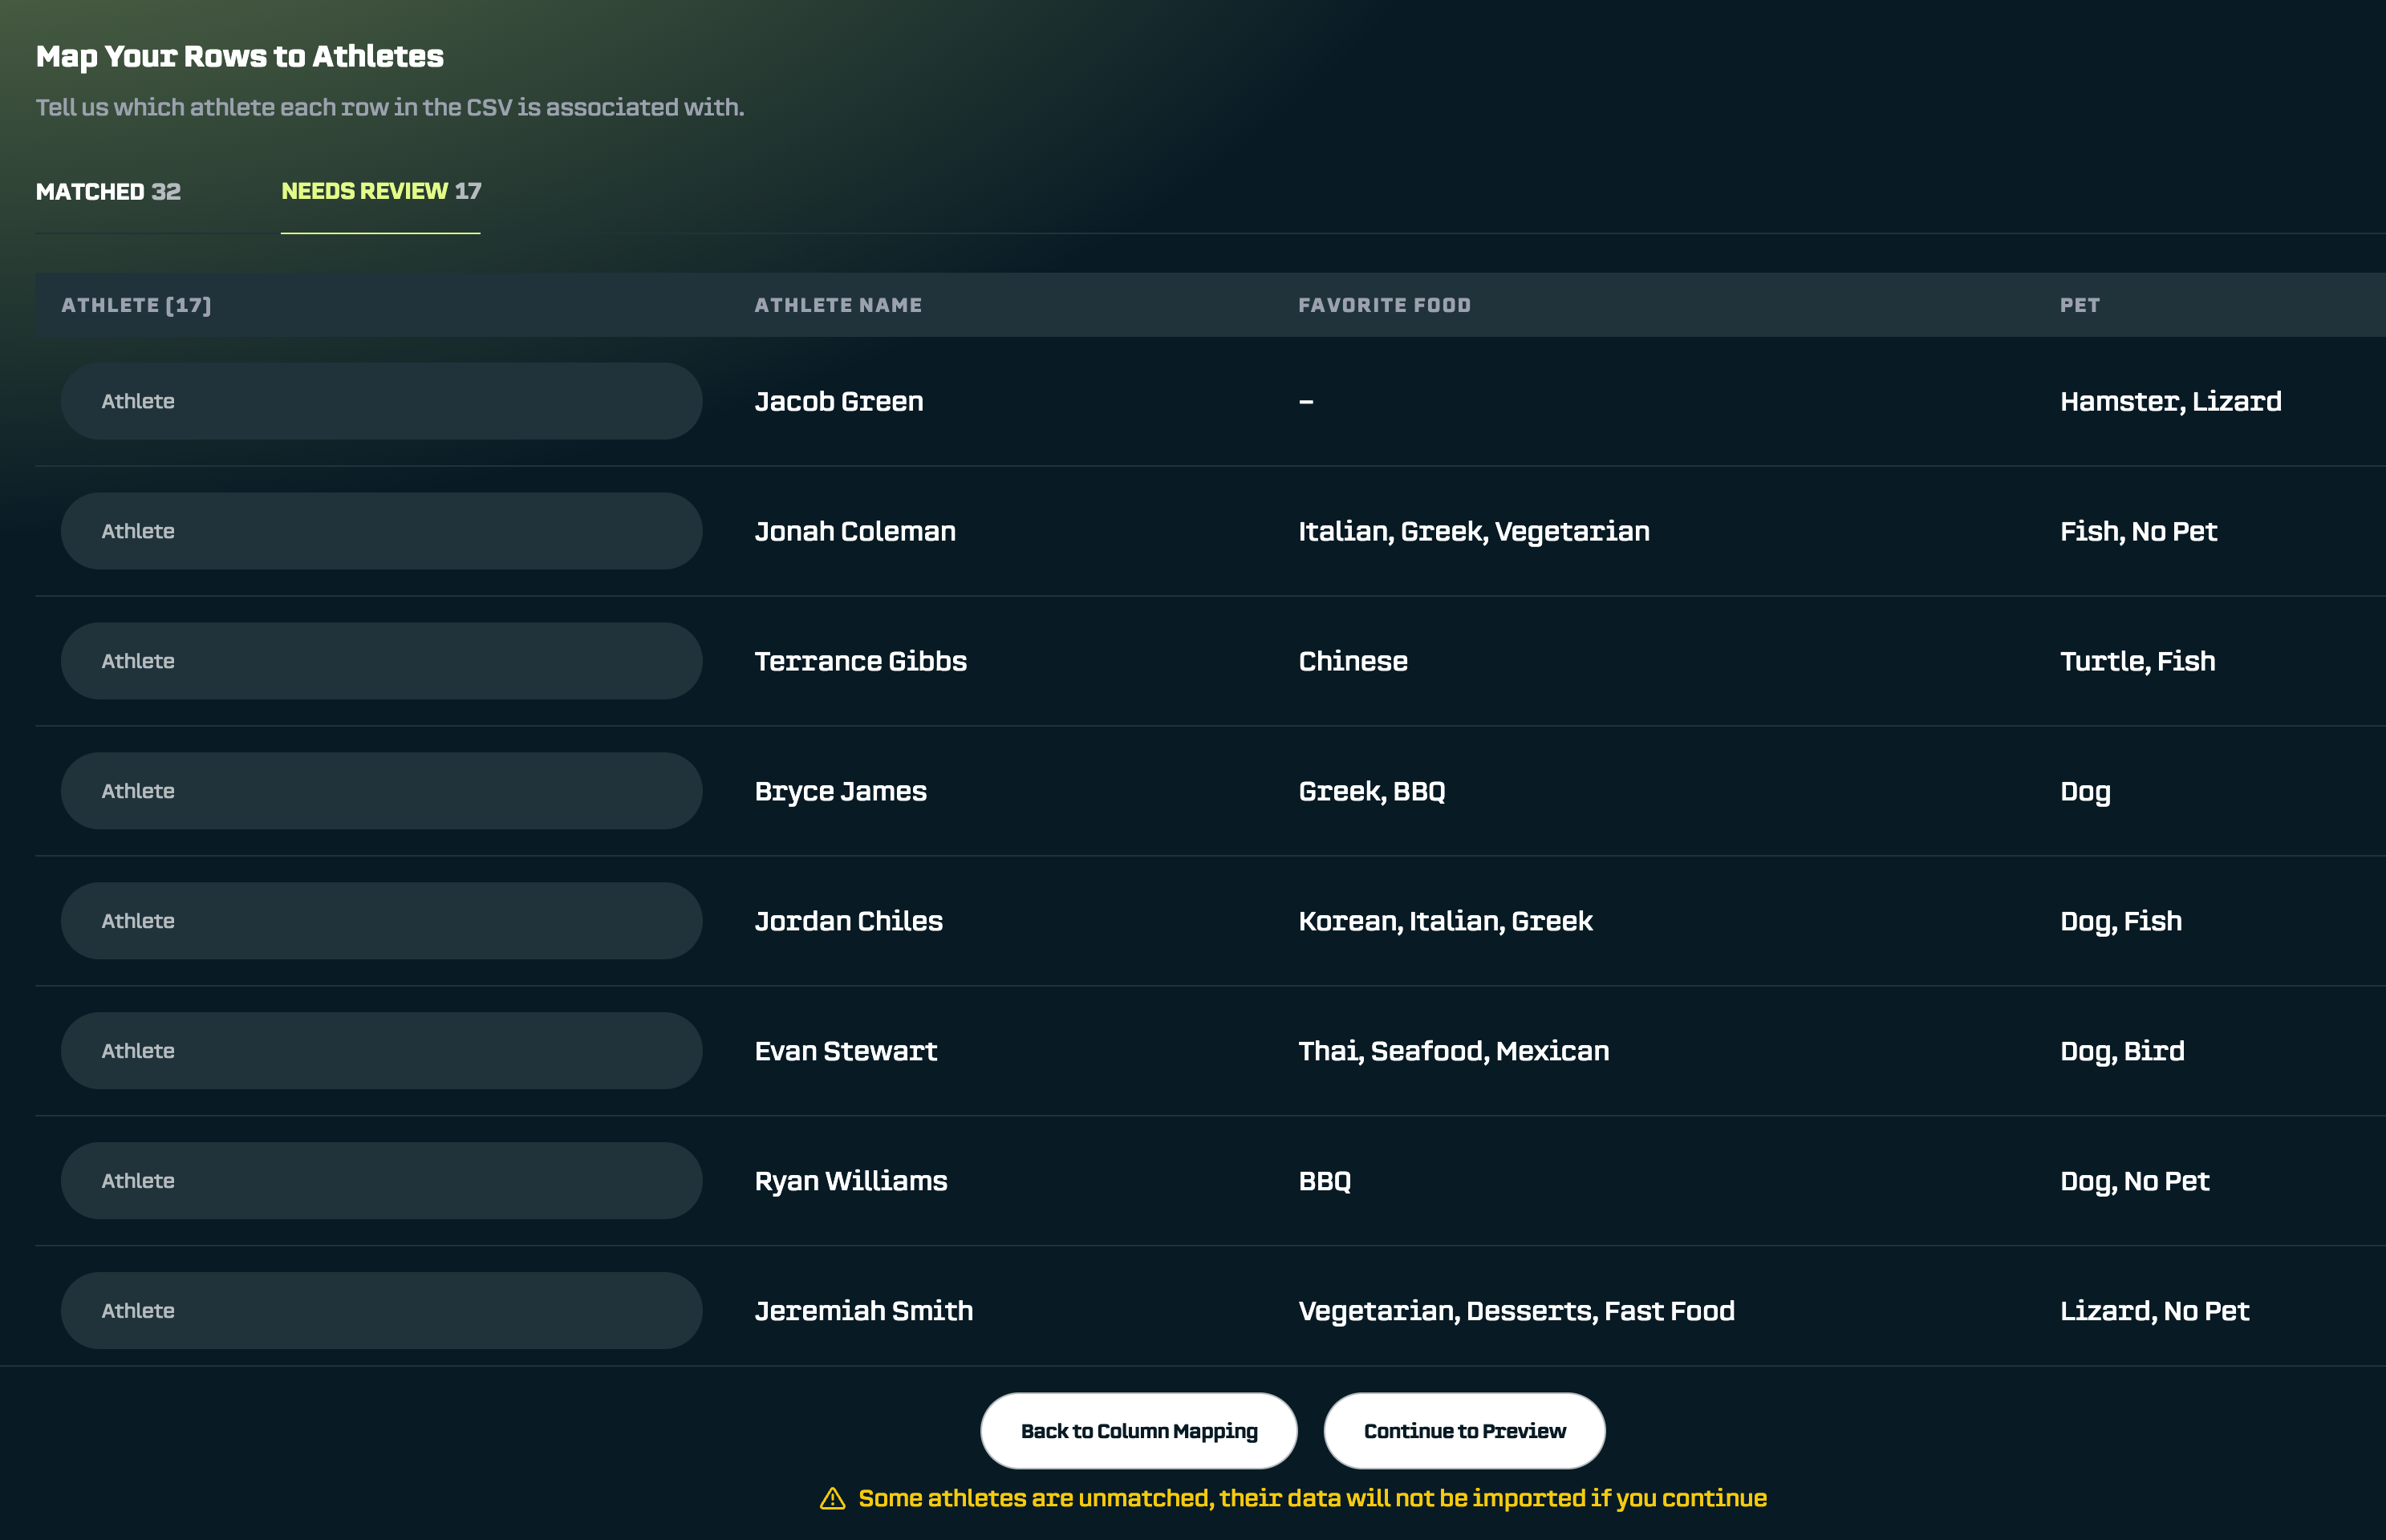
For each row, search for the correct athlete and select the match.
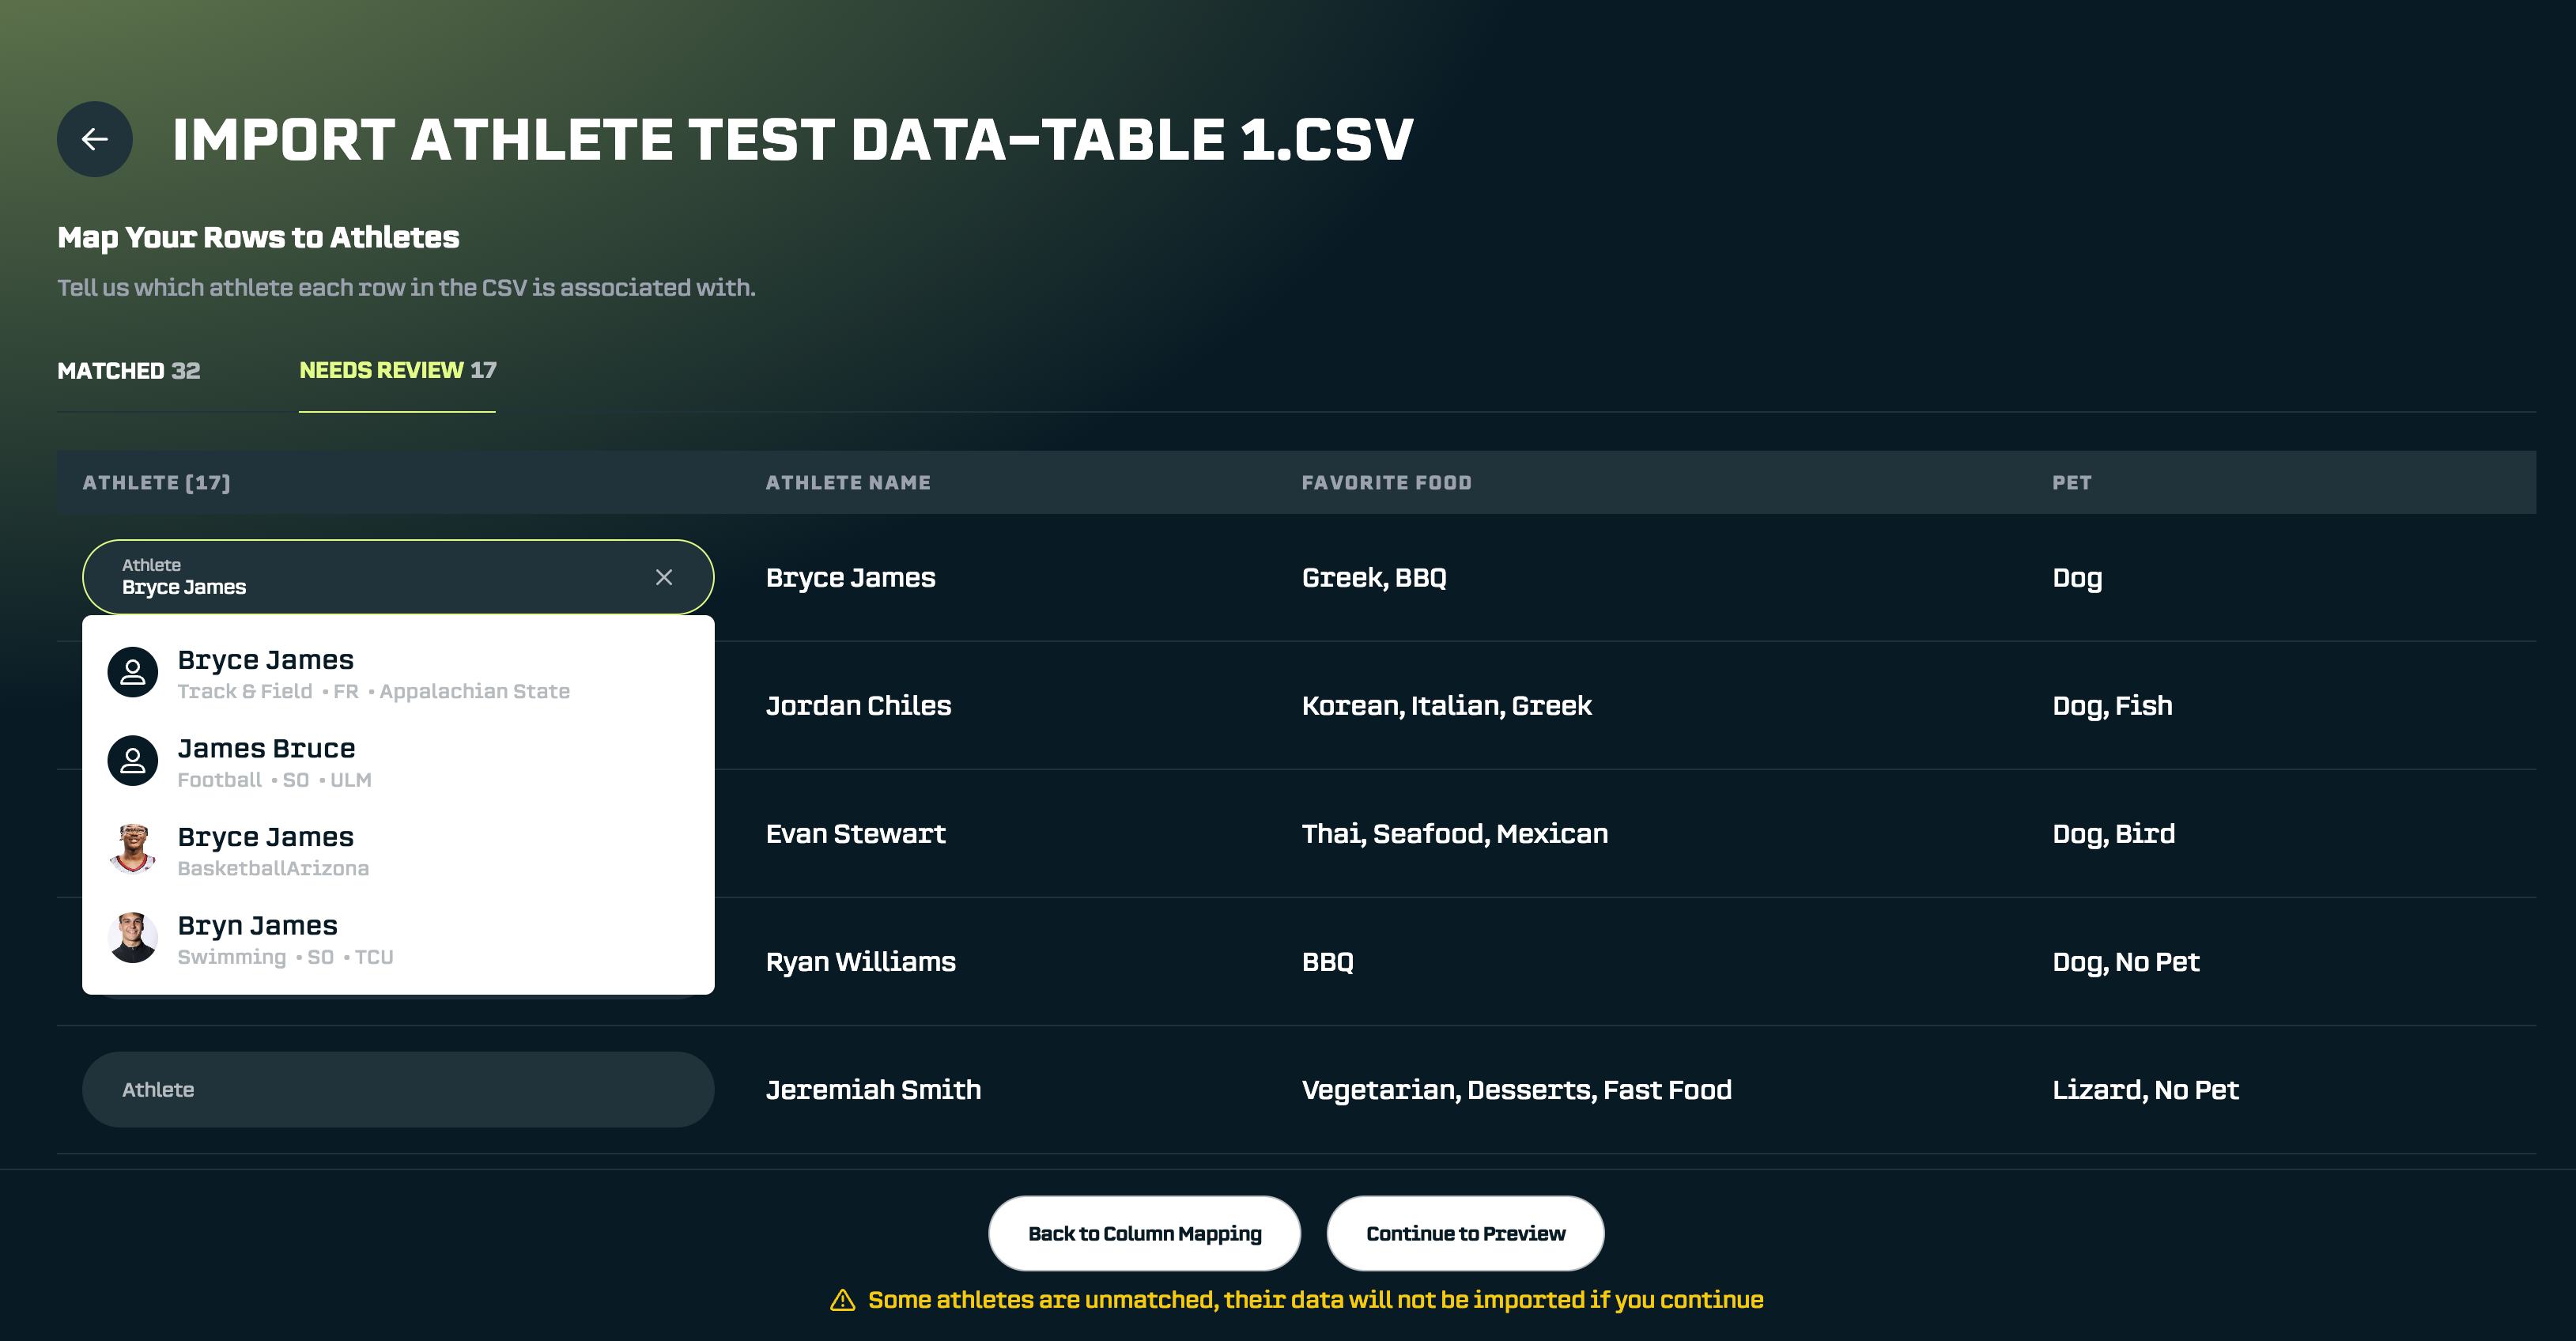
Click the green checkmark to confirm the match
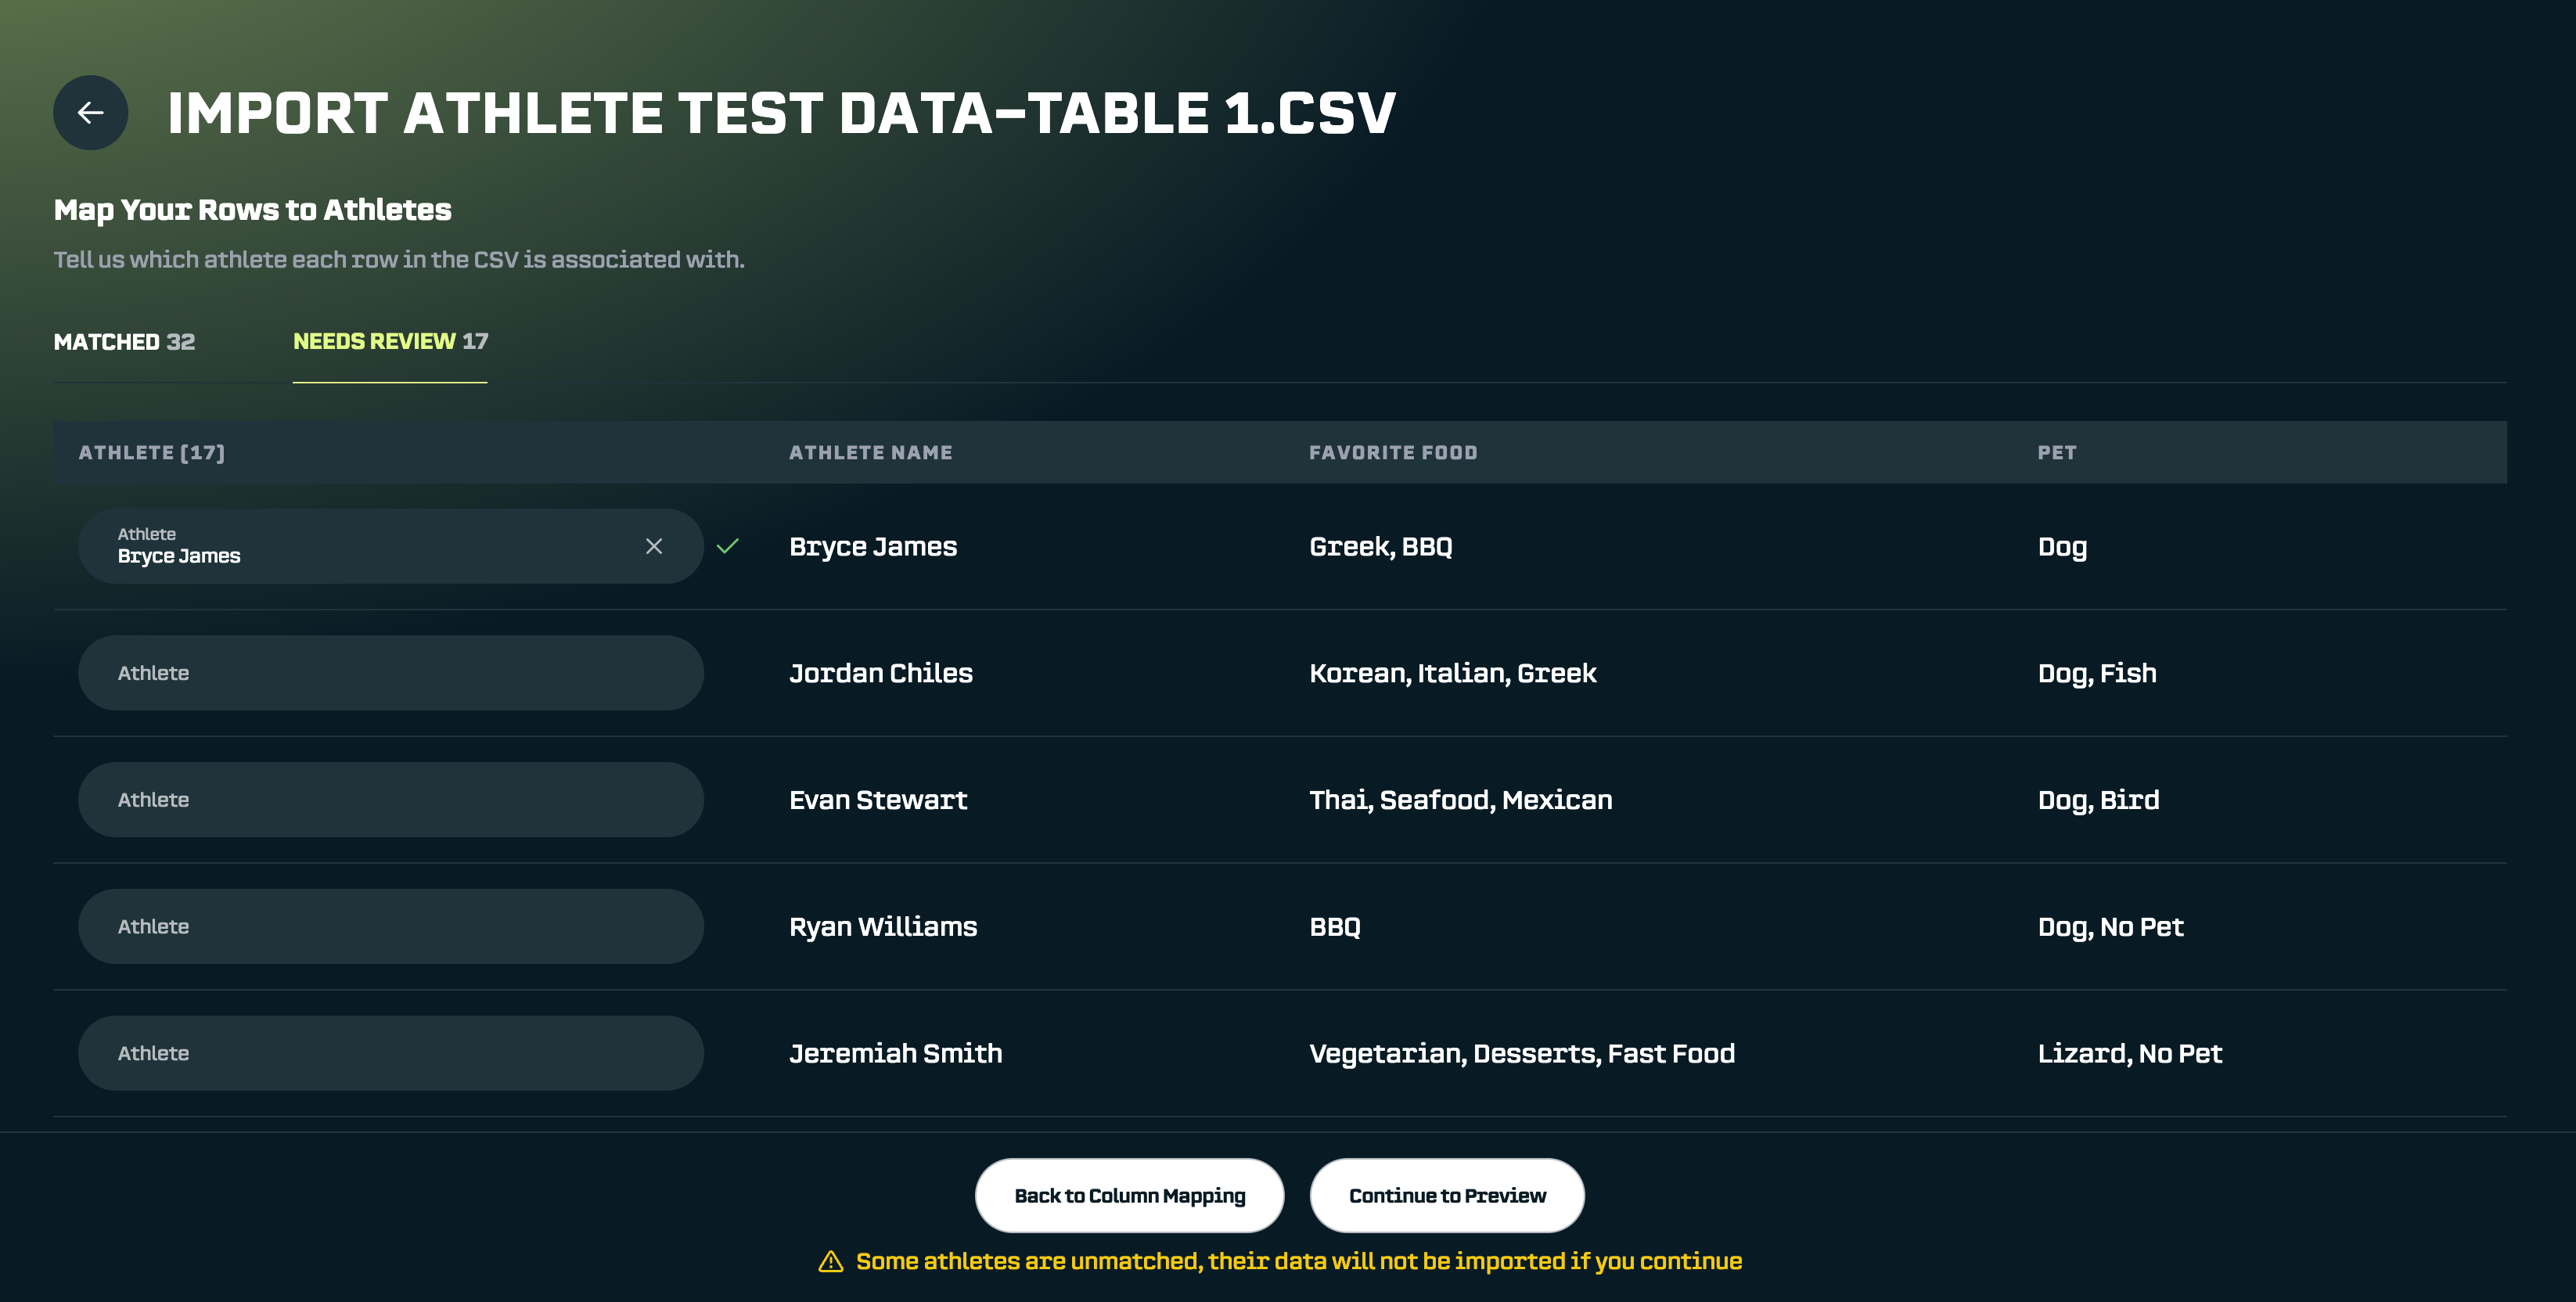
Repeat for each unmatched athlete. If you can't find a match for some rows, that's okay, they'll simply be skipped during import.
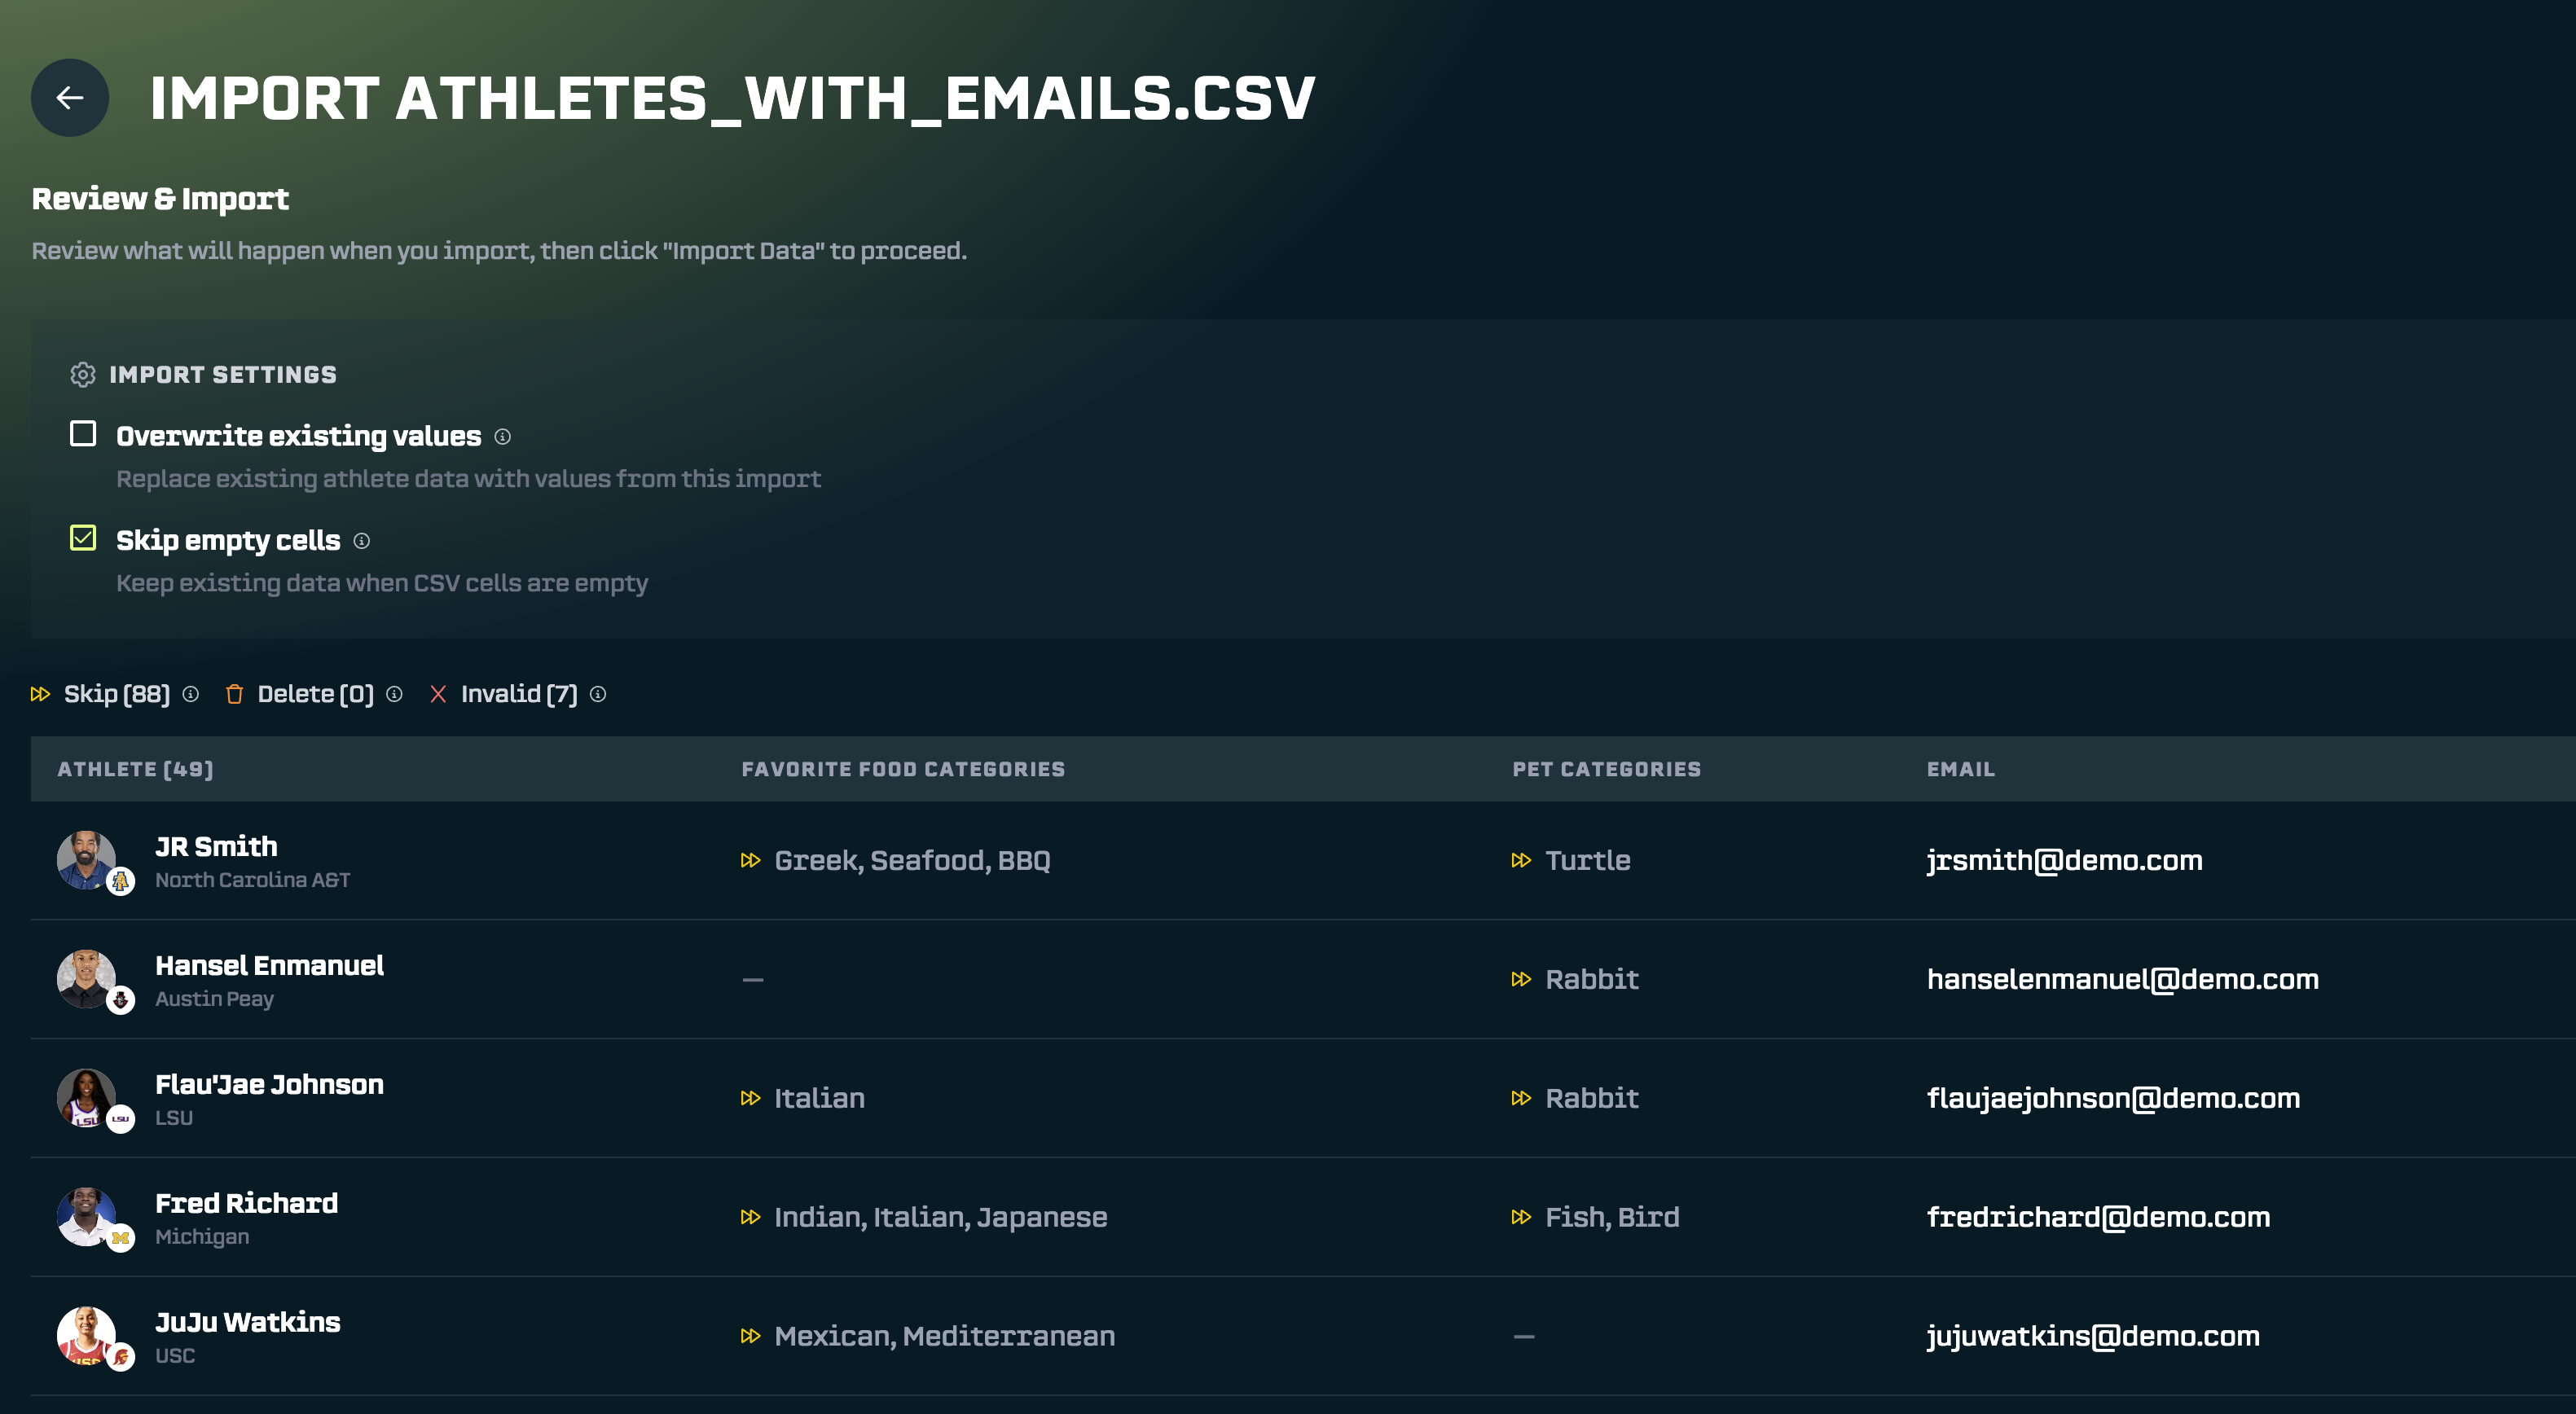
Step 4 & 5: Review and Import
Before importing, you'll see a preview of exactly what data will be added to each athlete.
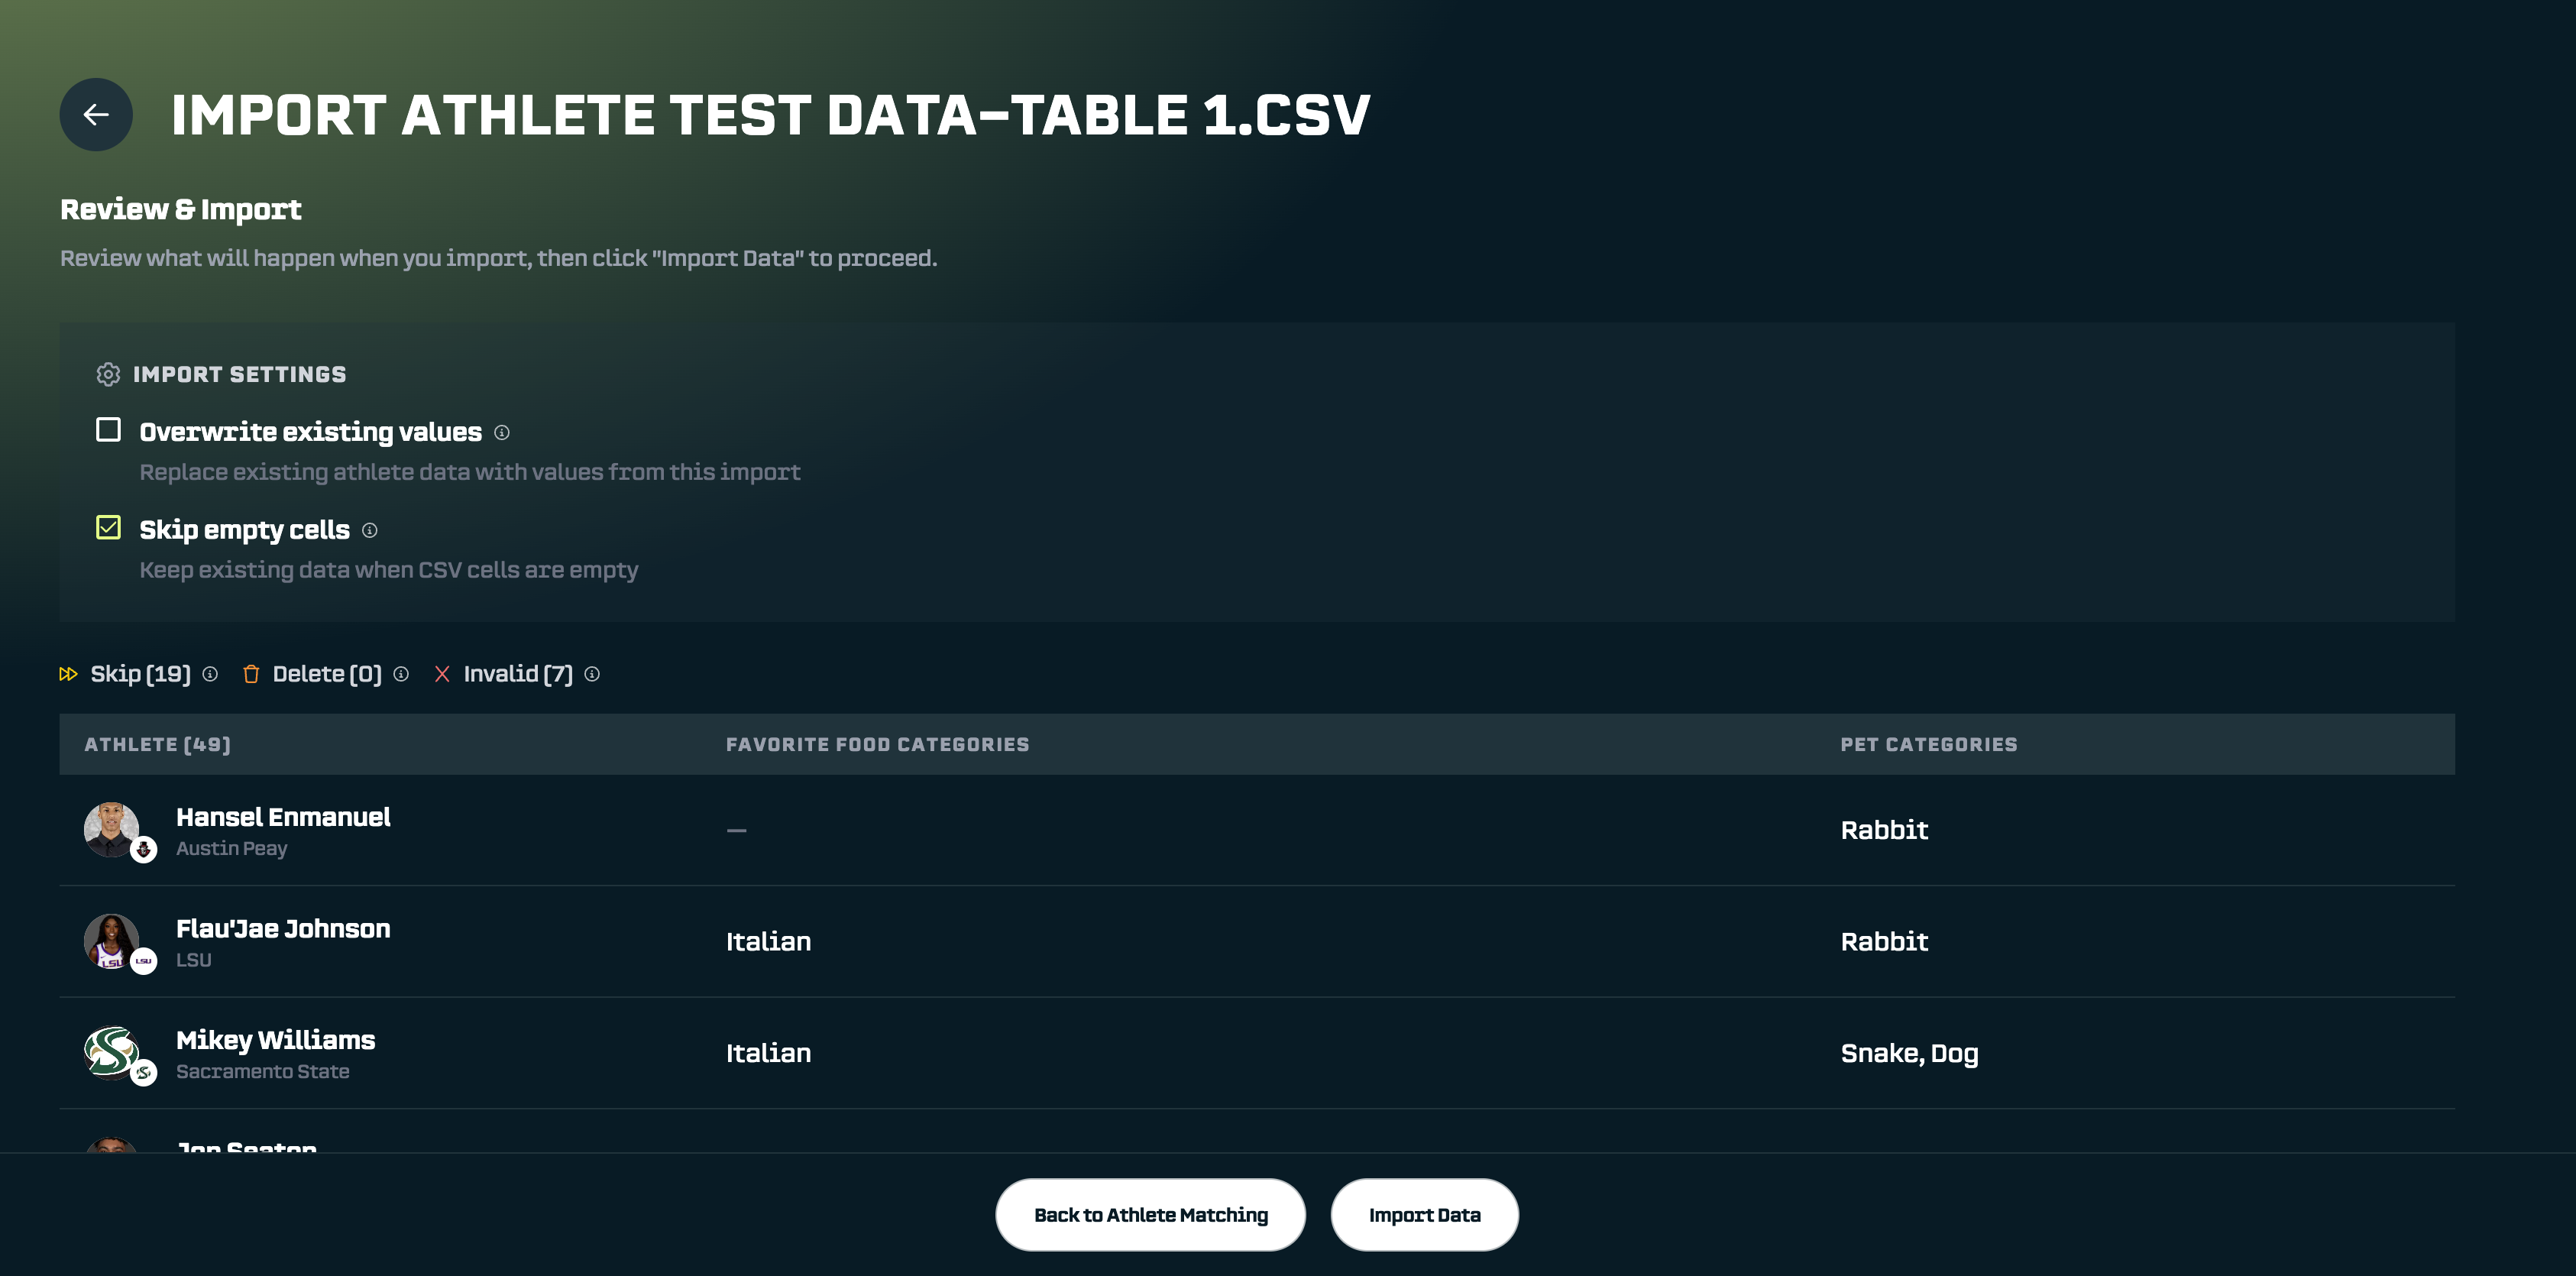
Import Settings
Two options control how the import handles existing data:
Overwrite Existing Values (off by default)When turned on, new values replace any existing data. For example, if Flau'Jae Johnson already had "Chinese" saved as her favorite food category, turning this on would change it to "Italian" (the value in your CSV).
When turned off, existing values are preserved. Only empty properties get filled in.
Skip Empty Cells (on by default)When turned on, blank cells in your spreadsheet are ignored. When turned off (and Overwrite is on), blank cells will clear out existing values.
Import Legend
- ⏩ Yellow Fast-Forward - Indicates ****the number of values that will be skipped (either because they are empty or because they would overwrite values depending on your settings)
- 🗑️ Orange Garbage Can - Indicates the number of values that will be deleted for athletes (because you are overwriting the athlete’s property value with an empty value)
- ❌ Red X - Number of rows with invalid data. These will be skipped.
Scrolling down, you can see how empty values and invalid entries are handled:
Once everything looks good, click Import Data.
Confirming Your Import
After the import completes, you’ll see a results summary:
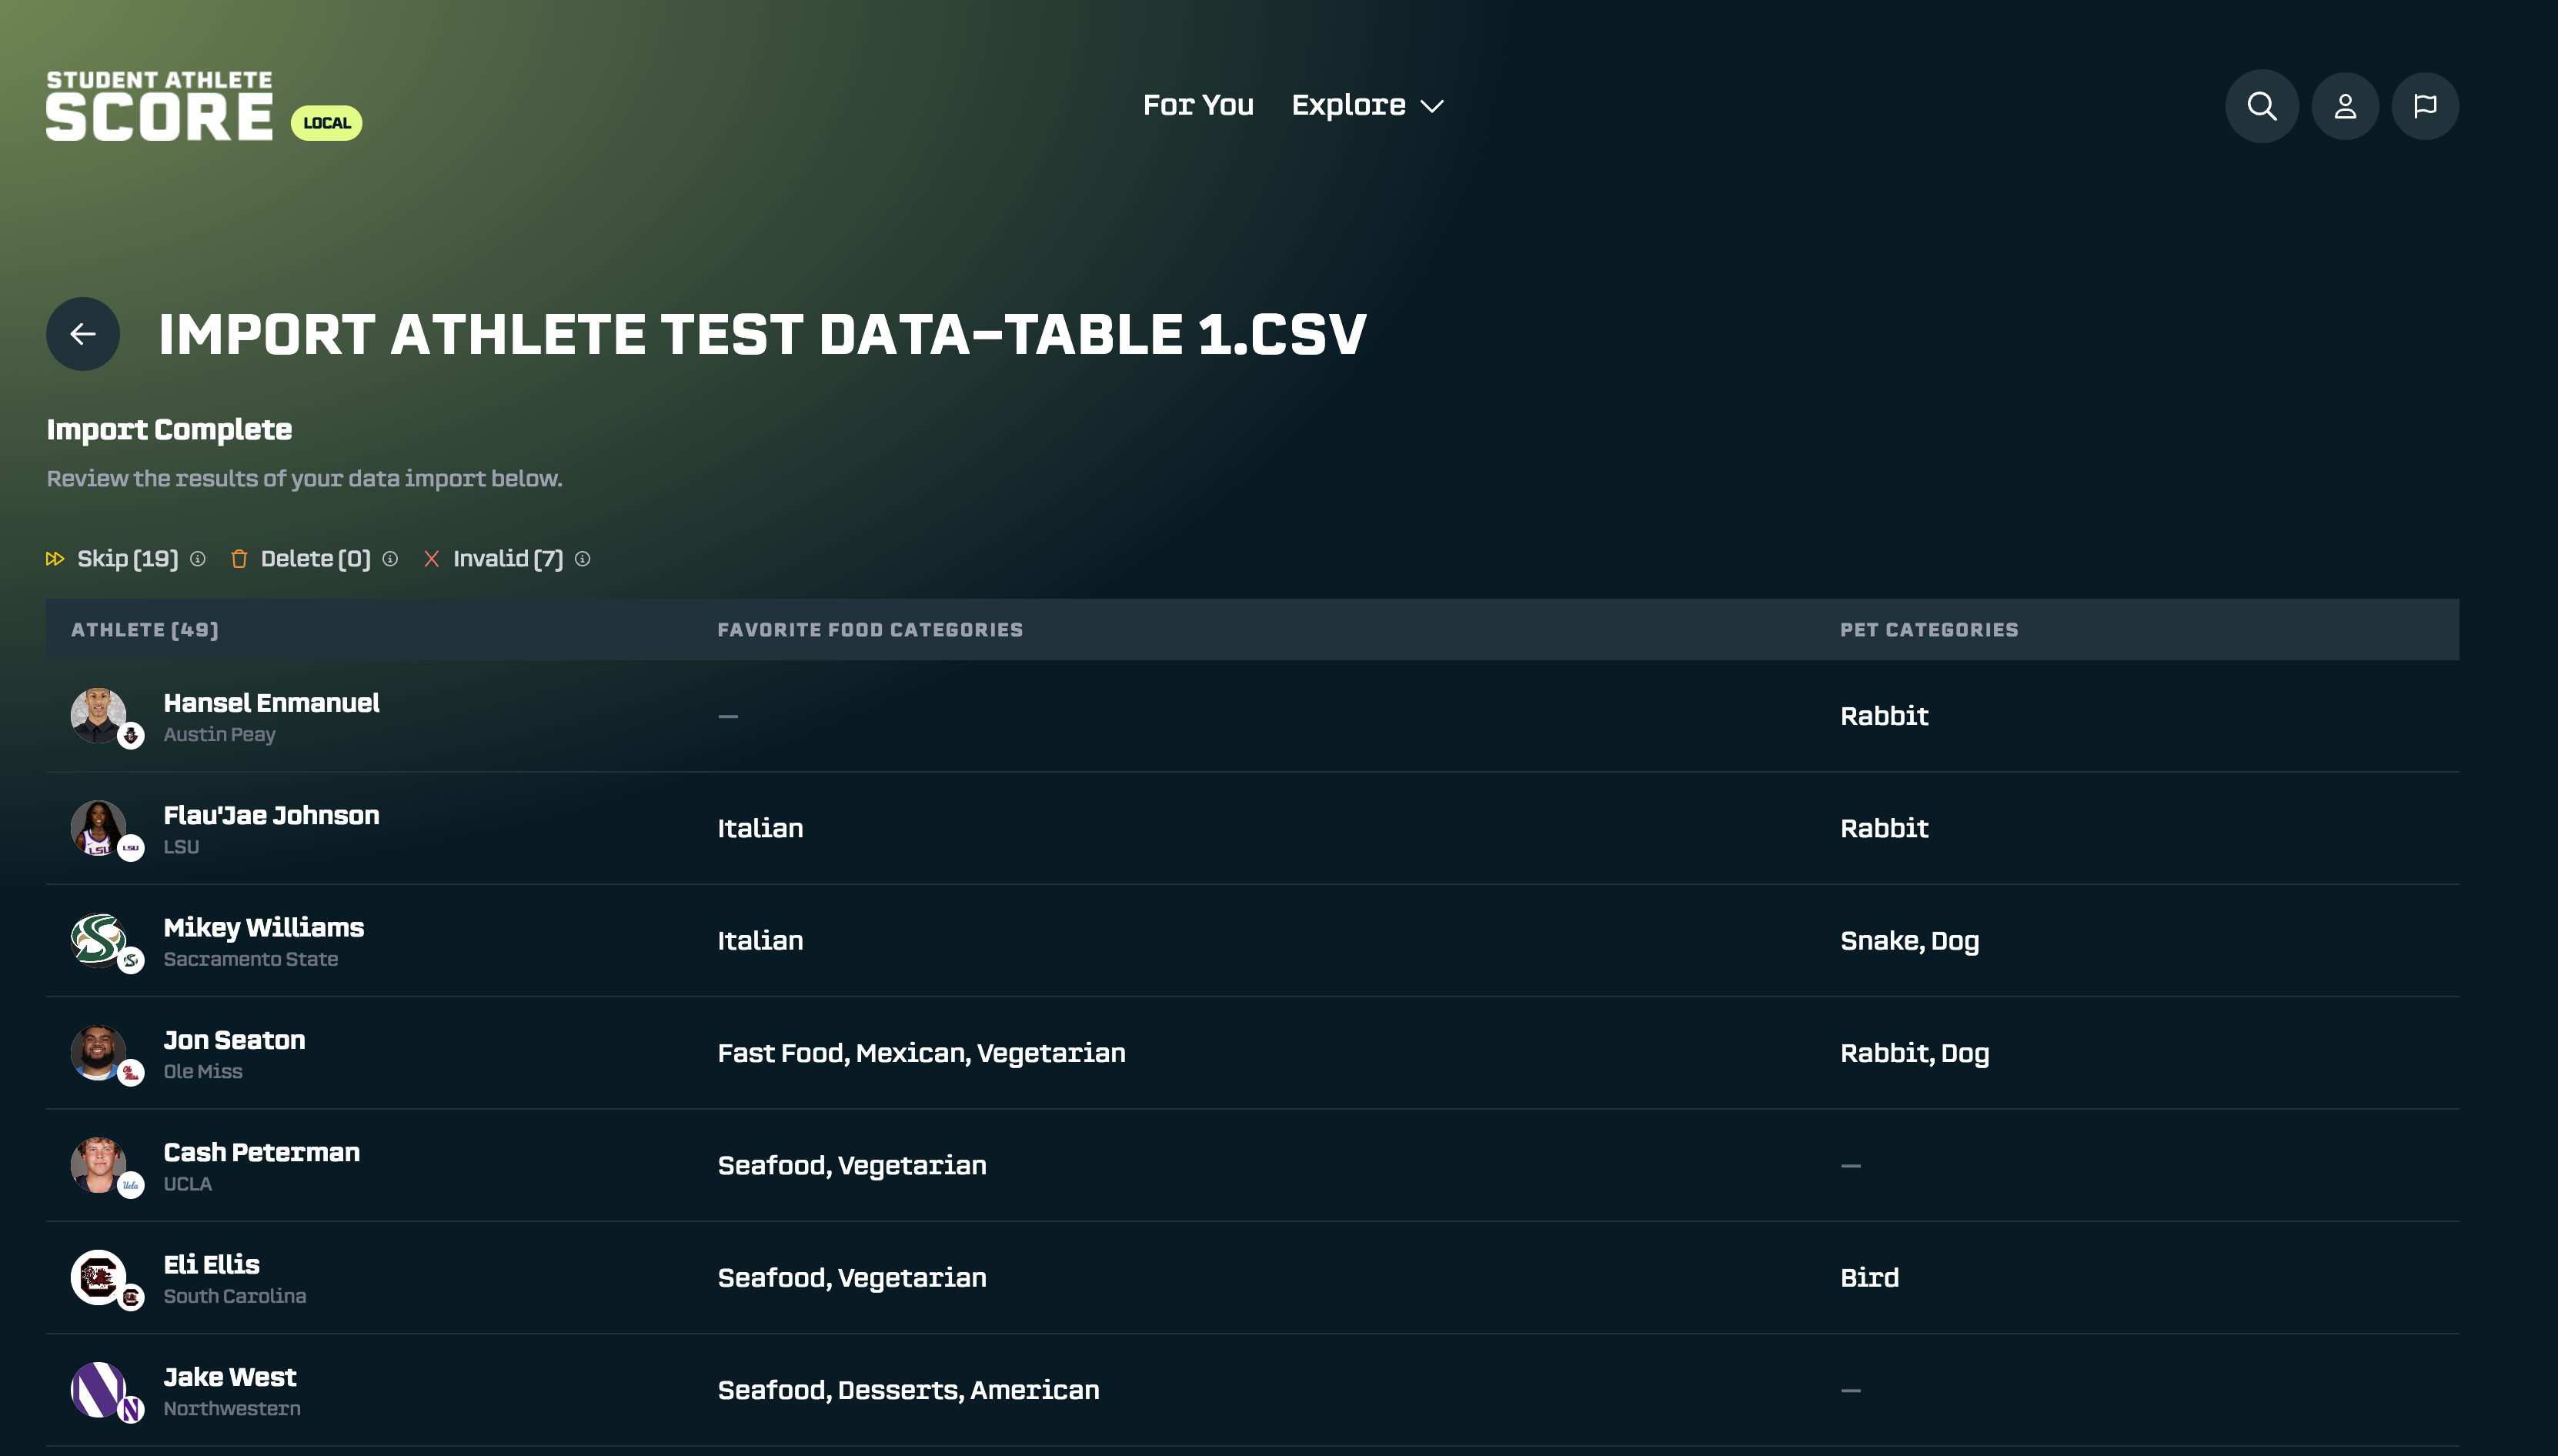
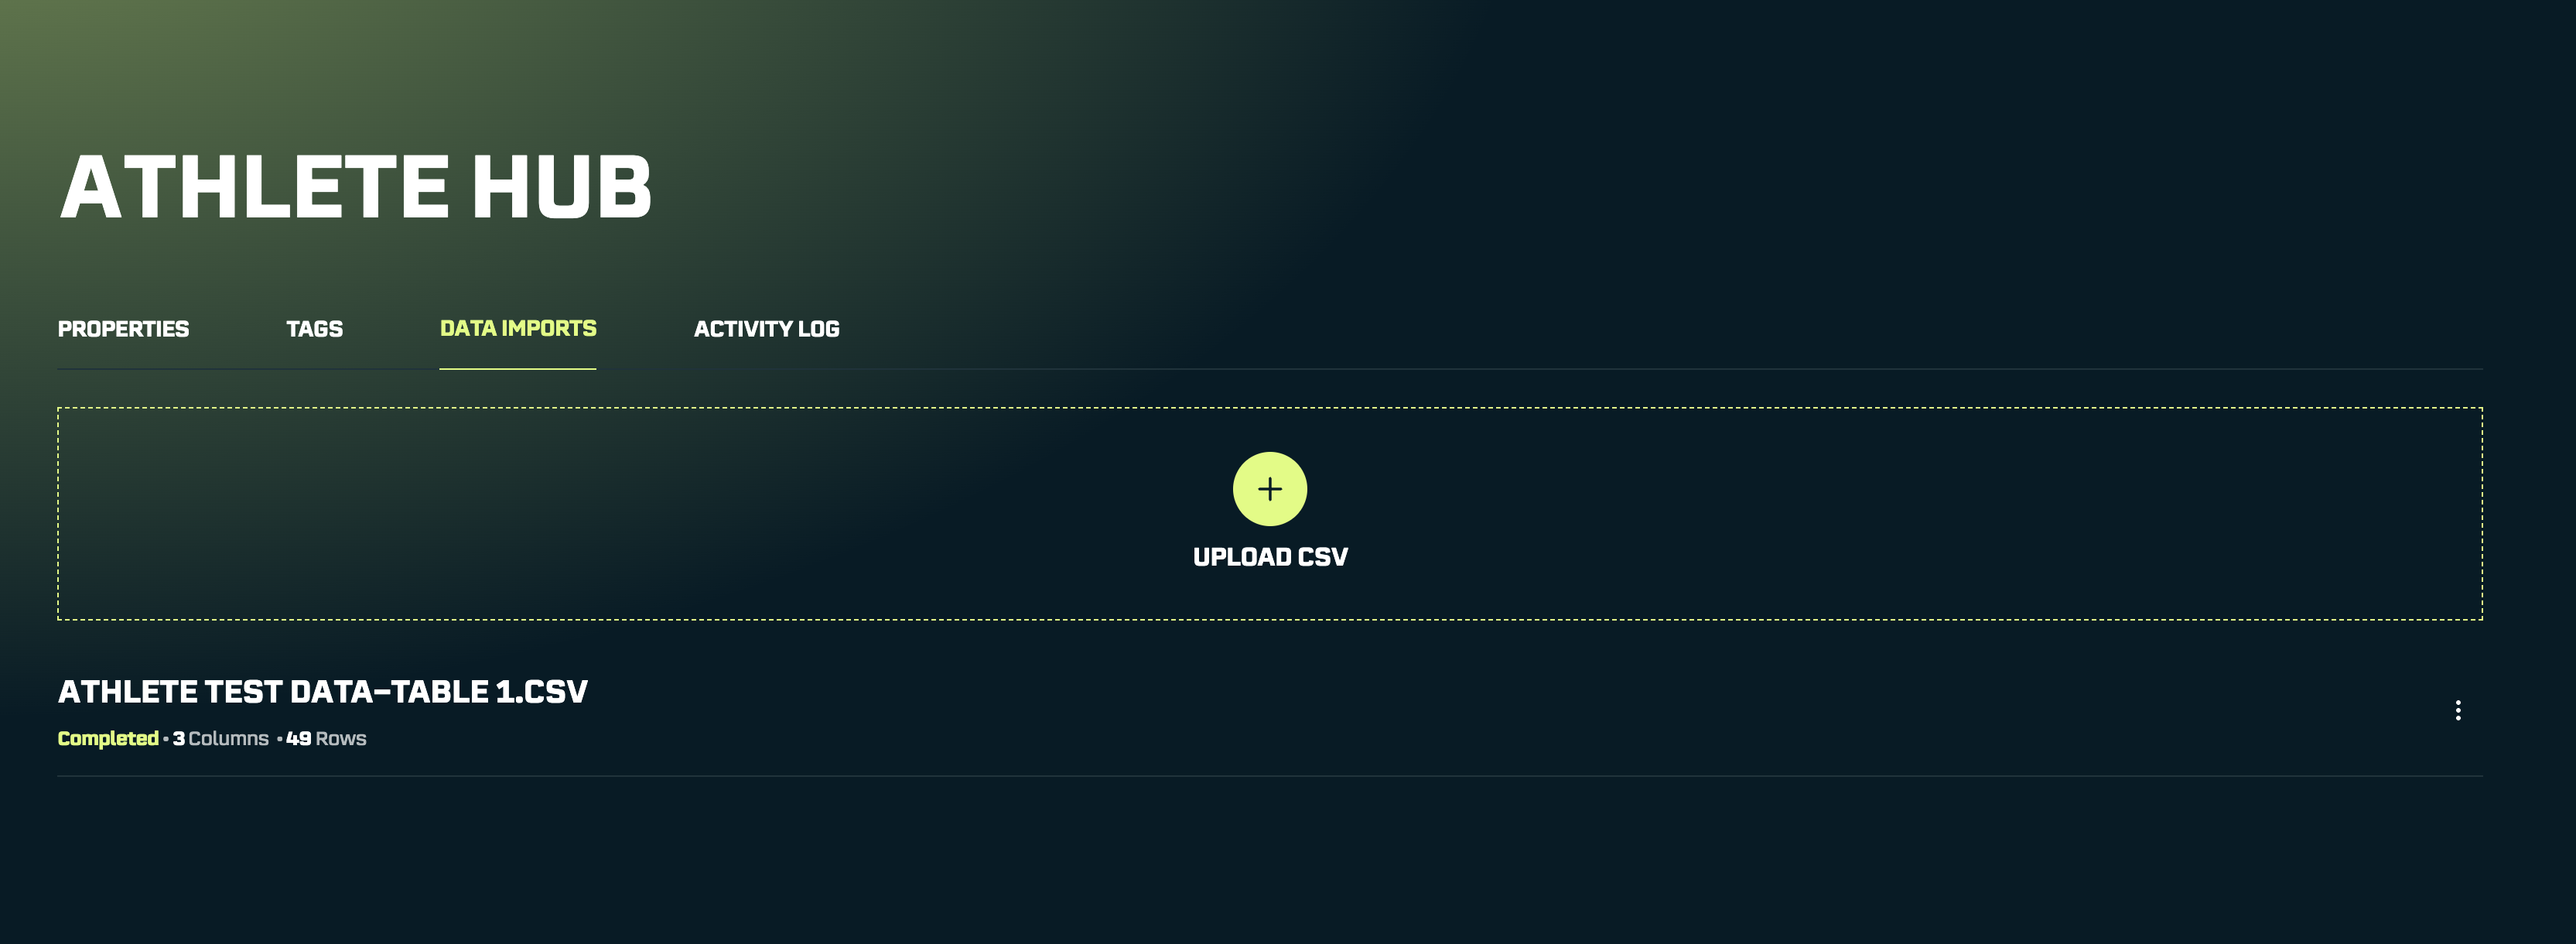
You can always revisit these results by clicking on the import in your Data Imports list:
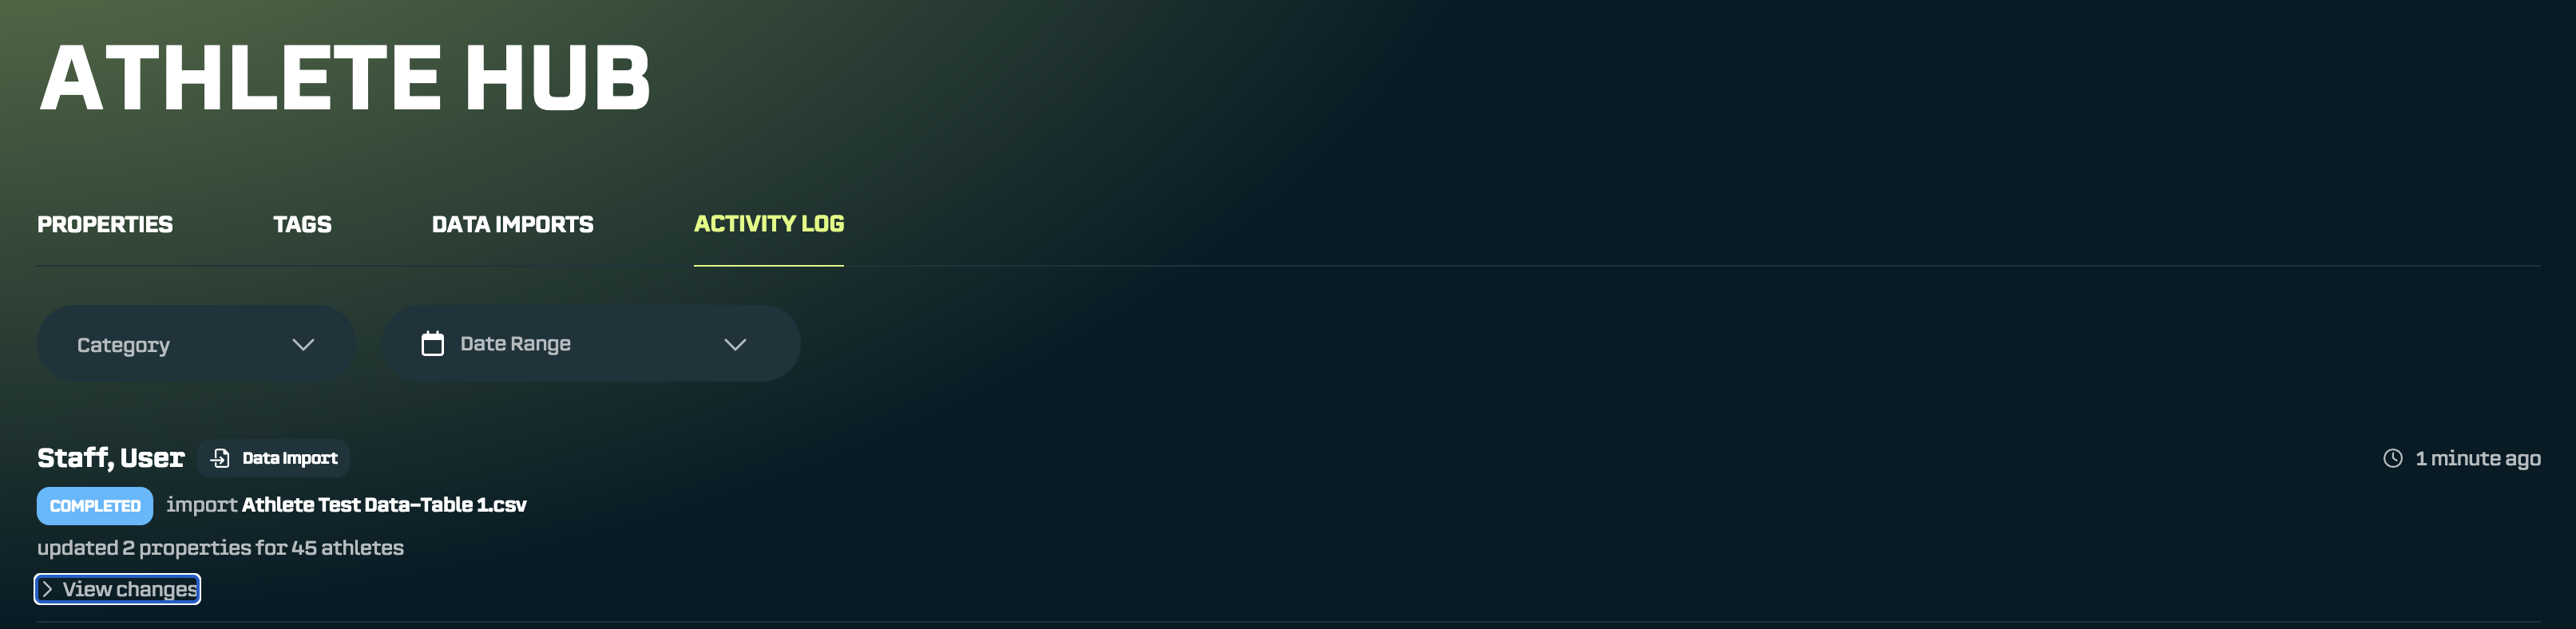
The Activity Log also confirms the import. In this case, 2 properties updated for 45 athletes:
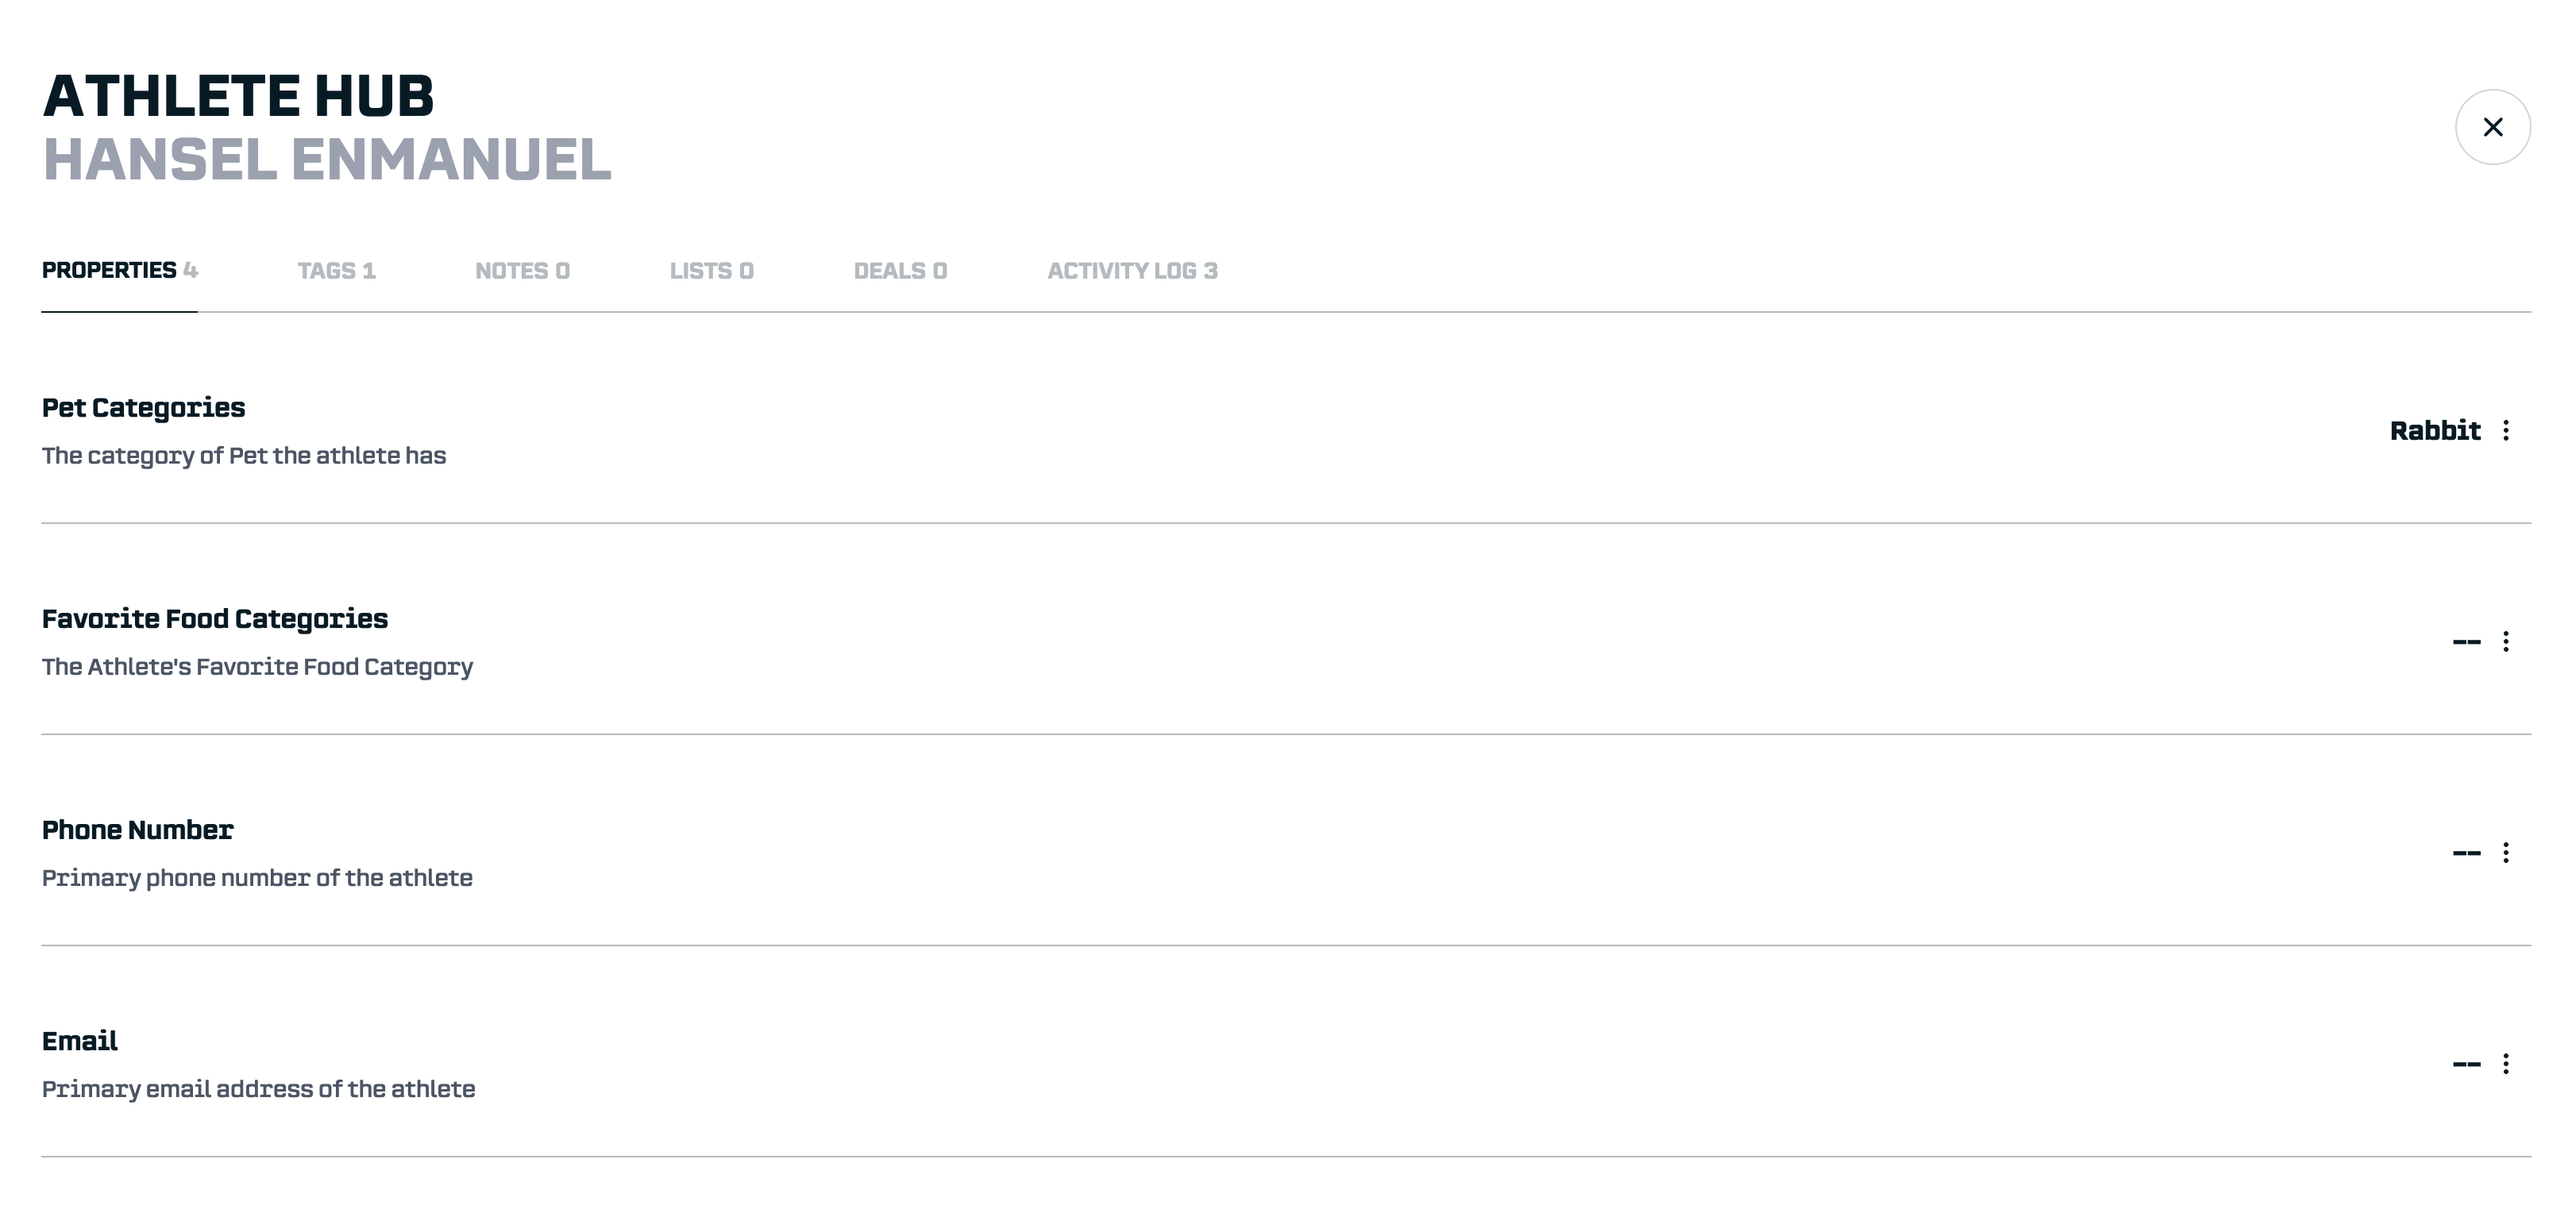
And if we check an individual athlete’s profile, we can see their properties are now populated:
Putting Your Data To Work
Now for the fun part. Let’s say Shake Shack reaches out about their “Pooch-inis” campaign. They want athletes who love fast food and have dogs.
.png)
With your imported data, that search takes seconds:
- Navigate back to the Discover > Athletes screen
- Click Filters
- Find the Athlete Hub Tab (use the arrows to navigate the filter tabs)
- Filter for “Favorite Food Categories = Fast Food” AND “Pet Categories = Dog”
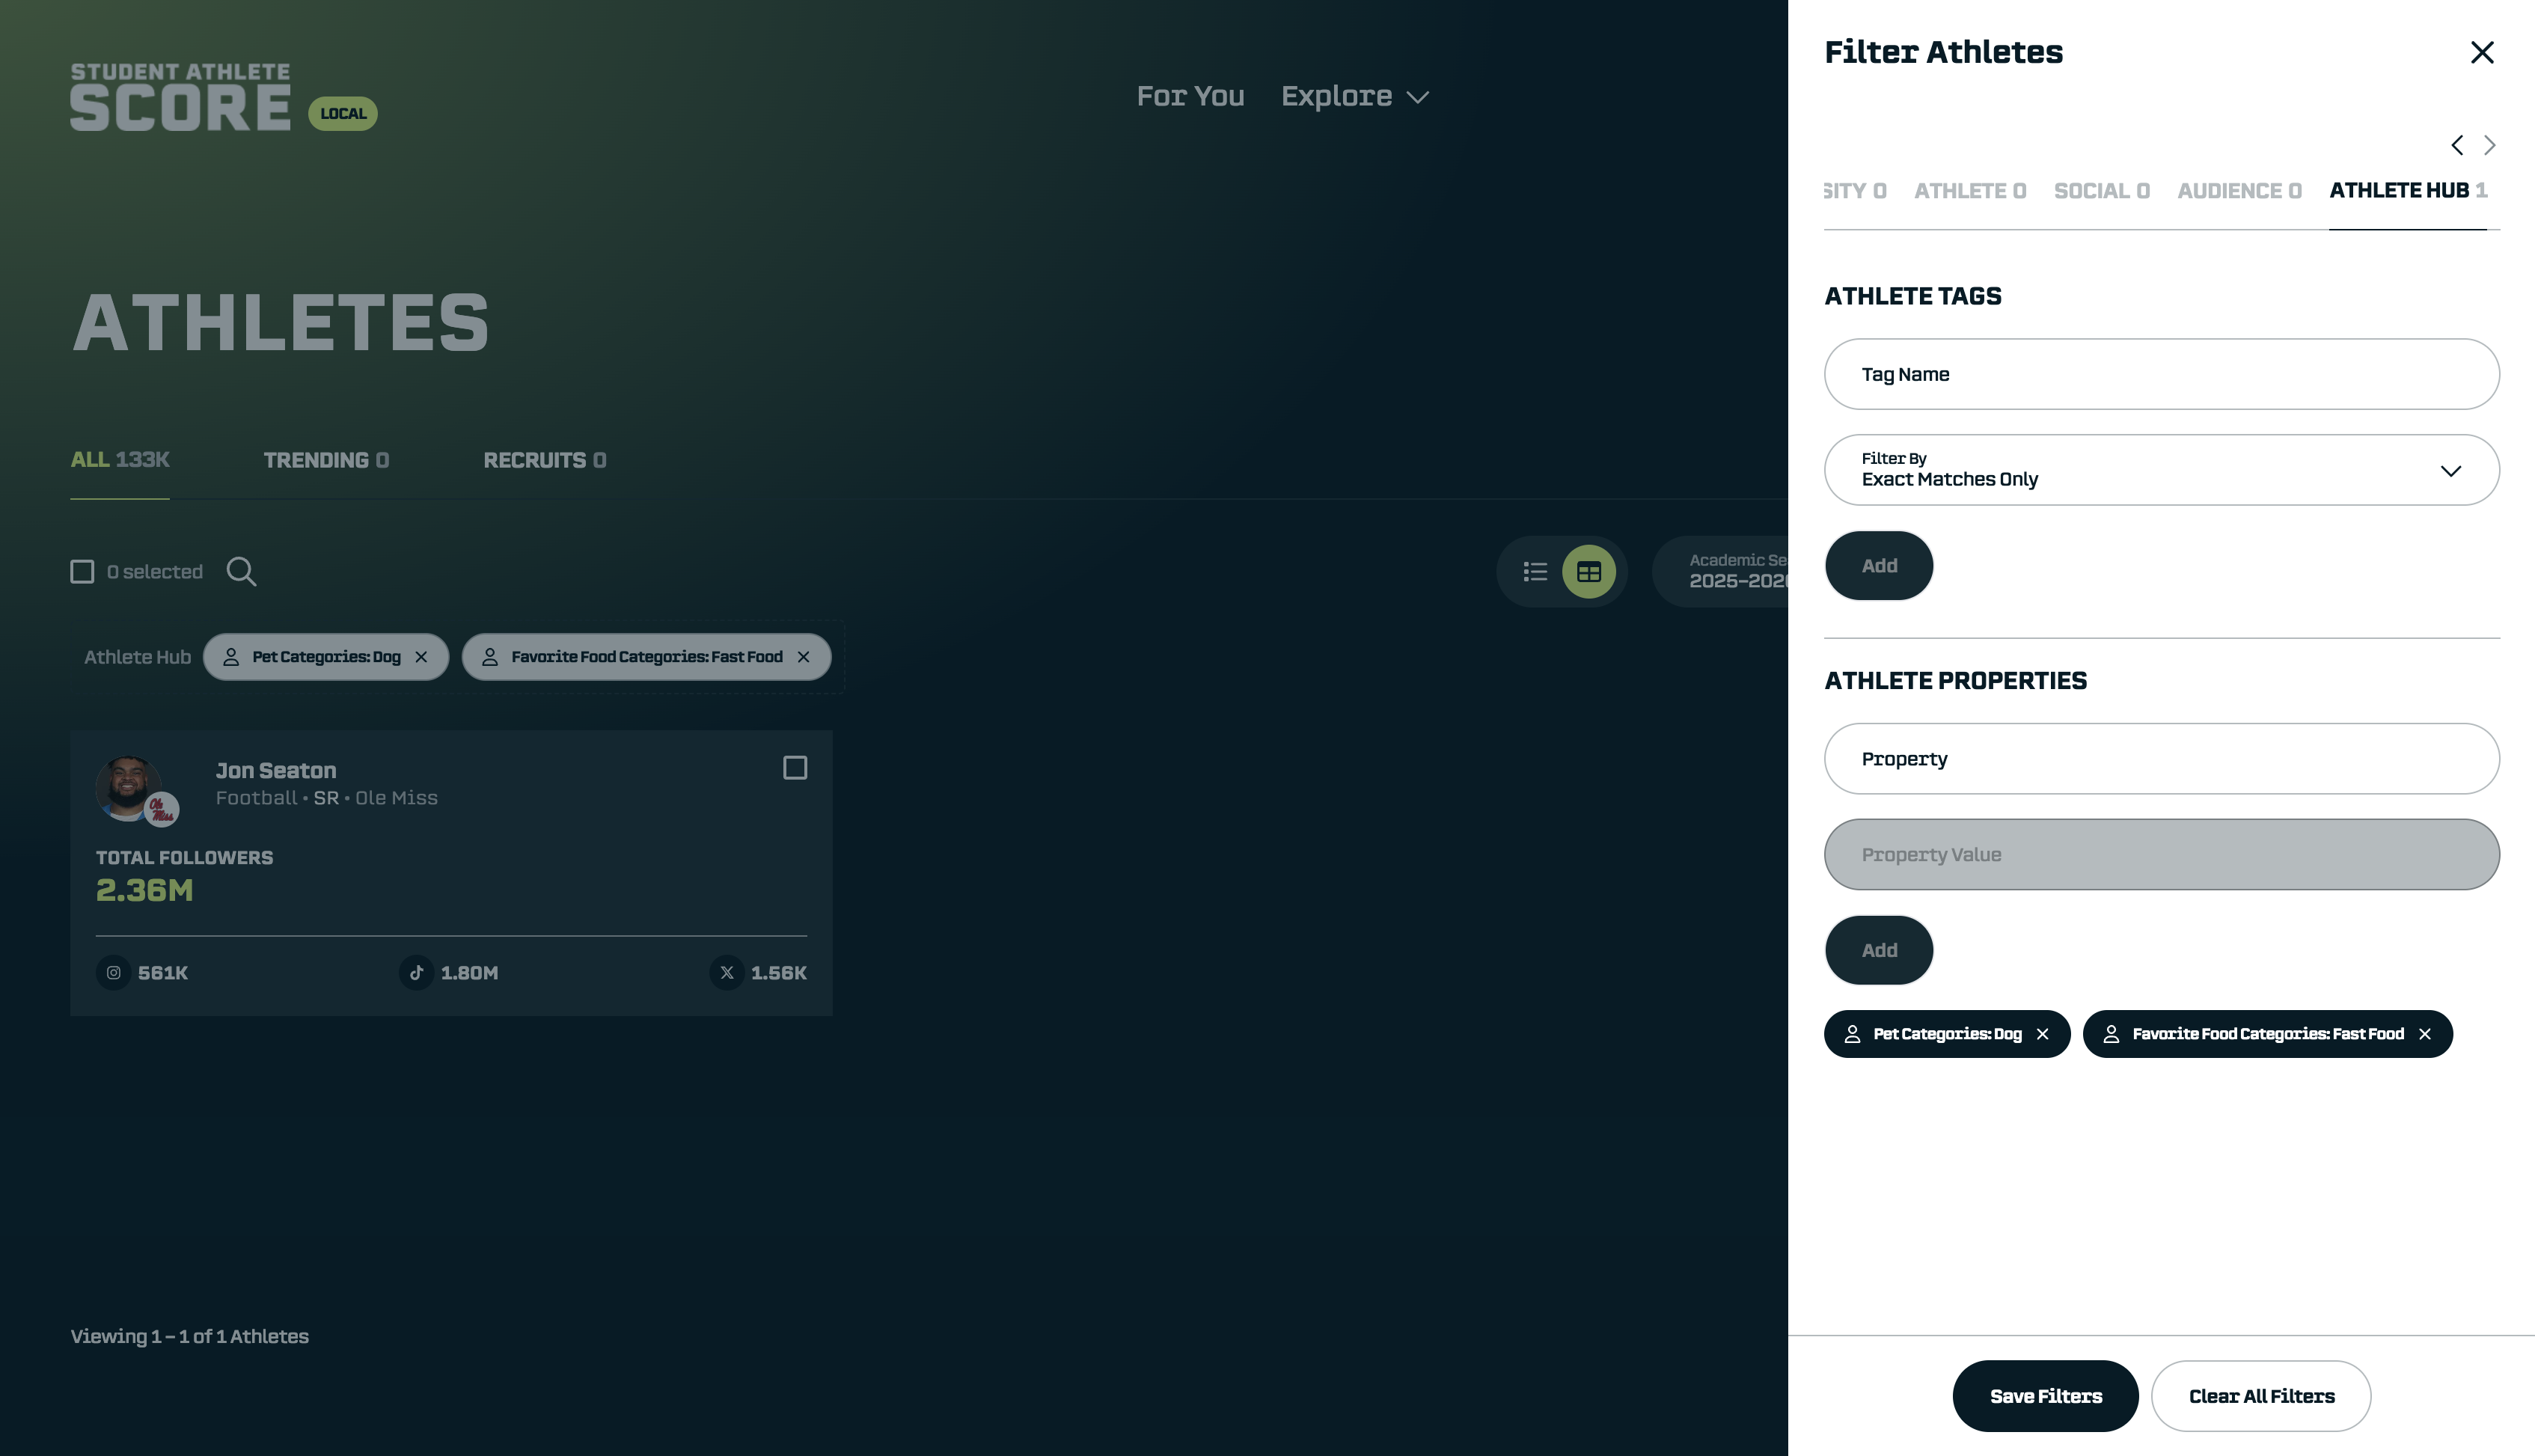
Instant candidate list. No more digging through spreadsheets or asking around.
Pro Tip: Skip Athlete Matching Entirely
Once you’ve done one import, you can make future imports even faster by using unique properties for matching.
What Are Unique Properties?
Unique properties are fields where each athlete must have a different value - no duplicates allowed. The default Email property is unique, and you can create your own (like an internal athlete ID from your system).
When you include a unique property in your CSV, SA Score can automatically match rows to athletes without you having to confirm each one.
Setting It Up
First, do an initial import that includes email addresses (or another unique identifier). You'll need to match athletes manually this first time.

Complete the import. Notice that email addresses are now being written to each athlete’s profile (this could be any other unique property you choose).
Future Imports: Automatic Matching
Now, for any future imports that include an email column, simply check Match Athletes for the email property:
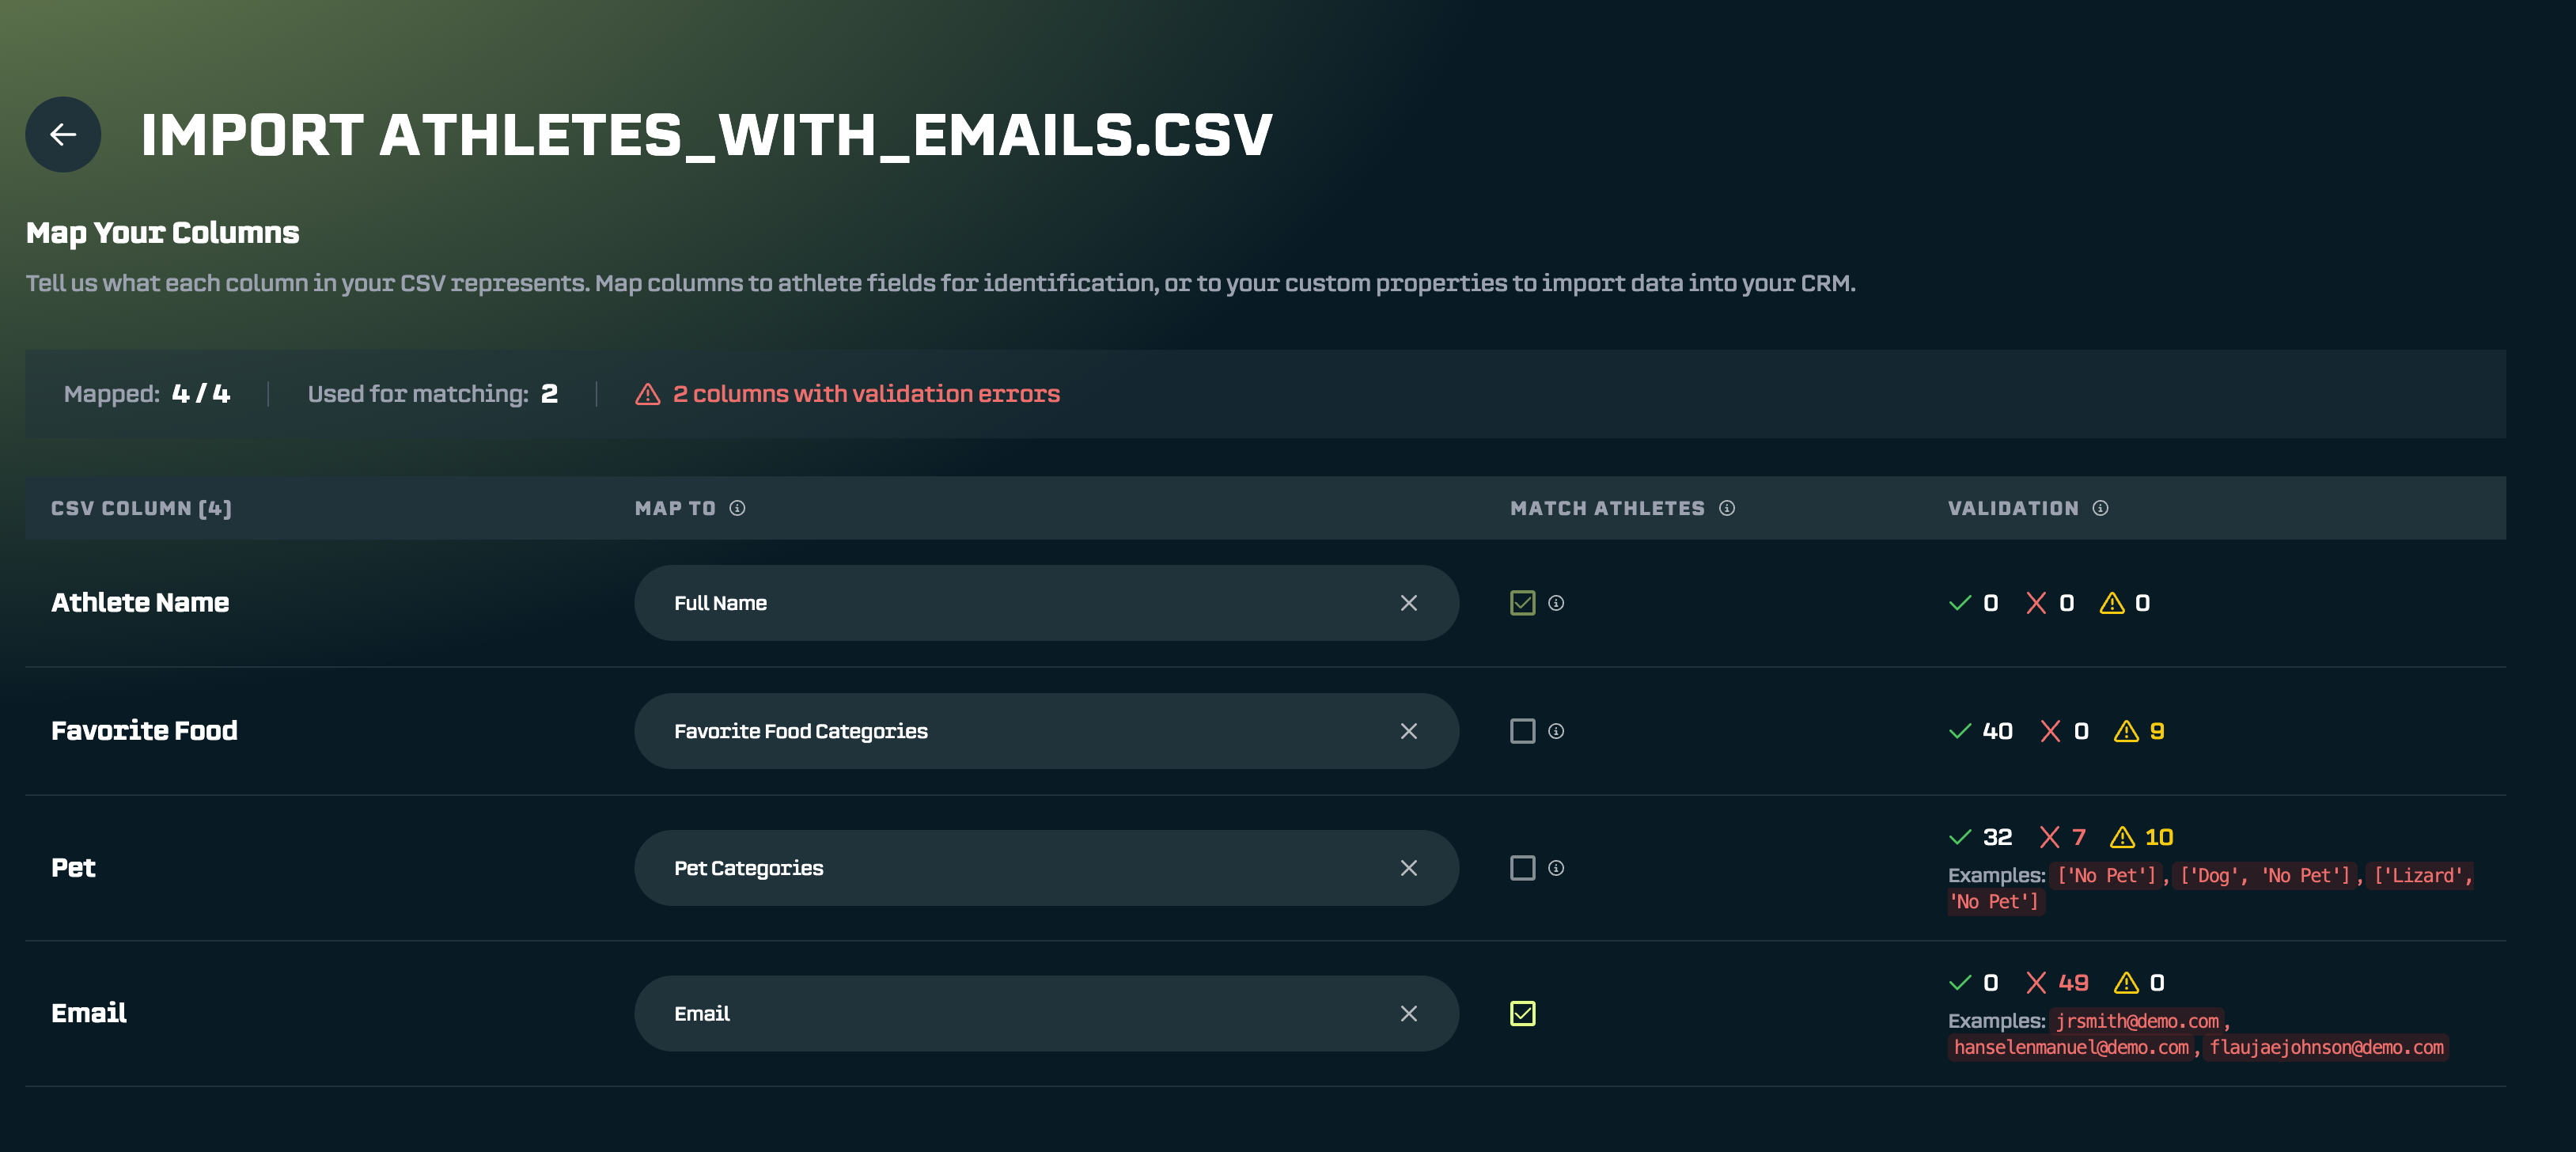
And watch the magic happen - all athletes match automatically:

This is especially powerful if you are pulling information routinely from different internal systems. Just include the unique identifier (like an email or athlete ID) in the CSV, import it once, and every future upload can skip the matching step entirely.
Summary
Data Import transforms your existing spreadsheets into searchable, filterable data inside SA Score. Here's the quick reference:
- Upload - Drag and drop your CSV
- Map Columns - Connect spreadsheet columns to properties
- Match Athletes - AutoMatcher handles most; manually confirm the rest
- Configure - Choose whether to overwrite existing data
- Import - Review and confirm
Pro tips:
- Use athlete name mapping for automatic matching on your first import
- Include a unique identifier (like email) to enable instant matching on future imports
- Invalid values are skipped. You don't need a perfect spreadsheet
- The activity log will show all the historical changes and updates made.
Reach out anytime at support@studentathletescore.com or use the in-platform support to share your feedback.
— The SA Score Team


